
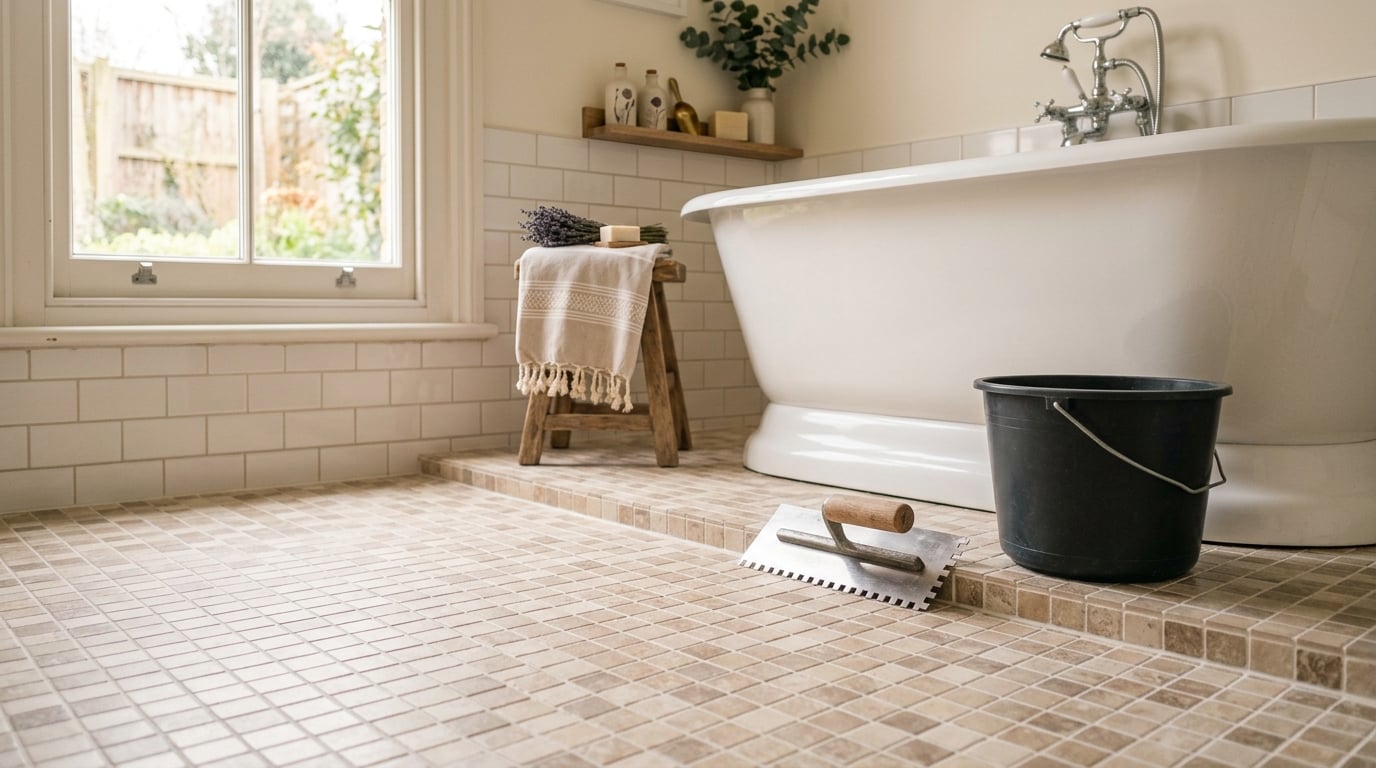
A tiled bathroom floor lasts decades, handles wet feet, and wipes clean in seconds. The whole job is four phases: prepare a flat subfloor, install cement backer board or an uncoupling membrane, set the tile in thin-set mortar, then grout and seal. Do the first phase properly and the rest is straightforward.
This guide is written for how to tile a bathroom floor step by step, from measuring a small powder room to a full bath with a tub. If you are starting from vinyl, linoleum or an old tile floor, budget a few days rather than a weekend. The work itself is a handful of hours; the cure times are what stretch the schedule.
Time: two to four days of work spread over a week, mostly waiting · Cost: driven by tile choice, and porcelain or natural stone costs several times more than a basic ceramic · Difficulty: moderate, with a steep learning curve on cutting · Skill level: patient beginner who has used a wet saw before
The six phases in order:
Quantities below are worked out for an 8 by 10 foot bathroom, which is 80 square feet. Scale them by area, not by guesswork.
Find out what is under there before you buy anything. Pull up a corner of the old flooring and look: 3/4 inch plywood over joists, chipboard, a concrete slab, or particleboard that has swollen near the toilet. People on r/HomeImprovement keep circling back to this one question, because the answer decides whether the job is a Saturday or a rebuild.
Check the total floor thickness. Add the backer board plus the tile to the subfloor and aim for at least 1-1/8 inch. If the finished floor ends up too high, the toilet no longer reaches the flange and the door stops swinging shut. That thickness surprise is the single most common complaint in bathroom renovation threads on r/Renovations, and it is much cheaper to solve with an extra day of planning.
Shut off the water at the toilet and disconnect the supply line before any demo. The braided supply is fragile, and nobody enjoys a wet floor at step one. If you are moving the toilet, an extra wax ring and a closet flange kit cost nothing compared to a dry-out.
Protect what stays. Mask the baseboards, the vanity toe kick and the door bottom, and lay a scrap sheet of plywood or a heavy drop cloth where you will walk out of the room. Grout dust finds every doorway in the house.
On permits: interior floor tile in an existing bathroom rarely needs one. Any new plumbing, a new shower pan, relocating the toilet or working on structure does. Check your local building department before assuming, and note that shower pans and wet areas fall under separate inspection rules in many jurisdictions.
Ventilation matters more than people expect, because thin-set and grout both cure by drying out slowly. Keep the room dry, move moisture out with a fan, and if the space stays damp, a dehumidifier will buy you a much better cure — our guide to cleaning a dehumidifier between jobs covers the filter and coil upkeep once the project is done.
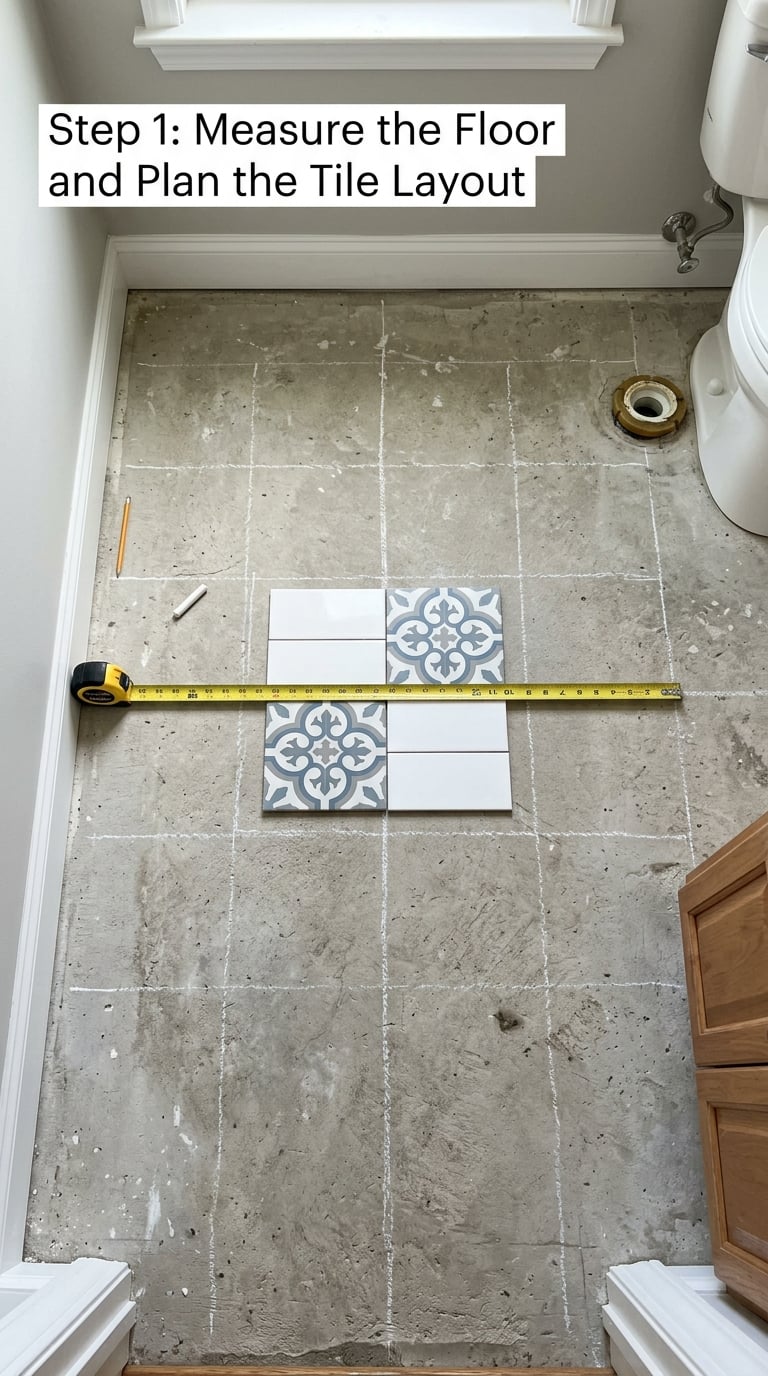
Measure both walls in two places and again at the midpoint, then use the smallest reading when you order tile. Dry-fit a row of loose tile from the door wall before you commit to a pattern.
Snap your reference lines from the center of the floor rather than from a wall, because bathroom walls are rarely straight. Find the centerline on each axis, then mark the two centerline points on the floor and pull a chalk line across them.
Square the grid with the 3-4-5 method. Measure 3 feet along one wall from a corner and mark it, then 4 feet along the other wall and mark that. The two marks should be 5 feet apart if the corner is square. If you measure 5-1/4 inch, nudge one mark a fraction and re-measure until the diagonal reads exactly 5 feet. That guarantees your lines are square, and the whole floor depends on those two lines.
Plan the cuts before the mortar goes down. Keep the narrow cut pieces away from the doorway and the toilet, which are the most visible areas, and aim for full tiles at the tub edge where everyone looks. Add a floor flange height check to this stage: the finished floor typically needs to finish 1/4 to 1/2 inch above the flange.
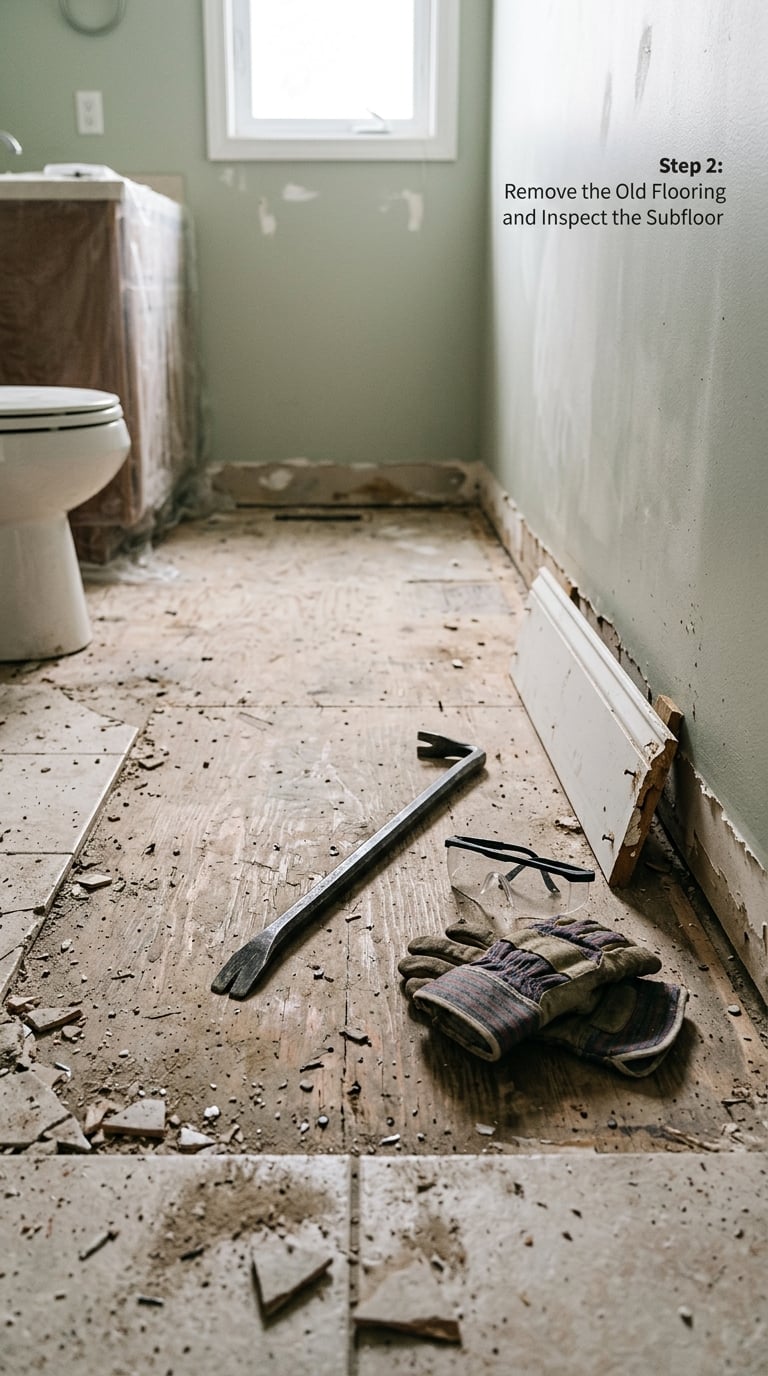
Remove the baseboard or shoe molding first, then lift the old floor. Pry bar and a flooring nail puller work well on sheet vinyl; for a concrete slab with old mortar bed, a demolition hammer breaks the mortar up in pieces rather than trying to lever a whole tile off.
Now look closely. You are checking four things: soft or spongy spots that mean water damage, rot or dark staining near the toilet or tub, screws or nails that will stand proud, and level. Run the 4 foot level in several directions and note the reading at every end.
Anything over 1/8 inch out over that span needs attention. Patch rot with a piece of matching thickness, screw down loose plywood into the joists with floor-rated screws, and pour self-leveling compound over waves. Let it cure and float as the bag says, usually a day before you go further.
Any softness you find is a leak or a failed seal. Fix and dry that first; a forum pattern worth noticing is that bathroom threads almost always begin with a small leak and a floor that has been wet underneath for longer than anyone realized.
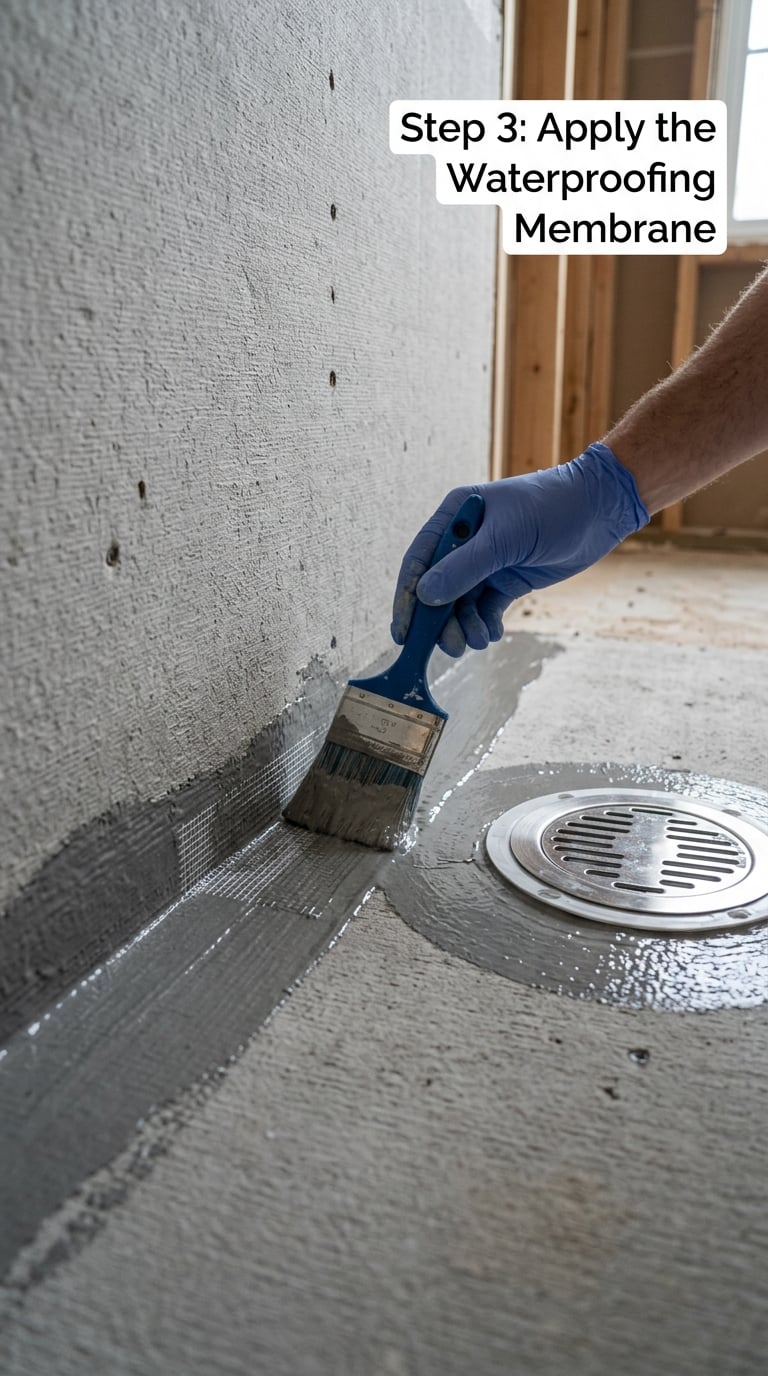
Yes, the bathroom floor needs waterproofing. Backer board is cement, not a sealer, and grout is porous, so without a membrane a slow leak can soak into the framing below your new tile. This is the step most DIY jobs skip and the one homeowners most often regret.
Work in this order: corners, wall-to-floor joints, then the field. Cut reinforcing tape into the corners and press it into wet membrane with a corner tool. Band the flange and any pipe penetration with a flexible waterproofing collar. Each coat has to dry to the touch before the next, and the label will tell you whether that is four hours or overnight.
Two things worth knowing when you choose a system. A liquid membrane over taped cement board is cheap and slow, several coats with drying time between each. A polyethylene sheet membrane bonds to the board with thin-set and gives you a tested waterproof layer in one step. A single-sheet membrane does both jobs at once and skips the board entirely, which saves an inch of height, though it costs more and needs a wider trowel.
Read the coverage figure and multiply by your floor area before you open the bucket. Running out half way through means the second coat goes on a different day.
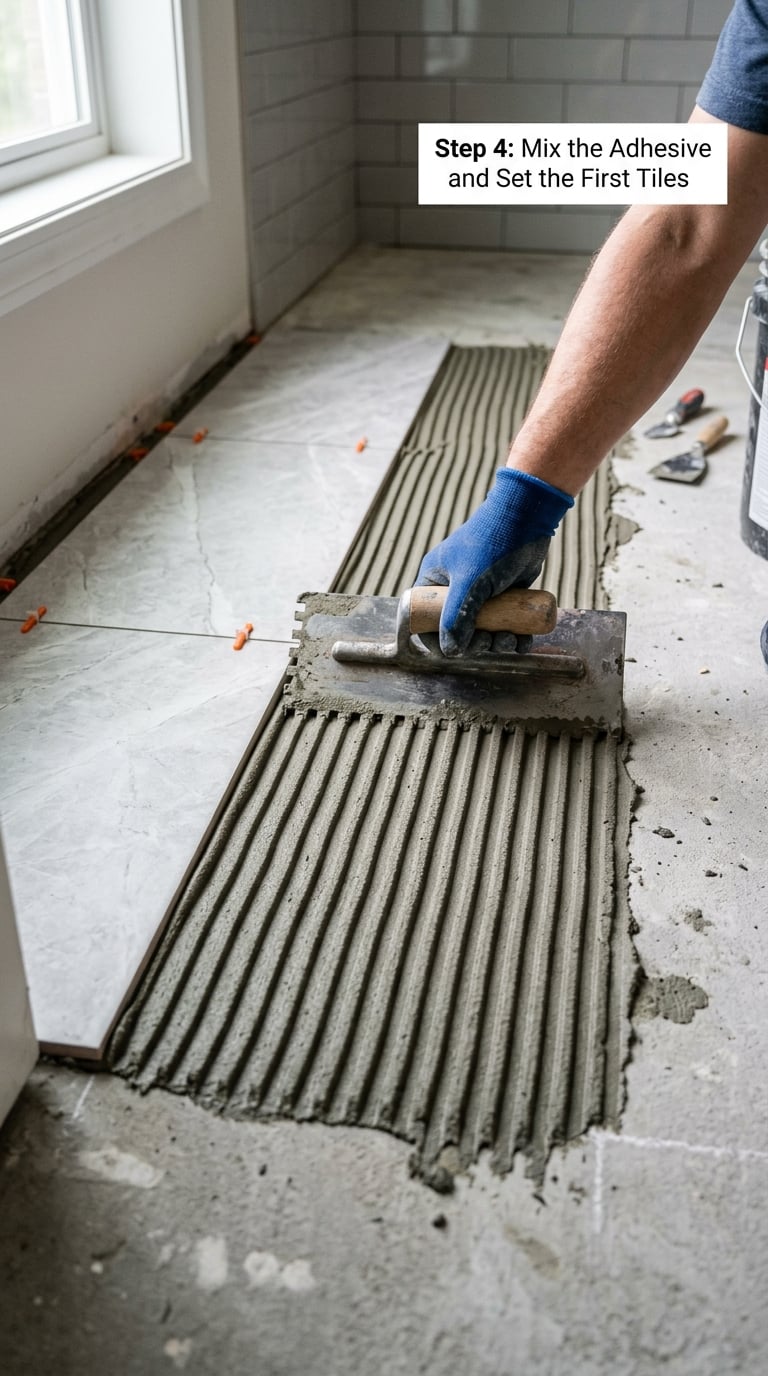
How to tile a bathroom floor step by step comes down to this step, so take your time. Mix the thin-set with water to the consistency of soft peanut butter, and only as much as you can use in about 30 minutes. A stiffer mix pulls the ridges over; a wetter one slumps.
After the first mix, let it slake about 5 to 10 minutes as the bag directs, then remix. Skipping the slake leaves you with dry pockets that never bond, and it is the most common reason tiles pop off later.
Comb the mortar with the notched trowel held at roughly a 45 degree angle, pulling it in one direction across the whole area you can cover before it skins over. Each pass leaves 1/8 inch tall ridges. Follow one direction across the entire floor and never cross-hatch; crossing directions leaves voids that show up as hollow-sounding or cracked tile.
Set the first tile at the intersection of your two centerlines and press it down with a twist, no hammering. Wiggle it gently in both directions to distribute the mortar, lift it once to confirm nearly the full back is covered, and lay it back down. Then run the edge of the trowel across the top of the tile to leave a clean line, and work outward from that first tile in the direction you combed.
Check every few tiles with the level, from two directions. Align with spacers, not by eye, and pull spacers as you go so they do not end up buried under grout.
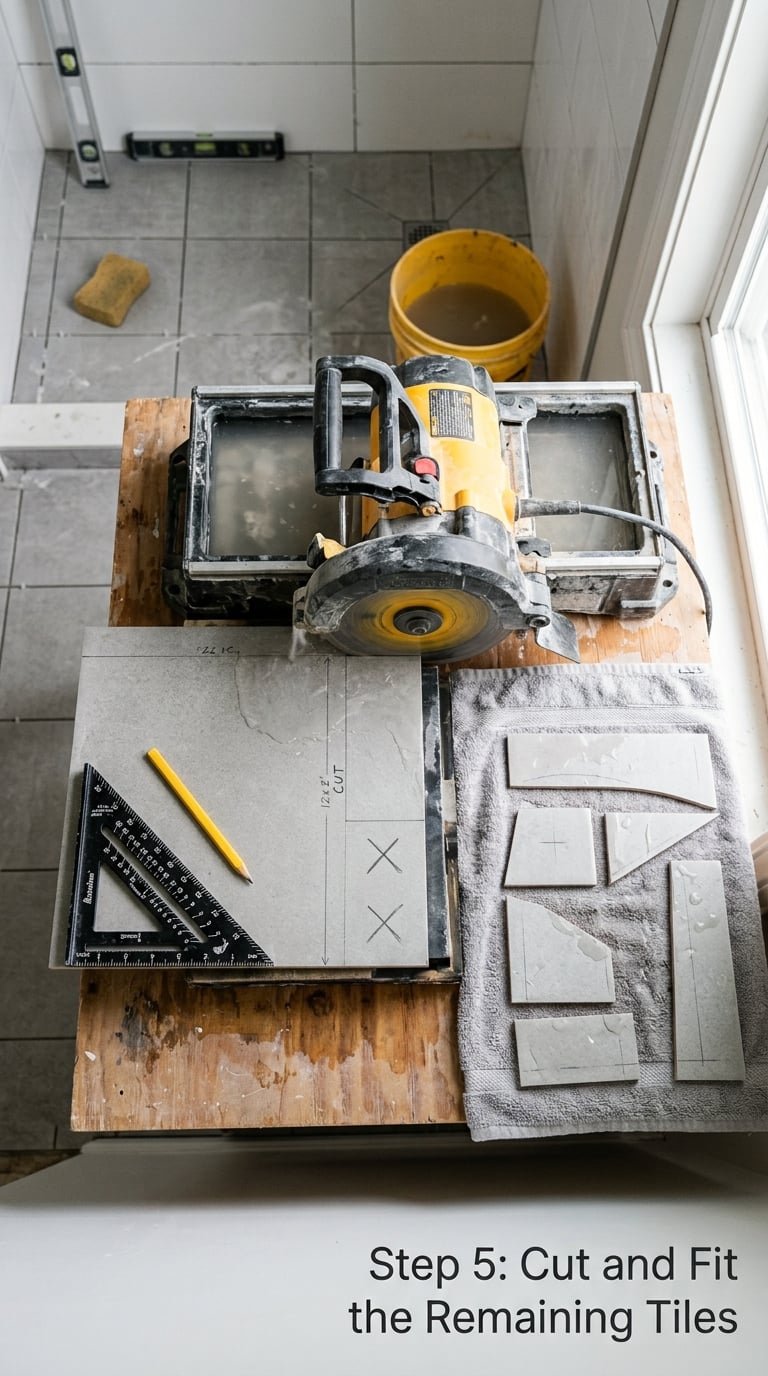
Measure each cut twice and mark with a pencil, then score and snap only once with a manual cutter. For porcelain or a large piece, use the wet saw, feed it slowly and steadily, and let the blade do the work rather than pushing down on it.
Leave a 1/8 inch gap on a normal grout joint, more if the tile has a slightly uneven edge. A little extra space costs nothing; tight joints on wavy edges are what produce chipped and cracked corners later.
For the toilet flange, measure from the finished wall on both sides of the centerline, mark those points on the tile, then split the tile so the two half pieces come out symmetric. The toilet should land on the centerline, so a small notch that keeps the tile from meeting the flange at an angle works better than a full cut-out.
Handle corners and around pipes with a small margin trowel and a float the mortar into the corner first. Then cut a piece a fraction larger than the hole, grind the back flat and set it with more thinset on the tile itself so it seats solid.
Carry a scrap plywood board and a pair of knee pads from the door to the first tile. Working off the floor at the start of a set tile is how beginners hurt their knees and press uneven pressure onto fresh tile.
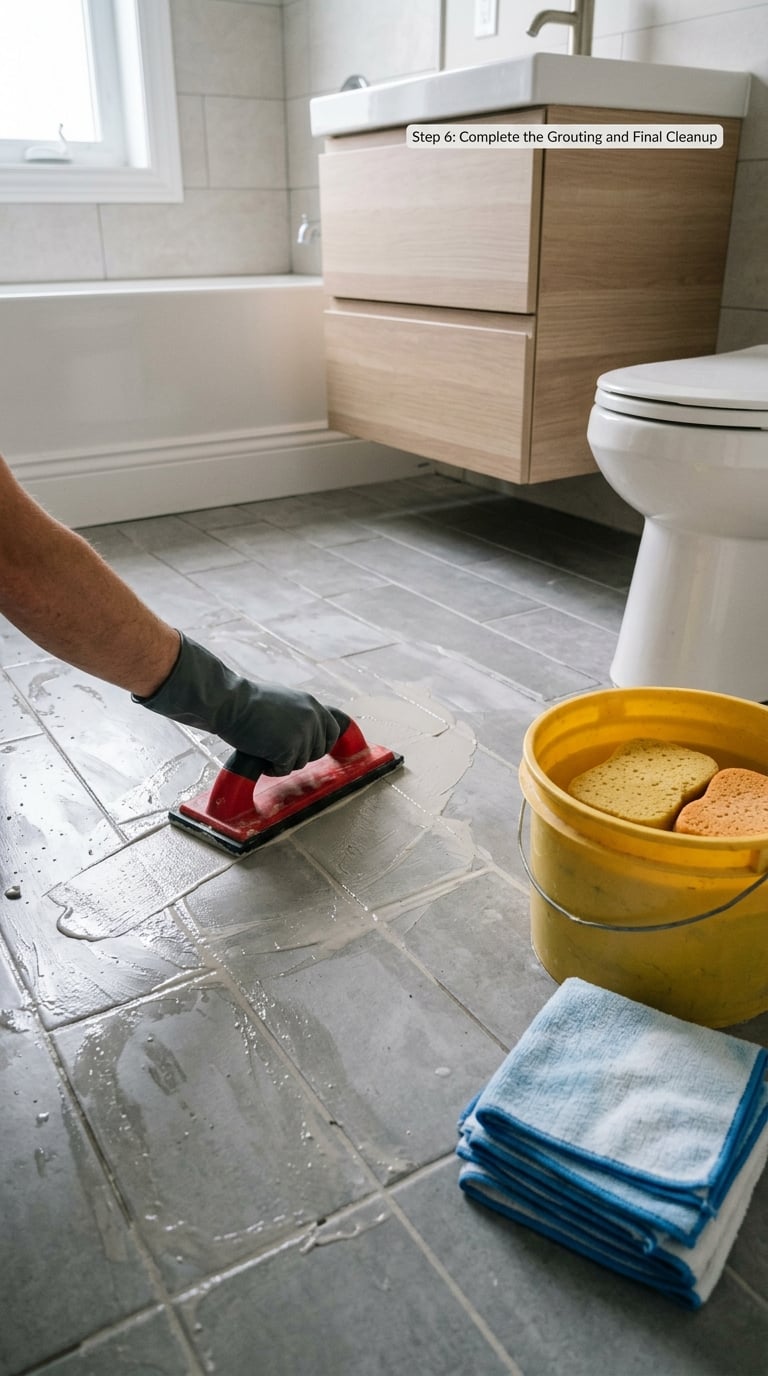
Leave the floor alone overnight, then check that the tile is solid by tapping a corner with a knuckle. When the thinset has cured enough, usually at least 24 hours, pull every spacer and scrape any dried mortar off the surface with a plastic scraper so it cannot scratch.
Mix grout to a soft, damp consistency like cookie dough and let it slake 10 to 15 minutes. Work it diagonally across the joints with a rubber float, not along them, so you do not scoop mortar out of a joint you just filled. Scrape the surface at about a 45 degree angle and leave a light, even skim rather than mounding it above the surface.
Let the grout go off about 20 to 30 minutes, then wipe with a wrung sponge. Change the sponge water constantly, because dirty water is how haze gets left behind. Work in small sections, and sponge diagonally so the joint edges stay sharp.
Anything that hardens into haze has to come off later with a grout haze remover, which is far more work than sponge wiping. A closed window for an hour while the room dries handles a hazy floor nicely in dry weather.
Seal the grout after it has cured, typically 48 to 72 hours, and stay off the floor 48 to 72 hours after grouting, longer for wet zones or heavy loads. Reinstall the toilet, set the vanity and replace the baseboard only after that. Keep the perimeter gap you left open filled with flexible silicone, not grout, so the floor can move without cracking the joints at the wall.
Starting along a wall that is out of square. The error doubles with every tile. Snap layout lines from the floor center with the 3-4-5 method instead, then cut the wall edges.
Skipping the waterproofing membrane. Cement backer board and grout both let water through. Band the corners, coat twice and let each coat dry.
Notching in two directions. Comb the thin-set in one direction across the whole floor. Cross-hatching traps air, and air is what makes a tile sound hollow and crack later.
Troweling more area than you can tile. Thin-set skins over in 15 to 30 minutes in a warm room. Work in sections about as large as you can set in that window.
Skipping the slake. Mixing and immediately using leaves the mortar unevenly hydrated. Slake, remix, then use it.
Guessing at grout joint width. Use the spacers the tile is designed for, and swap them rather than eyeballing. Misaligned joints are the most visible defect on a new floor.
Walking on it too early. Most modified thin-set wants 48 to 72 hours before foot traffic. The tile feels fine and still moves, which shows up as a hollow spot weeks later.
Grouting the perimeter joint. Tile expands and contracts; that gap is a movement joint and needs silicone. Grouting it locks the floor to the wall and produces the crack that runs the length of the room.
Call a tile setter when the subfloor is soft, rotten or sagging, or when the 4 foot level shows damage that a patch will not solve. Cracks radiating from a corner or from a load-bearing wall are structural and need an engineer’s eye, not a trowel.
Extensive water damage belongs with a remediation contractor first. Once the floor is dry and the cause is fixed, tiling it is ordinary work.
A concrete slab is a hire-it case for most people, because old mortar beds are brutal to remove and slab floors usually need grinding, etching or a membrane system rather than backer board.
Radiant floor heating, curbless showers, waterproofing requirements that a local inspector will check, and any job where your finished floor height is already tight all deserve professional work. So does a floor that will be walked on with hard heels, and a commercial or multi-unit bathroom on a schedule.
If you are unsure, buy a short consultation. A tile setter can look at the subfloor for an hour and tell you what you are actually dealing with, which is cheaper than discovering the problem half way through.
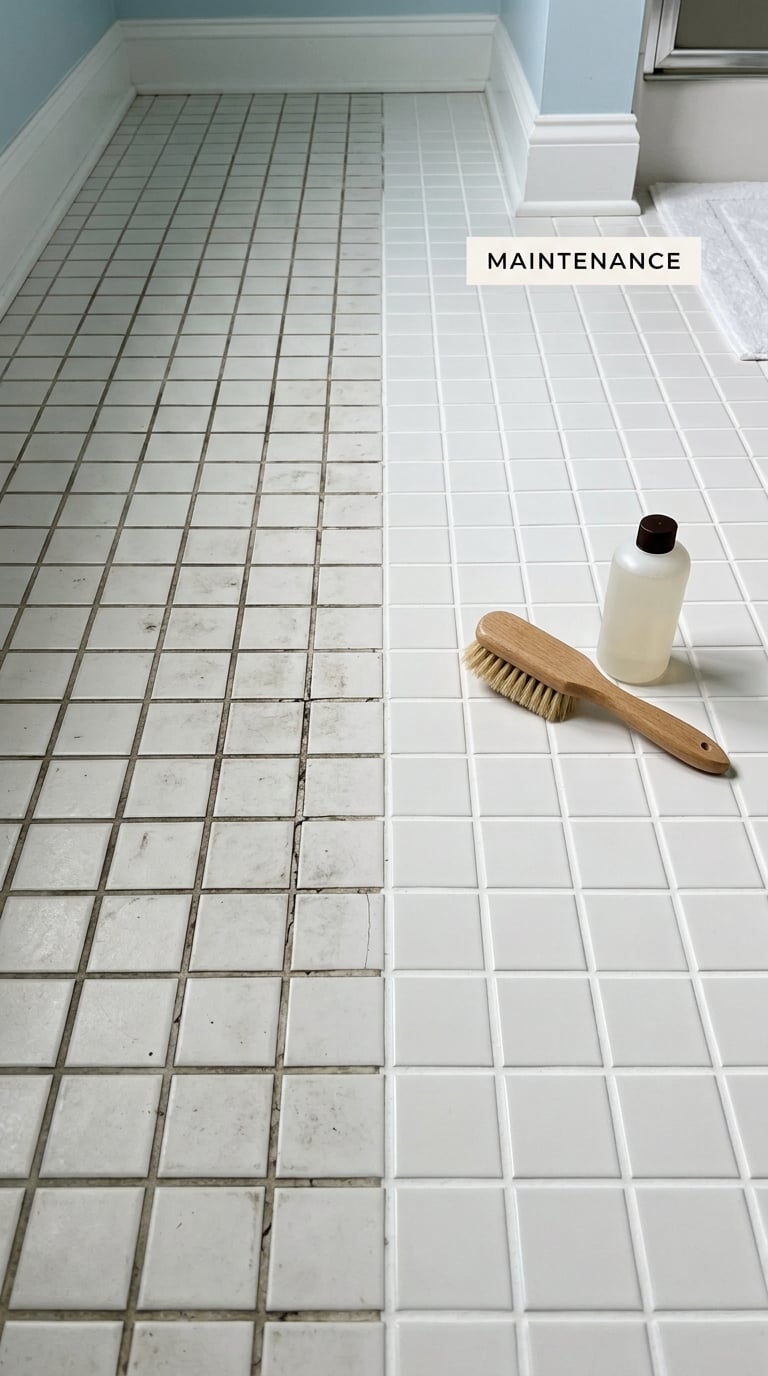
Sweep or vacuum first, always. Grit is what scratches a glazed surface and dulls the finish over time. Damp mop with a pH-neutral cleaner; anything acidic, including vinegar and lemon, etches polished porcelain and dulls the grout.
Grout upkeep is about two things: keeping the joints clean and keeping them sealed. Scrub stained joints with an oxygen-based cleaner rather than bleach, and touch up a crumbling joint by raking it out with a grout rake and regrouting instead of topping it up.
Natural stone is the exception. Seal marble, travertine and limestone right after installation and on a schedule the supplier recommends, and never use an acidic cleaner on them. Ceramic and porcelain need no sealer on the tile face; the grout still does.
Catch problems early. A soft grout joint, a damp smell or a ceiling stain below usually means a leak behind the wall or under the tub, and grout colour is the last thing to worry about. If your bathroom holds humidity, a good exhaust fan is worth as much as the tile choice; our step-by-step on cleaning a bathroom fan keeps it pulling properly.
Ceramic mosaic on mesh sheets is the most forgiving choice for a first bathroom job. The sheets are small, so they follow a slightly wavy floor, and one sheet is a quick square to cut around a flange or pipe. Porcelain in large format is the opposite end of the scale: fewer grout lines, but it demands a flatter floor and a bigger saw.
You can, but only over sound, well-adhered tile with waterproofing already beneath it. Grind off wax, dust and loose grout, then use a bonding or waterproofing membrane rated for tile over tile instead of plain thin-set. Heavy, hollow, cracked or water-damaged tile has to come up; skipping that just relocates the problem.
Treat the two materials separately. Most modified thin-set needs at least 24 hours before grouting and 48 to 72 hours before foot traffic. Cement-based grout wants another 48 to 72 hours before it gets wet, and a sealer goes on after that. Always read the bag, because accelerated products are much faster.
Yes, if the plywood is thick enough and well supported. Aim for at least 3/4 inch exterior-grade plywood over joists spaced 16 inches on center, with 1/2 inch cement board bedded on top. That gives roughly 1-1/8 inch of total floor thickness, which is the usual minimum before tile goes down.
Measure the floor, add 10 percent for cuts, and round up. An 8 by 10 foot bathroom is 80 square feet, so 88 square feet keeps you safe. Buy everything in a single dye lot, because matching a shade across boxes from different production runs is much harder than ordering a little extra up front.
A soft grey or warm off-white shows dirt less than a stark white while still framing light tile cleanly. Matching grout disguises the joint lines and hides small alignment errors, which matters more than people expect in a tight room. Skip anything high-contrast unless you want every crooked cut to announce itself.
Start by opening a corner of the old floor and finding out what you are working with. That one hour of checking decides your material list, your total floor height and whether this is a weekend or a longer job.
Then work in the order above: measure, strip, waterproof, set, cut, grout. Resist the urge to tile first and fix the subfloor later, because that is the sequence that turns a good weekend into a floor that cracks at the toilet within two years.
If the floor underneath is soft or wet, stop and deal with that before anything else. Everything after the subfloor is careful, repetitive work, and the cure times on the bag set the schedule rather than your enthusiasm. Check those labels again each 2026 if the notes you are working from are more than a year old.
