
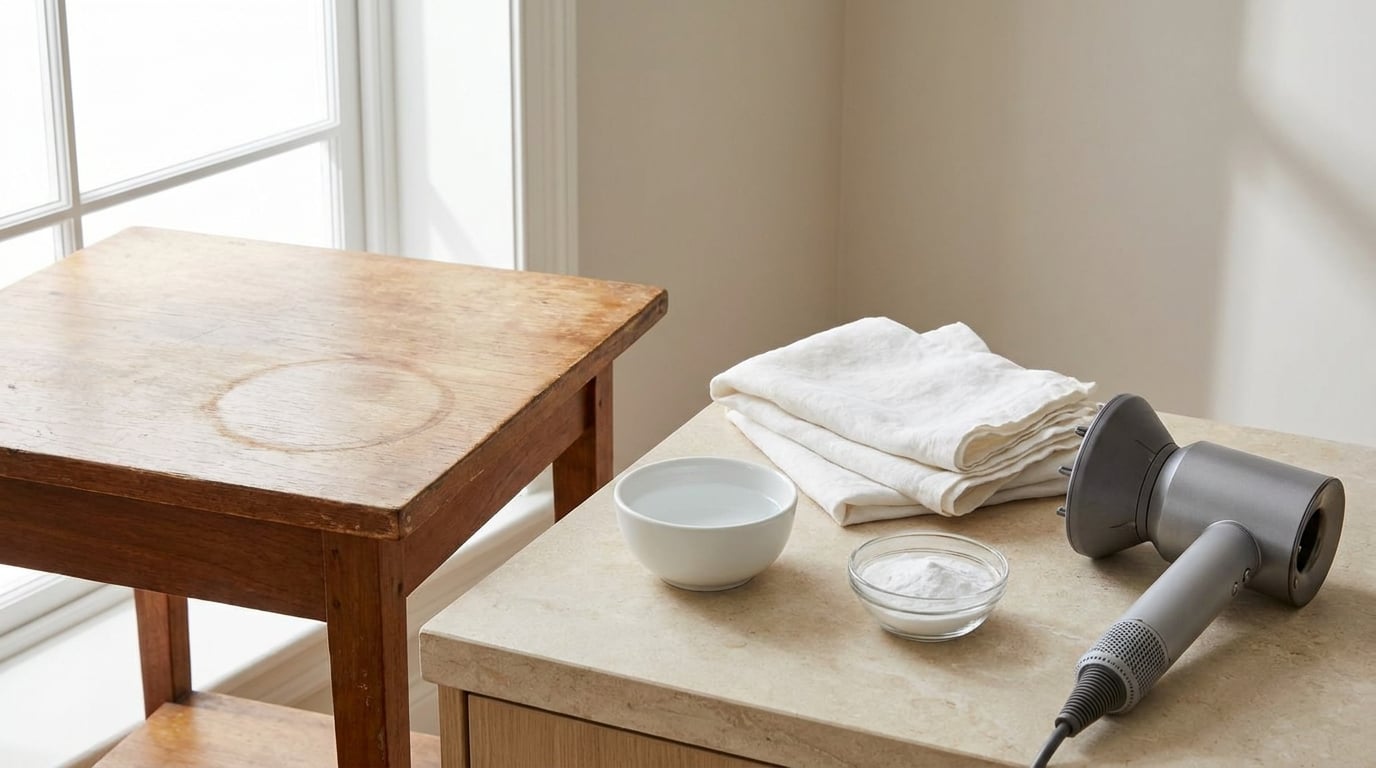
A water stain on wood furniture is usually moisture sitting in the surface finish rather than deep in the timber, which means most marks come out with a damp cloth, gentle heat or a mild abrasive paste. Start with the least aggressive method, test it on a hidden spot, and work your way up only if the mark survives. The whole job takes about 20 minutes for a fresh ring on a varnished tabletop.
That is the part most viral fixes skip. A towel-and-iron trick that looks effortless on a honey-oak coffee table can scorch a walnut top or leave a dull smear on a waxed dresser, and mayonnaise behaves completely differently on a lacquered surface than on an oiled one. Identify what is actually on the wood first, then treat the stain.
Two things decide your whole approach: the type of finish, and whether the mark is cloudy white or dark brown. Get those right and the fix is mostly patience.
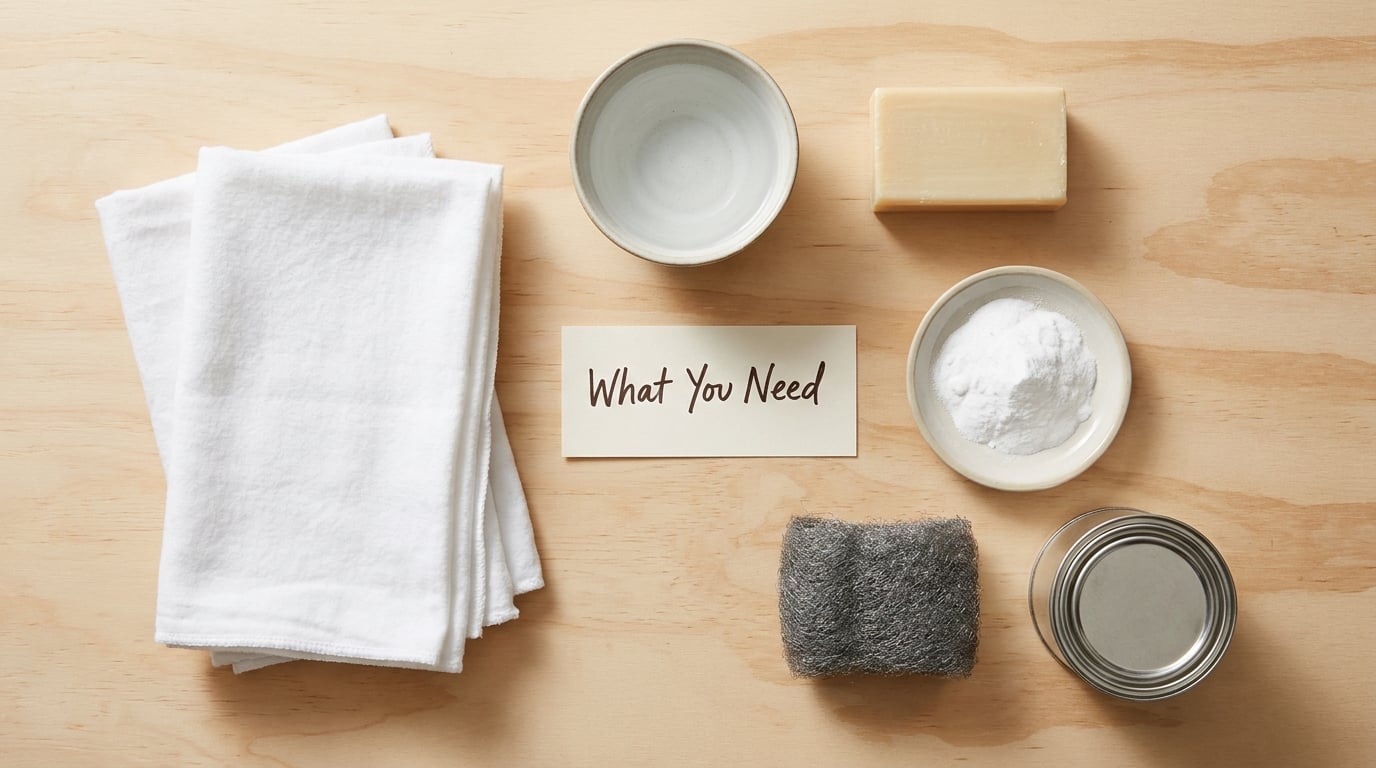
Gather these before you touch the stain, because half of them exist purely to protect the piece from the treatment you are about to try.
Soft white cloths — lint-free cotton or microfibre, one clean and one spare. Dark fabric dyes can transfer into a pale finish.
A shallow bowl of distilled water — hard tap water carries minerals that leave their own faint ring, especially on dark wood.
Mild wood soap — a small amount of unscented dish soap diluted in warm water works for the first test.
Baking soda — mixed to a thin paste for the mild abrasive stage.
Fine steel wool, grade 0000 or 00000 — only for wax, oil or varnish finishes, and only in a later stage.
Gloves and a dust mask — fine steel wool and any solvent product produce dust you do not want to breathe.
A finish-compatible touch-up product — paste wax for wax, a matching oil for oil finishes, or a clear coat that matches the sheen for varnish and lacquer.
Paper towels and a drop cloth — the piece will drip, and lacquer thinner will find your floor.
A hairdryer is a cheap stand-in for the heat step if you do not own an iron, and a plastic razor scraper handles the paste methods without scratching.
Work through these six stages in order. Each one is gentler than the next, and stopping as soon as the mark disappears keeps you from removing finish you did not intend to remove.
Find out what the surface is made of before you put anything wet or hot on it. Finish type changes the method more than stain severity does.
Wax — feels waxy or buttery to a fingertip, scratches easily, and shows an uneven sheen. Often found on antique and mid-century pieces.
Oil or Danish oil — the surface looks dry and matte, and a drop of water sits on top rather than beading. Very common on unfinished and reclaimed wood.
Lacquer or polyurethane — glossy, hard and cool to the touch, with a thin film that can be scratched with a fingernail.
Shellac — very light, brittle, and dissolves in alcohol. Test on a hidden spot before any alcohol or solvent goes near it.
Varnish — thick, glassy and often slightly amber, with visible grain texture.
Painted or laminated — the grain is printed or the surface is a plastic film over particleboard or MDF. Water and heat both behave badly here.
Two quick checks. Wipe the hidden area with a cotton swab dipped in rubbing alcohol: if the finish softens, dissolves or goes tacky, it is shellac and solvents are off the table. Press a coin lightly into an inconspicuous spot and look for a full, even mark: a broken or dull mark means wax, oil or shellac, which repair beautifully, while a glossy scratch means a film finish that needs a different approach.
Then move the piece into a well-ventilated room, lay a drop cloth, and keep pets and children out until everything has dried and any fumes are gone. Wipe the surface first with a dry cloth so you are not grinding loose dust into the grain as you work.
Most white rings disappear here. Dampen a soft cloth so it is barely wet, add one drop of mild soap, and wring it out until you could not squeeze a drop from it.
Wipe along the grain, not in circles, and keep the passes short. Check your work every few seconds and stop the moment the cloudiness lifts. Soaking, scrubbing and leaving a wet cloth sitting on the wood are the three things that turn a repair into a bigger problem, because they drive water through the finish and into the timber itself.
Signs the test area is safe: the cloth lifts with no colour or residue on it, the wood does not darken as it wets, and the mark looks lighter rather than more pronounced once it dries. Give the surface a few hours to fully dry before judging, since damp wood always looks darker than it will be in the end.
If the ring is still there but the finish feels normal, you have a problem you can fix with abrasion. If the finish now feels soft or tacky, you went too wet — stop, let the piece dry fully for 24 hours, and reassess.
Mix one part baking soda with roughly half a part water to get a thin, spreadable paste, thinner than toothpaste. Baking soda is a very fine abrasive, so it levels the dulled finish without cutting through it.
Apply the paste with a soft cloth and rub gently along the grain for about ten seconds, then wipe with a clean damp cloth and dry immediately. Check the mark, wait a few minutes, and repeat only as needed. You are aiming to level the sheen, not to sand, and the difference is a light hand and frequent checking.
Non-gel toothpaste works the same way and is slightly more abrasive because of the added silica. Gel toothpaste, and anything with coloured or glossy particles, is a bad idea here — the colour is exactly what you are trying to remove.
Stop as soon as the mark goes. Overworking a baking soda paste dulls a satin finish into a flat spot, and that flat spot is harder to blend than the original ring. If after two or three careful passes the mark has not moved, the stain is deeper than the surface and needs a different plan.
| What the mark looks like | Where the problem sits | What usually fixes it |
|---|---|---|
| Cloudy white or grey ring | Inside the surface finish | Damp cloth, then baking soda paste |
| Dark ring, water still wet on the piece | On the surface | Blot and dry immediately, no treatment needed |
| Dark brown or black mark on open-grained wood | In the wood fibres | Light abrasion with the grain, then re-oil |
| Rough, fuzzy or swollen edge | Under the veneer or in particleboard | Dry it out fully; no household method repairs swelling |
| Ring on laminate or veneer | Delamination risk | Baking soda only, no heat, no liquid |
Once the gentle stages fail, the method has to match the finish. Using the wrong one is what makes a stain permanent.
Waxed and oiled furniture: the classic treatment is full-fat mayonnaise or plain petroleum jelly, left on for about an hour and wiped off, then buffed. The oil re-saturates the dried, porous finish so it matches the sheen around it again, which is why the trick works on wax and fails on lacquer. Users often report the mayonnaise method doing nothing at all — that is almost always a sign the piece is mass-market engineered wood with a printed surface rather than a real finish, and no oil will help there. Wax finishes also respond to a light rub with #0000 steel wool along the grain, followed by a fresh coat of paste wax buffed off after it hazes.
Lacquer and polyurethane: heat is the answer here. Water that sits on a film finish gets trapped just beneath it, and gentle warmth evaporates it back out. Use a hairdryer or an iron on low over a dry cotton cloth, kept moving constantly and held a couple of inches above the surface, never parked in one spot. Check by lifting the cloth every few seconds. Follow with a light rub of a finish-matching polish, never steel wool, because a single stray fibre cuts a permanent scratch into a film finish.
Varnish: a small amount of boiled linseed oil on a cloth, left for fifteen minutes and wiped off, restores the surface. Keep the oil off the surrounding area so you do not create a darker halo that is harder to live with than the ring. The same gentle heat approach works here too, with the same caution about keeping the iron moving.
Oiled and unfinished wood: re-oil the whole top evenly rather than spot-treating, so the repaired area matches its neighbours. A sharpened card scraper or 120-grit sandpaper taken lightly with the grain will lift a stain that has soaked into the fibres, but sand the entire surface, never just the mark, or you will end up with a pale circle that reads as a second stain.
Shellac: this is the one to handle gently. Shellac redissolves in its own solvents and in alcohol, so a damp cloth can lift a whole topcoat instead of a stain. Use a wax crayon in a matching tone to disguise the mark, and take it to a professional if the mark bothers you.
Painted, veneered and laminated surfaces: skip the iron entirely. A baked-on stain in a laminated top cannot be lifted, and heat or liquid will bubble the film or swell the particleboard core underneath. A baking soda paste and a soft cloth are the safe limit.
Wipe away every trace of residue with a clean cloth and warm water, then dry the area properly with a soft towel. A sticky film left by petroleum jelly or paste wax will collect dust within days, so the final wipe matters more than the treatment.
Apply your touch-up product only where the surface actually needs it. Paste wax on a waxed table, a thin coat of the same oil used elsewhere on an oiled top, or a clear finish that matches the sheen on lacquer or varnish. Buff in the direction of the grain and let it cure for the time printed on the label, which is often 24 to 72 hours before the surface will take weight without marking.
Set the piece back in place only once it is fully cured. A water ring reappearing a few weeks after a successful repair almost always means the surface was never sealed, so moisture is going straight into the bare timber each time a glass touches it.
Look at the repaired area in daylight, ideally near a window rather than under a warm ceiling light. Turn the piece so light rakes across the surface; a repaired area shows up as a change in sheen long before it shows up as a change in colour.
Blend what remains rather than chasing it. A barely visible difference in a satin finish looks far better than a glossy patch, and if the mark is a fraction of a shade off, a matching wax or polish applied over the whole top will usually merge it.
For prevention, a few habits do most of the work:
Coasters and placemats under every glass, mug and hot dish — felt or cork underneath, not bare wood.
Trivets or mats under anything hot, since a heat mark is far harder to remove than a water mark.
Blot spills immediately rather than wiping, which spreads moisture into a wider area.
A soft cloth on the table instead of a damp rag, and never a paper towel that leaves fibres.
Routine care with the matching wax or oil every few months, which keeps the finish sealed and gives water something it cannot penetrate.
For outdoor wood, the same logic applies with a different finish system. If your garden table or fence is already sealed, follow our guide to deck stains for long-lasting protection to find a coating suited to weather exposure, and see how fence stains and paints compare if the piece is a vertical surface.
Almost every ruined water stain starts as a small mistake made confidently. Each of these has a straightforward fix.
Soaking the wood. A wet cloth left on the surface, a bowl of water used as a rinse, or furniture placed near a dripping window all push water past the finish. Stop adding moisture, set the piece somewhere dry and well ventilated, and let it cure for a full day before judging how bad it is.
Using household bleach. Chlorine bleaches wood fibres unevenly and permanently, leaving a white or grey patch worse than the ring you started with. There is no correction for it. Use a two-part wood bleach made for furniture, or a refinisher, if the damage is already done.
Scrubbing before testing. Circular scrubbing with anything abrasive cuts through the finish before you know whether the stain is even in the finish. Wipe first, always along the grain, and only escalate after the damp-cloth test has failed.
Applying vinegar, lemon juice or oil indiscriminately. Vinegar and lemon juice are acids that strip varnish, dull lacquer and raise the grain of bare wood. Oil on an already-oiled or waxed surface leaves a dark halo. Both make a white ring turn into a greasy blotch. Use each only on the finish type it belongs to.
Sanding through a thin finish. Veneer is often less than a millimetre thick and MDF has no solid layer at all. One pass of 120-grit with a rotary sander and you are through to the core. Sand by hand with the grain, on the whole surface, and only on solid wood.
Drying with high heat. A hair dryer on high, or an iron held still, softens the finish and burns the surface. Any heat you use stays low, stays moving, and stays a couple of inches above the cloth.
Testing in a visible spot. The underside of a table, the back of a drawer, or an interior shelf corner will tell you everything you need to know about how a finish reacts, with nobody ever seeing it. Put a piece of masking tape over the test patch and mark which method you tried.
Yes, for most white and cloudy rings. Mix one part baking soda with about half a part water into a thin paste, rub it along the grain with a soft cloth for roughly ten seconds, then wipe and dry. Baking soda is a fine abrasive that levels the dulled finish without cutting through it. It will not touch a dark stain that has soaked into the wood fibres, and it is one of the few methods that is safe on veneer and laminate.
No. Vinegar is an acid, and it strips varnish, dulls lacquer and raises the grain on bare wood. Applied to a water ring it usually leaves a wide dull patch that is harder to live with than the ring. If vinegar has already been used, the fix is to re-oil or re-wax the entire surface evenly rather than spot-treating the damaged area, because the boundary is where the real problem shows.
It helps on oiled and unfinished wood, because it re-saturates dried-out fibres and evens the colour back out. On a waxed, lacquered or varnished surface it does nothing useful and leaves a dark greasy halo that reads as a second stain. Always apply it to the whole top rather than to the mark, and buff off anything that does not absorb within about fifteen minutes.
Only after a spot test, and never on shellac. Alcohol dissolves shellac instantly and will lift a topcoat rather than a stain. On lacquer and varnish it can soften the finish enough to show a matte smear. Wipe a hidden area first with a cotton swab, wait a few minutes, and if the finish goes tacky or loses its gloss, stop. Waxed and oiled surfaces are generally safer with mild soap and warm water.
Paint only when the stain has genuinely beaten every gentler method and you want the change anyway. A dark or black mark that has soaked into the wood fibres cannot be lifted by surface methods, and painting over it traps it rather than hiding it for long. Wax crayons in a matching tone disguise a stubborn mark on a dark surface far more safely. Sanding back to bare wood is the honest fix, and that is a refinishing job.
Call a refinisher when the piece is antique or mid-century and you cannot identify the finish, when a dark stain has gone into the grain of solid wood, when the surface is veneer, particleboard or laminate that has already swollen or bubbled, or when a failed attempt has left finish flaking or tacky. Professional work also makes sense on a piece whose value depends on the original patina. A single ring on a lacquered table is a weekend job.
Blot it, then find the finish. A barely damp cloth with a drop of mild soap, wiped along the grain, clears most rings in a couple of minutes and costs nothing but the risk of testing first. If the mark survives that, a thin baking soda paste is the next rung on the ladder, and anything beyond that depends entirely on what the wood is wearing.
Know where you stop. Heat, solvents and steel wool each fix stains that gentler methods cannot, and each one takes a little of the finish with it. That is a fair trade on a solid wood table you plan to keep, and a bad deal on a laminate top or a piece whose patina is the reason you own it.
If you are working on a piece you want to keep rather than replace, a steady re-waxing or re-oiling routine is what stops the next glass from leaving a mark at all. Seal the surface properly now, and the stain you just removed stays removed.
