

If you have ever priced a traditional greenhouse kit, you already know the sticker shock. A permanent glass or polycarbonate structure can easily run $10,000 to $14,000 installed, and that is before you factor in the concrete foundation. A cattle panel greenhouse flips that equation on its head. Gardeners across the country are building these DIY hoop houses for roughly $300 to $600, and they are harvesting fresh greens straight through January.
I have been gardening long enough to know that season extension changes everything. A simple cattle panel greenhouse, also called a cattle panel hoop house, can shift your effective growing zone by about a zone and a half. That means spinach in December, kale all winter, and tomato seedlings started six weeks earlier than your neighbors. The concept is not new, but it has surged in popularity as homesteaders and backyard growers realize how accessible this build really is.
This guide walks through every step of building a cattle panel greenhouse from the ground up. You will find a complete materials list with specific specifications, panel dimension calculations for different build sizes, site selection and orientation advice, construction steps that include the critical ridge beam installation, ventilation strategies, cold-hardy crop recommendations, and an honest pros and cons breakdown. Whether you are working with three panels on a small backyard plot or planning a five-panel high tunnel for market growing, the instructions here apply directly to your project.
What makes this build so appealing is that no special skills are required. If you can drive a screw, bend a piece of welded wire with a friend, and stretch plastic over an arch, you can build a cattle panel greenhouse in a weekend. Let us get into the details so you can start planning yours today.
A cattle panel greenhouse is a hoop house style structure built from galvanized steel livestock panels bent into arches and covered with greenhouse plastic. The panels are made from 4 gauge welded wire, typically 16 feet long and 50 inches tall, and they are designed to contain cattle. That same rugged construction makes them ideal for supporting a curved greenhouse frame that can withstand serious wind, snow, and daily wear.
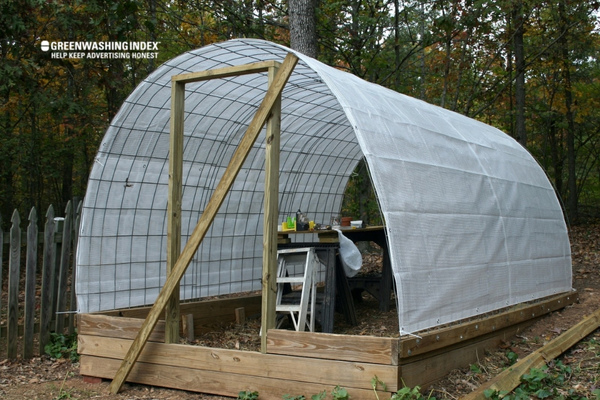
People sometimes use the terms hoop house, high tunnel, and greenhouse interchangeably, and there are meaningful overlaps. A hoop house refers to any arched structure covered in plastic, regardless of the frame material. A high tunnel is essentially a larger hoop house, often used for commercial growing, and may not include permanent heating. A cattle panel greenhouse is a specific type of hoop house that uses livestock panels as the structural ribs. The beauty of this design is that it borrows the durability and curved profile of commercial high tunnels while keeping costs and complexity to an absolute minimum.
The reasons gardeners choose this style of build over kits or permanent structures come down to cost, simplicity, and surprising resilience. Here is what sets the cattle panel greenhouse apart from the alternatives.
For anyone who wants serious growing space without a serious investment, the cattle panel greenhouse hits a sweet spot that few other structures can match.
Before buying a single panel, you need to understand the standard dimensions and how they translate into finished build sizes. Getting these numbers right determines everything from headroom to grow bed layout.
Cattle panels are manufactured to consistent industry standards. The most common size you will find at farm supply stores like Tractor Supply is 16 feet long by 50 inches tall, made from 4 gauge galvanized welded steel wire. The grid pattern typically features 6 inch by 6 inch openings at the top with narrower 4 inch by 4 inch spacing near the bottom. Some manufacturers produce panels that are 52 inches tall or 60 inches tall, but 50 inches is the most widely available.
The 4 gauge wire is what gives these panels their strength. This is thick, rigid steel that holds its arch shape under load. Cheaper panels made from thinner 6 gauge or 9 gauge wire exist, but they flex more and provide less snow load support. For a greenhouse that needs to survive winter, stick with 4 gauge.
When you bend a 16-foot panel into an arch, the resulting structure has a footprint of roughly 7 to 10 feet wide and about 7 feet tall at the peak. The exact dimensions depend on how flat or rounded you make the arch. Here is how panel count translates to tunnel length.
The maximum practical width is about 10 feet before headroom becomes too low at the edges. Beyond that width, the arch flattens out and you lose the vertical space needed for walking and working comfortably inside.
The materials list for a cattle panel greenhouse is short and accessible. Every item can be found at a farm supply store, hardware store, or ordered online from greenhouse specialty retailers. Let us break down each component so you know exactly what to buy and why.
Your panels are the structural backbone of the entire greenhouse, so this is not the place to cut corners. Look for 4 gauge galvanized steel panels measuring 16 feet by 50 inches. The galvanized coating prevents rust, which matters when the panels are enclosed in humid greenhouse conditions for months at a time.
Tractor Supply is the most commonly recommended source, with panels typically priced around $90 to $95 each. Most builders use 3 to 5 panels depending on desired tunnel length. When selecting panels, inspect the welds at each intersection and make sure the panel lies flat without warping. A warped panel will create an uneven arch that is harder to cover neatly with plastic.
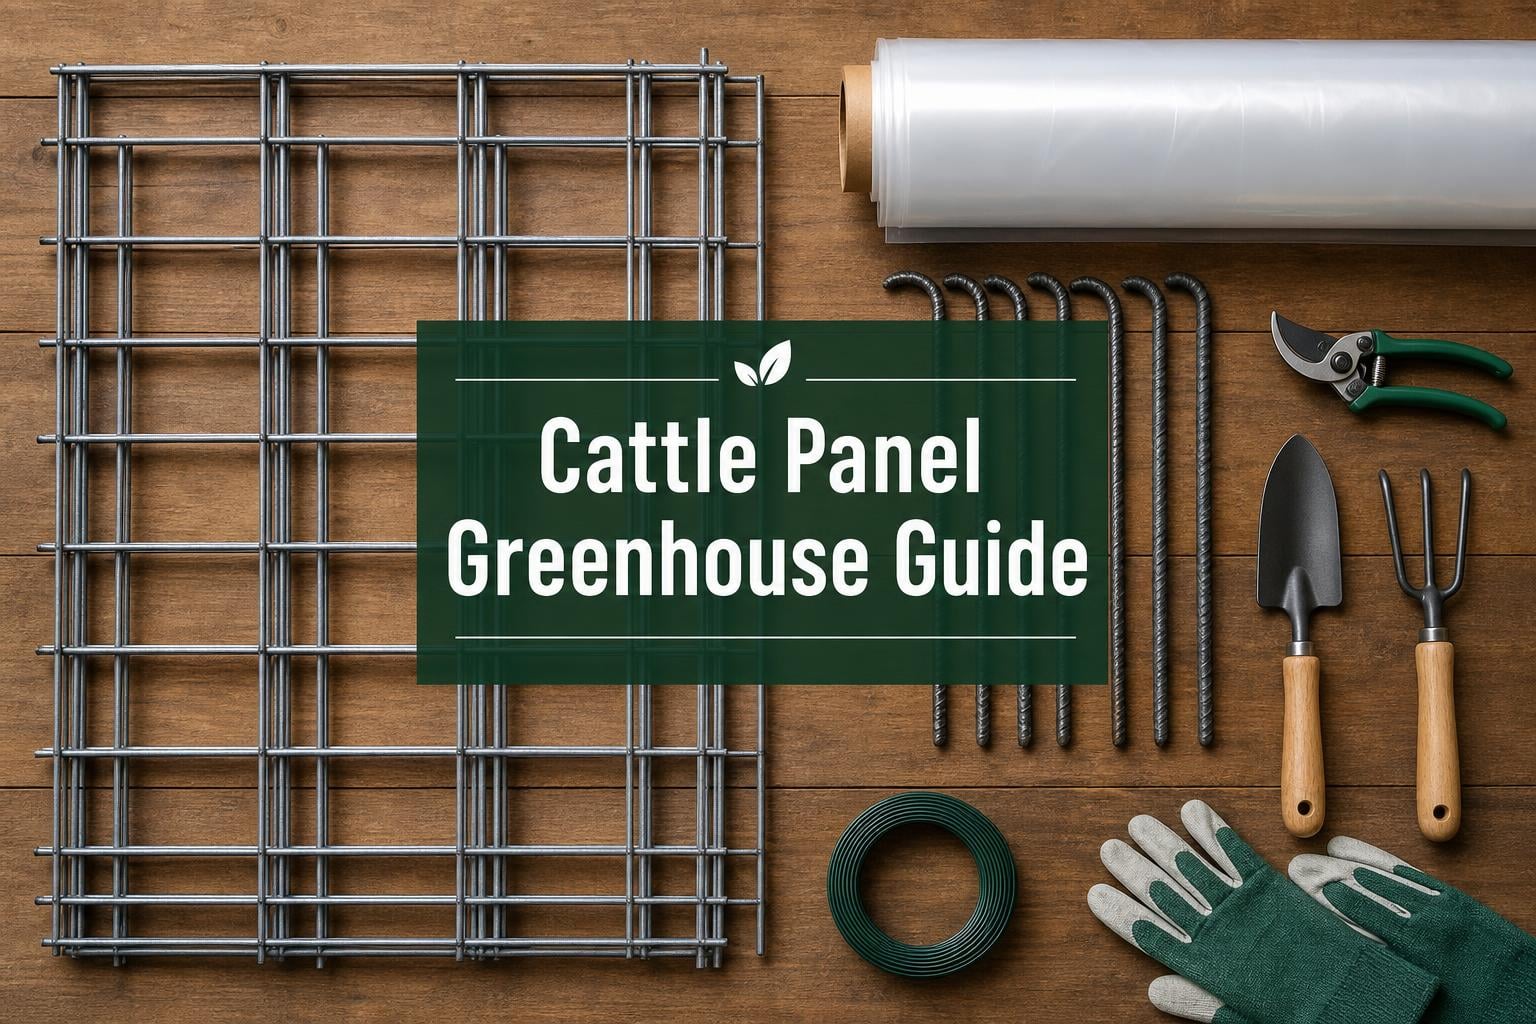
Here is every item you need for a standard 4-panel cattle panel greenhouse covering roughly 8 by 16 feet. Prices are approximate and vary by region and retailer.
Cattle panel greenhouses can be built for about $300 to $600 depending on size, material quality, and whether you already own basic tools. This is the single most common question gardeners ask before starting, so let us break down where that money goes.
That puts a typical 4-panel build in the $580 to $690 range if you are buying everything new. Builders who already have lumber, screws, or tools on hand routinely bring the total closer to $400. On the r/gardening and r/Greenhouses communities on Reddit, the most commonly reported total cost is $400 to $500 for a complete structure.
The average cost of a traditional permanent greenhouse installed is approximately $14,000. Even a basic polycarbonate kit greenhouse runs $2,000 to $5,000 before you pour the required concrete foundation. A cattle panel hoop house delivers comparable growing space for less than 5 percent of that cost. The tradeoff is longevity and aesthetics, but for most food-focused gardeners, the math speaks for itself.
One ongoing cost to plan for is greenhouse plastic replacement. The UV-stabilized film typically lasts 4 to 5 years before it becomes brittle and needs replacing. Budget roughly $100 every four to five years for a new roll, which is a small fraction of the original build cost.
Where you place your cattle panel greenhouse matters as much as how you build it. A well-sited hoop house captures maximum sunlight, drains properly, and stays sheltered from prevailing winds. A poorly sited one underperforms no matter how well it is constructed.
If your primary goal is winter growing, orient the greenhouse on an east-west axis so the long side faces south. This maximizes passive solar heating during the months when the sun tracks low across the southern sky. The broad south-facing wall captures sunlight all day, warming the soil and air inside.
For summer use, some builders prefer a north-south orientation so both sides of the tunnel receive equal morning and afternoon sun. If you plan to remove the plastic for summer and use the frame as a trellis, orientation matters less since there is no covering to manage light.
Spend a day observing your chosen site before committing. Watch how shadows from trees, fences, and buildings move across the area from morning to evening. A winter sun path is lower and shorter than summer, so a spot that gets full sun in July might be shaded by a neighboring building in December.
Ideally, the site should receive at least 6 to 8 hours of direct sunlight during the growing season you care about most. For winter gardening, aim for the sunniest possible south-facing exposure with no obstructions.
Choose ground that is level or slopes very slightly away from where the greenhouse will sit. Avoid low spots where water pools after rain, because a flooded greenhouse kills plants and rots wood. If your only option is a sloped site, you will need to level it with a shovel or build a terraced base frame.
If you plan to plant directly in the soil inside the greenhouse, prepare the beds before construction. Add compost, loosen compacted earth, and remove any weeds or sod. Once the plastic is on, working the soil becomes much less convenient.
Now for the hands-on part. Building a cattle panel greenhouse is a weekend project if you have your materials staged and a helper lined up. The steps below follow the sequence that experienced builders use, with critical details that prevent the most common failure modes.
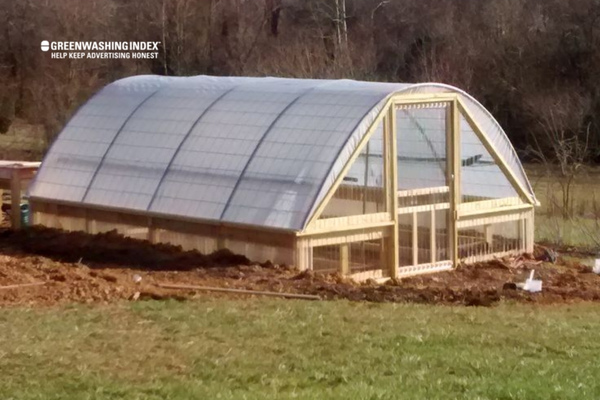
Start by marking out the footprint of your greenhouse using stakes and string. For a standard 4-panel build, that is approximately 8 feet wide by 16 feet long. Level the ground as needed, removing rocks, sod, and debris.
Lay your base boards along both long sides. These boards define the bottom edge of the tunnel and provide a surface for anchoring the panels. Use 2×12 planks or doubled 2×6 boards for stiffness. One common mistake reported on forums is using single 2×6 boards, which tend to warp over time after weather exposure. Several builders have had to replace warped 2×6 lumber with heavier 4×4 corner posts and 2×12 side boards. Save yourself that headache and start with the heavier lumber.
Install 4×4 corner posts at each end of the base boards. These posts give the frame rigidity and provide solid mounting points for end wall construction later. Sink the posts at least 18 inches into the ground or anchor them with concrete for maximum stability.
Drive 1/2 inch steel rebar stakes into the ground along the inside edge of each base board. Place one stake at each end and then every 3 feet along the length. Drive them at a slight inward angle so the curved portion that remains above ground catches the panel arch as it bends.
This rebar anchoring method is popular because it requires no digging or concrete. The rebar grips the soil and holds the base of each panel firmly against the wood frame. The rebar also gives you something to zip-tie the panels to for extra security.
This is where a second person makes a big difference. Take one cattle panel and walk it to the base frame. Position one end against the base board and rebar on one side, then flex the panel upward and over to the other side. The panel will naturally curve into an arch as you bring the other end down to the opposite base board.
One person holds the panel in its arched position while the other secures the base to the wood frame using fencing staples or cable staples. Then secure the panel to the rebar stakes using UV-stabilized zip ties at every contact point. Repeat this process for each panel, spacing them evenly along the length of the tunnel.
Bending panels is physically demanding. The 4 gauge wire is stiff by design. If you have arthritis or mobility limitations, enlist help for this step. Some builders have used a cargo strap or rope wrapped around the panel to help pull it into the arch shape without straining their back.
Once all panels are standing, connect them to each other at the top of the arch using zip ties. Place a zip tie at every other square where two panels meet along the ridge. This ties the structure together into a single rigid unit rather than a collection of independent arches.
Now install the ridge beam, also called a purlin. This is a horizontal board running the full length of the tunnel at the peak of the arch. Secure it to the top of each panel using zip ties or wire. The ridge beam serves a critical structural purpose: it prevents the arches from bowing inward or outward under the weight of accumulated snow. Without a purlin, heavy winter snow can flatten the arches and collapse the greenhouse. This single addition is the difference between a structure that survives blizzards and one that does not.
Before covering the frame with plastic, take foam pipe insulation tubes and place them over the top edges of each panel arch. Split the foam tubes lengthwise so they snap over the wire. This creates a smooth, cushioned surface between the sharp wire edges and your greenhouse plastic.
This step is frequently overlooked by first-time builders, and they pay for it when the plastic tears along panel edges within the first season. Pipe insulation costs about $10 and adds ten minutes of work, but it can add years to the life of your plastic covering. Some builders reinforce the insulation further by wrapping duct tape around it every few inches.
Drape the 6 mil UV-stabilized greenhouse plastic over the entire frame on a calm day. Wind is your enemy during this step, so pick a morning with still air. Center the plastic so you have equal overhang on both sides and both ends.
Secure the plastic to the base boards using plastic round cap nails, spacing them every 6 to 8 inches. The wide caps prevent the plastic from tearing at each fastening point. Alternatively, you can sandwich the plastic between the base board and a thin furring strip screwed on top, which creates an even more secure attachment.
For a tighter seal, dig a 4-inch-deep furrow along the outside of each base board and bury the bottom edge of the plastic in the soil. This anchors the plastic against wind and creates a seal that prevents cold air from infiltrating under the frame.
The end walls close off the tunnel and provide a door for access. The simplest approach is to frame a rectangular opening at one end using 2×4 lumber, then cover the remaining end wall area with greenhouse plastic secured by cap nails.
For the door itself, you have two options. A framed wooden door looks nicer and lasts longer, but it requires more carpentry. A faster alternative is a self-adhesive greenhouse zipper installed directly in the plastic end wall. You peel and stick the zipper, then cut along its length to create an opening. This takes five minutes and costs about $15.
On the opposite end wall, plan for ventilation. Even a simple louvered vent or a flap of plastic that can be rolled up and tied will provide enough airflow to prevent overheating on sunny days.
A sealed greenhouse on a sunny day can hit 100 degrees Fahrenheit even when it is 40 degrees outside. Ventilation is not optional, it is essential for plant survival. The challenge with a cattle panel hoop house is that there is no natural roof vent like you would find on a traditional greenhouse.
The most effective passive ventilation strategy is a cross-breeze. Open the door on one end wall and a vent on the opposite end wall. As the sun heats the air inside, hot air rises and escapes through the high vent while cooler air is drawn in through the door. This creates a continuous flow that keeps temperatures manageable.
For serious summer ventilation, install roll-up sides. Instead of nailing the plastic permanently to the base boards, attach it to a thin furring strip or pipe along the bottom edge. To ventilate, you roll the plastic up a foot or two off the ground and secure it with ties. This opens the entire length of the greenhouse to airflow while keeping the top covered for shade.
Roll-up sides are one of the most requested features in forum discussions. Gardeners who live in hot summer climates find that without this feature, the greenhouse becomes unusable from June through August. The modification is straightforward: replace cap nails along the bottom with a furring strip and screws, and the plastic can be rolled up or down as needed.
If you cannot be present to open and close vents manually, consider installing an automatic vent opener. These ingenious devices use a wax-filled cylinder that expands as temperature rises, pushing the vent open without electricity. When temperatures drop, the cylinder contracts and the vent closes. They cost around $40 to $60 each and are worth every penny for gardeners who work away from home during the day.
The growing possibilities inside a cattle panel greenhouse depend on your climate and whether you add supplemental heat. Even in an unheated structure, the protective environment effectively shifts your growing zone by about one and a half zones warmer. That means a gardener in zone 6 can grow as though they are in zone 7.5.
Winter growing in an unheated hoop house works best with cold-hardy crops that tolerate near-freezing temperatures. Forum users and experienced builders consistently report success with the following varieties through the coldest months.
These crops do not just survive winter, they thrive in it. Many leafy greens actually taste sweeter after a frost because the cold triggers sugar production in the leaves. Author Eliot Coleman, in his book “The Winter Harvest Handbook,” documents extensive winter harvests in unheated high tunnels in Maine, where winter temperatures regularly drop below zero.
As winter loosens its grip, the greenhouse becomes an ideal environment for starting seeds six to eight weeks before your last frost date. Tomatoes, peppers, eggplants, and onions all get a significant head start in the warm, protected interior. The natural light is superior to indoor grow lights, and the temperature fluctuations harden off seedlings naturally.
Once danger of frost has passed, remove the plastic covering and use the panel arches as a trellis. The welded wire grid is perfect for supporting indeterminate tomatoes, cucumbers, pole beans, squash, and other climbing crops. This effectively gives you two structures in one: a winter greenhouse and a summer vertical garden.
No structure is perfect, and an honest assessment of both strengths and limitations helps you decide whether a cattle panel greenhouse is right for your situation. Forum discussions on Reddit and Permies consistently surface the same points.
The pros overwhelmingly outweigh the cons for most gardeners, especially when you address the limitations proactively. Installing a ridge beam solves the snow load problem. Roll-up sides solve ventilation. And the plastic replacement cost is minor compared to the value of year-round food production.
A cattle panel greenhouse is low maintenance, but it is not no maintenance. A few routine practices will keep the structure sound and the growing environment healthy for years.
Keep the interior clean by sweeping out plant debris, fallen leaves, and old roots at the end of each growing season. Decaying organic matter harbors mold spores and provides habitat for pests. A clean greenhouse starts each season with a clean slate.
Inspect the frame and plastic regularly. Check the galvanized steel panels for signs of rust, particularly at weld points and where the wire meets the base boards. Look for tears, thin spots, or discoloration in the greenhouse plastic. Catching problems early prevents small issues from becoming structural failures.
Tighten or replace any zip ties that have degraded from UV exposure. Even UV-stabilized ties weaken over several years, and a failed tie at a critical connection point can allow a panel to shift out of alignment.
Storms, falling branches, and accumulated snow can cause damage even to a well-built structure. The good news is that cattle panel greenhouses are modular, so repairs are straightforward.
If a panel gets bent or broken, it can be removed and replaced individually without disturbing the rest of the structure. Simply cut the zip ties securing it, pull it out, slide a new panel into the same arch position, and re-secure it. A replacement panel costs about $90.
Tears in the greenhouse plastic should be patched immediately using clear greenhouse repair tape. Small tears expand quickly under wind pressure, so do not delay. For large tears or plastic that has become brittle from age, plan to replace the entire covering. Budget for this every 4 to 5 years as part of normal maintenance.
Wood frame components may warp or rot over time, particularly 2×6 boards exposed to constant moisture. If you notice warping, replace the affected board with heavier stock like a 2×12 or a 4×4 post. Several forum users have reported that switching from 2×6 to heavier lumber eliminated their ongoing frame maintenance issues entirely.
Beyond the basic construction steps, a handful of pro tips separate a greenhouse that merely functions from one that truly performs. These are the details experienced builders wish they had known on their first build.
For homesteaders looking to expand their DIY skills beyond the greenhouse, these same cattle panels can be used to build trellises, chicken runs, compost bins, and garden arches. The techniques you learn building a hoop house translate directly to other projects around the property. If you keep livestock as well, you may also be interested in our guide to automatic chicken doors for another practical homestead upgrade.
A cattle panel greenhouse typically costs $300 to $600 to build, with most builders reporting a total around $400 to $500 for a standard 4-panel structure. The cattle panels themselves run about $90 each, greenhouse plastic costs $80 to $120, lumber adds $80 to $120, and hardware brings the total to the final range. This is a fraction of the $14,000 average cost of a traditional permanent greenhouse.
Build a cattle panel greenhouse by bending 16-foot galvanized steel livestock panels into arches, securing the base to wood framing with rebar anchors and fencing staples, connecting panels with UV-stabilized zip ties, installing a ridge beam for snow load support, covering the frame with 6 mil UV-stabilized greenhouse plastic secured by round cap nails, and adding end walls with a door and vent. The full project takes a weekend with basic tools.
Yes, a cattle panel greenhouse can be used year-round. In winter, it functions as an unheated cold frame for cold-hardy crops like spinach, kale, and carrots, effectively shifting your growing zone by about 1.5 zones warmer. In summer, remove the plastic and use the panel arches as a trellis for tomatoes and cucumbers. For true year-round growing of heat-loving crops, add a small thermostat-controlled heater.
Cold-hardy crops thrive in winter inside a cattle panel greenhouse, including spinach, kale, mache, bok choy, carrots, radishes, and herbs like cilantro and parsley. In summer with the plastic removed, the panel grid works as a trellis for climbing crops including indeterminate tomatoes, cucumbers, pole beans, squash, and climbing peas. Spring is ideal for starting heat-loving seedlings like peppers and eggplants.
Standard cattle panels measure 16 feet long and 50 inches tall, made from 4 gauge galvanized welded steel wire. The grid pattern typically features 6 inch by 6 inch openings. Some manufacturers produce panels that are 52 or 60 inches tall, but 16 feet by 50 inches is the most common size available at farm supply stores like Tractor Supply.
Attach greenhouse plastic using plastic round cap nails driven into the wood base boards every 6 to 8 inches. The wide caps prevent tearing. For a tighter seal, bury the bottom edge of the plastic in a 4-inch furrow along the outside of the base. Use pipe insulation over panel edges before covering to prevent sharp wires from puncturing the film.
UV-stabilized 6 mil greenhouse plastic typically lasts 4 to 5 years on a cattle panel greenhouse before becoming brittle and requiring replacement. Budget approximately $100 every four to five years for a new roll. Non-UV-stabilized construction plastic will degrade in a single season and should not be used.
Yes, a cattle panel greenhouse can survive heavy snow loads if you install a ridge beam, also called a purlin, running the length of the tunnel at the peak. This horizontal support prevents the arches from bowing inward or collapsing. Without a ridge beam, accumulated snow can flatten the structure. One builder reported their greenhouse surviving 75 mph winds, and properly braced structures handle blizzards reliably.
Building a cattle panel greenhouse is one of the highest-value projects a home gardener can undertake. For an investment of $300 to $600 and a weekend of work, you get a structure that extends your growing season, protects plants from harsh weather, and produces fresh food through the coldest months of the year. The galvanized steel frame lasts for years, the modular design lets you expand whenever you need more space, and the built-in trellis grid doubles as a summer growing structure when you remove the plastic.
The keys to success are straightforward. Choose 4 gauge galvanized panels from a reliable farm supply source like Tractor Supply. Use heavy lumber for the base frame to avoid warping. Install a ridge beam to handle snow loads. Protect your plastic investment with pipe insulation on panel edges. And plan your ventilation strategy from the beginning so the structure works in every season.
Whether you are a first-time gardener looking to stretch your harvest past the first frost or an experienced grower ready for serious winter production, the cattle panel greenhouse delivers more growing power per dollar than almost any other build. Pick your site, gather your materials, and start bending panels. Your winter garden is one weekend away.
