

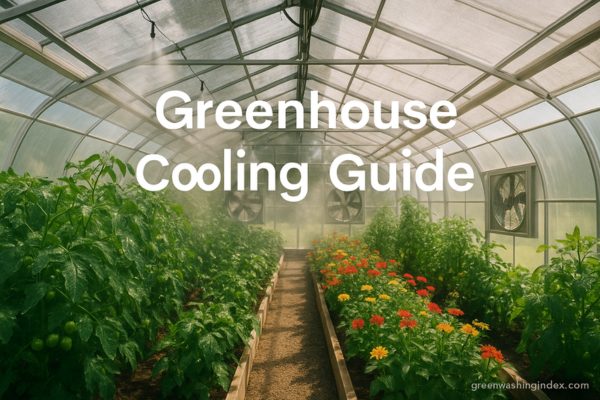
Picture this: You’ve built the perfect greenhouse, expecting a thriving garden paradise. Instead, you walk into what feels like a sauna, with wilting plants begging for relief. The very structure designed to nurture your plants has become their biggest threat during summer’s peak.
Excessive heat in greenhouses isn’t just uncomfortable—it’s devastating. When temperatures soar above 90°F, plants experience stress, pest populations explode, and your carefully cultivated garden can fail within days. The good news? Multiple proven greenhouse cooling methods can reduce temperatures by 10-40°F, transforming your overheated greenhouse into a thriving oasis.
This comprehensive guide covers everything from simple DIY cooling solutions costing under $200 to professional greenhouse cooling systems. You’ll discover passive ventilation techniques, evaporative cooling secrets, strategic shading methods, and advanced temperature control systems.
Here’s what we’ll explore: natural ventilation fundamentals, active cooling systems, evaporative cooling installation, shading strategies, cost-effective solutions, and troubleshooting common cooling challenges.
When greenhouse temperatures climb above 85°F, your plants face serious threats. Heat stress causes immediate wilting, disrupting photosynthesis and stunting growth. Leaves develop brown edges, flowers drop prematurely, and fruit production plummets.
Overheated greenhouses become breeding grounds for spider mites, aphids, and whiteflies. These pests thrive in hot, stagnant conditions, multiplying rapidly and devastating crops. The warm, humid environment also encourages fungal diseases like powdery mildew and botrytis.
Beyond visible damage, excessive heat weakens plants’ immune systems. Stressed plants can’t defend against pathogens effectively, leading to widespread disease outbreaks. Your indoor greenhouse investment quickly becomes a liability without proper cooling.
Most greenhouse plants thrive between 80-85°F during peak summer hours. However, specific crops have varying preferences that successful growers must understand.
| Plant Type | Ideal Day Temp | Maximum Safe Temp |
|---|---|---|
| Tomatoes | 75-85°F | 95°F |
| Lettuce | 60-70°F | 75°F |
| Peppers | 70-85°F | 95°F |
| Herbs | 65-75°F | 85°F |
| Orchids | 70-80°F | 90°F |
Monitoring tools are essential for maintaining these ranges. Digital thermometers with remote sensors provide real-time readings throughout your greenhouse. Smart controllers can automatically activate cooling systems when temperatures exceed preset limits.
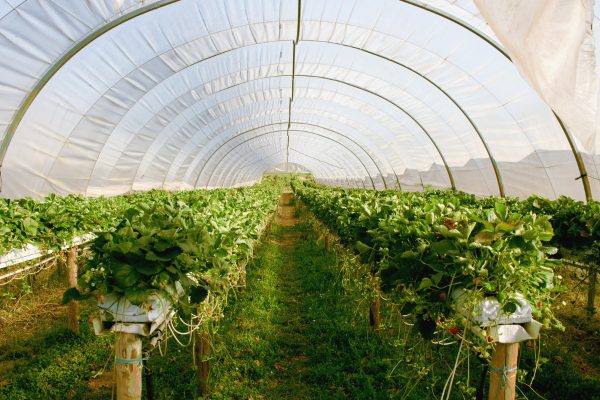
The chimney effect forms the foundation of passive greenhouse cooling. Hot air naturally rises through roof vents while cooler air enters through lower openings. This continuous cycle requires no electricity, making it the most cost-effective cooling method.
Roof vents should comprise 15-20% of your floor area for optimal airflow. Position them along the ridge for maximum efficiency. The greater the vertical distance between intake and exhaust vents, the stronger the natural convection current.
Automatic vent openers revolutionize passive cooling. These ingenious devices use expanding beeswax cylinders that respond to temperature changes. When heat increases, the wax expands, pushing the vent open. As temperatures drop, the wax contracts, closing the vent automatically.
Large garage-style doors transform greenhouse ventilation capabilities. Installing these on opposite ends creates a wind tunnel effect, rapidly exchanging hot air for cool. During peak summer heat, keeping doors open during daylight hours can reduce temperatures by 5-10°F.
Window placement requires careful planning for cross-ventilation success. Install operable windows at plant level on prevailing wind sides. Position exhaust windows higher on the opposite wall, creating diagonal airflow patterns that efficiently cool a greenhouse.
Roll-up sides offer maximum ventilation for portable greenhouse structures. These systems allow you to adjust opening height based on temperature and wind conditions. During calm mornings, roll sides halfway. As temperatures rise, increase the opening for enhanced cooling.
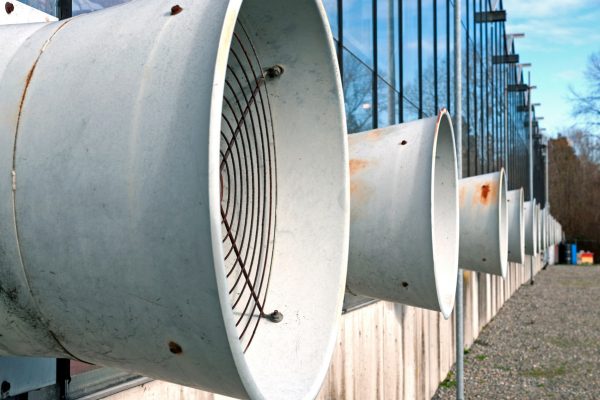
Proper greenhouse ventilation requires moving the entire air volume every 1-3 minutes during hot weather. Calculate your greenhouse’s cubic footage (length × width × average height) to determine required CFM (cubic feet per minute) ratings.
For a 10×12×8 foot greenhouse (960 cubic feet), you need a minimum 320 CFM fan for adequate cooling. Double this capacity for extremely hot climates or heat-sensitive crops. University of Massachusetts research confirms proper sizing prevents temperature stratification.
Strategic fan placement maximizes cooling efficiency:
HAF fans create a gentle, continuous air movement pattern throughout your greenhouse. Unlike exhaust fans that remove air, HAF fans circulate existing air horizontally, eliminating temperature variations between floor and ceiling levels.
These fans prevent microclimates where hot air pockets damage sensitive plants. By maintaining constant air movement, HAF fans also reduce humidity on leaf surfaces, dramatically decreasing disease incidence. Most greenhouses benefit from one HAF fan per 50 feet of length.
Energy efficiency makes HAF fans attractive for continuous operation. A typical 1/10 HP fan costs less than $30 annually to run 24/7. This minimal investment provides consistent temperature control and healthier plants year-round.
Evaporative cooling harnesses water’s natural phase change to cool greenhouse air. As water transforms from liquid to vapor, it absorbs significant heat energy—approximately 970 BTUs per pound of water evaporated.
This process can reduce air temperature by 10-20°F in dry climates. The cooling effect depends on ambient humidity levels. In arid regions with 20% humidity, temperature drops of 25-40°F are possible. However, effectiveness decreases as humidity rises.
The relationship between temperature and humidity determines cooling potential. Use a psychrometric chart to calculate expected temperature reduction based on your local conditions. This ensures realistic expectations when designing your cooling system.
Fan and Pad Systems represent the gold standard for greenhouse cooling methods. Water continuously flows over cellulose pads while fans draw air through, creating cooled, humidified air. Commercial systems can cool 20,000+ square feet effectively.
Swamp Coolers offer portable, affordable cooling for smaller greenhouses. These self-contained units combine water reservoir, pump, pads, and fan in one device. Prices range from $200 for small units to $1,000+ for commercial models.
Wet-Wall Systems maximize cooling in large commercial operations. Entire greenhouse walls become cooling surfaces, with water trickling down corrugated cellulose. Though installation costs reach $5,000+, these systems provide unmatched cooling capacity.
Creating a simple misting system offers immediate cooling relief. Install misting nozzles along greenhouse peaks, spacing them 3-4 feet apart. A timer-controlled pump creates cooling mist cycles, reducing temperatures while avoiding oversaturation.
Build a homemade swamp cooler using:
Integrate your greenhouse pond as a cooling feature. Position fans to blow across the water surface, creating natural evaporative cooling. The 600-3,000 gallon thermal mass also moderates temperature swings naturally.
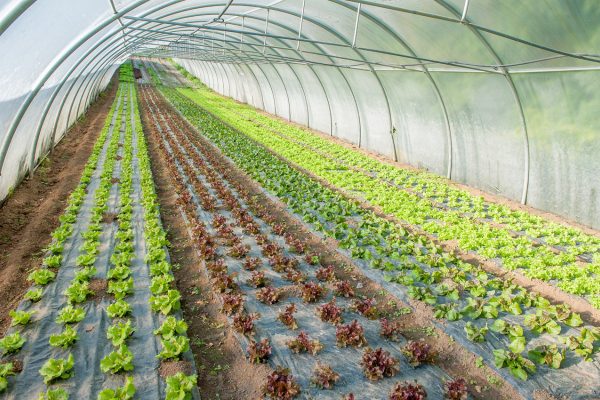
Shade cloth reduces solar heat gain while maintaining adequate light for photosynthesis. The 50% shade density works best for most vegetables, blocking half the sun’s intensity without causing stretching or weak growth.
Aluminet shade cloth outperforms traditional black materials by reflecting heat rather than absorbing it. This specialized fabric can reduce greenhouse temperatures by an additional 5-8°F compared to standard shade cloth. Though initially more expensive, the superior cooling justifies the investment.
Installation timing matters for optimal results:
Large-leafed plants create living shade while contributing to evaporative cooling. Fig trees and grapevines excel at this dual purpose, with mature plants transpiring 10-50 gallons daily. Position these in western zones to block intense afternoon sun.
External deciduous trees provide seasonal shading perfectly timed with cooling needs. Plant trees 10-20 feet from greenhouse walls on south and west sides. Select fast-growing varieties like hybrid poplars or silver maples for quicker results.
Whitewash applications offer temporary, adjustable shading. Mix 1:10 ratio of white latex paint to water, spraying on exterior glazing. This method allows gradual removal as seasons change, simply washing off with water when increased light is needed.
Extreme heat demands layered cooling approaches. Start with maximum ventilation—both passive vents and powered exhaust fans running continuously. Add evaporative cooling during peak hours (10 AM – 4 PM) when temperatures exceed 90°F.
Implement progressive shading based on temperature thresholds:
Create thermal buffers using water barrels painted black. These absorb excess heat during the day, then radiate warmth at night when temperatures drop. Place 55-gallon drums throughout your greenhouse for passive temperature moderation.
Evaporative cooling in arid regions requires smart water management. Collect condensation from cooling pads in gutters, directing runoff to storage tanks. This reclaimed water can supply 20-30% of cooling system needs.
Drought-resistant cooling modifications include:
Consider xerophytic companion plants that thrive in low-water conditions. Agaves, aloes, and cacti positioned strategically provide shade while requiring minimal irrigation. Their presence reduces overall greenhouse water demands significantly.
12V Hybrid Fans suit small greenhouse structures perfectly. These energy-efficient units run on solar panels during day, switching to battery power at night. Typical 12V fans move 800-1,200 CFM while consuming minimal electricity.
110V Exhaust Fans provide serious cooling power for larger greenhouses. Commercial-grade models feature:
Solar-Powered Options eliminate operating costs entirely. Modern solar fans include integrated panels and batteries, ensuring operation during cloudy periods. Though initial costs reach $300-500, zero electrical usage provides rapid payback.
Mount exhaust fans as high as structurally possible, angling 15° downward to eliminate ceiling heat pockets. Install on leeward walls to work with prevailing winds, not against them.
Create optimal airflow patterns by positioning:
Regular maintenance extends fan lifespan significantly. Clean blades monthly, removing dust and debris. Lubricate bearings seasonally. Replace worn belts before failure. This preventive care ensures reliable cooling when needed most.
Geothermal cooling taps earth’s stable temperatures for greenhouse climate control. Perforated pipes buried 2-4 feet deep circulate air through soil, cooling it naturally. Inlet pipes near water features maximize cooling potential.
This system requires:
Soil temperatures remain 10-20°F cooler than air during summer. As hot greenhouse air passes through buried pipes, it transfers heat to surrounding soil. The cooled air emerges at root level, exactly where plants need it most.
Attic fans revolutionize large greenhouse cooling. Installing 2-3 units in 30+ foot structures creates powerful updrafts, exhausting heat accumulating at peak heights. These fans move 3,000+ CFM, dramatically improving natural convection.
Smart greenhouse technology automates cooling responses. WiFi-enabled controllers monitor temperatures continuously, activating appropriate cooling stages. Integration with weather stations anticipates heat waves, pre-cooling greenhouses before stress occurs.
Ridge vents running the entire greenhouse length maximize passive ventilation. Continuous openings eliminate hot spots common with individual vents. Motorized systems can open incrementally, fine-tuning ventilation based on conditions.
Starting your greenhouse cooling journey doesn’t require massive investment. Basic box fans ($30-50 each) provide immediate relief when positioned correctly. Add automatic vent openers ($25-40 per vent) for passive cooling without electrical costs.
DIY evaporative cooling systems offer excellent value:
| Component | Cost Range | Cooling Capacity |
|---|---|---|
| Misting Kit | $50-150 | 5-10°F reduction |
| Small Swamp Cooler | $200-400 | 10-15°F reduction |
| Shade Cloth (20×20) | $75-150 | 8-12°F reduction |
| Exhaust Fan Kit | $150-300 | 5-8°F reduction |
Combined systems maximize cooling while minimizing expense. A $500 investment in fans, vents, and shade cloth can reduce temperatures by 15-20°F effectively.
Commercial greenhouse cooling systems deliver consistent, reliable temperature control. Professional installation ensures optimal performance and longevity, though costs increase significantly.
High-end systems include:
Calculate ROI based on crop value and climate severity. In hot regions, professional cooling systems pay for themselves within 2-3 years through increased yields and reduced crop losses.
Over-shading ranks as the most frequent cooling error. Excessive shade cloth or multiple layers reduce light below photosynthesis requirements. Plants become leggy, weak, and unproductive despite comfortable temperatures.
Inadequate air exchange creates stagnant conditions promoting disease. Many growers install fans too small for their greenhouse volume. Remember: complete air exchange every 1-3 minutes during summer heat.
Ignoring humidity levels while cooling causes fungal explosions. Evaporative cooling adds moisture, potentially creating disease-friendly environments. Balance cooling with dehumidification in humid climates.
Poor fan placement wastes energy while leaving hot spots. Fans blowing directly on plants cause windburn and excessive transpiration. Create gentle, indirect airflow patterns instead.
Neglecting maintenance leads to system failure during critical periods. Clogged cooling pads, dirty fan blades, and stuck vents reduce efficiency by 30-50%. Schedule weekly summer maintenance checks.
Proper fan sizing ensures effective greenhouse air circulation without excessive energy use. Calculate total CFM requirements using this formula: Greenhouse Volume × 60 ÷ Minutes for Complete Air Exchange.
For optimal cooling, size fans to exchange air completely:
Multiple smaller fans often outperform single large units. They provide better air distribution, redundancy if one fails, and variable cooling stages. Position fans to work together, not against each other.
Solar-powered fans eliminate operating costs while providing reliable cooling. Modern panels generate sufficient power even on cloudy days. Battery backup ensures continuous operation during extended overcast periods.
Timer and thermostat controls prevent unnecessary operation. Set fans to activate at 75°F, increasing speed as temperatures rise. Nighttime settings can maintain gentle circulation without overcooling.
Variable frequency drives (VFDs) on larger fans reduce energy consumption by 30-50%. These controllers adjust motor speed based on cooling demands, running slower during mild conditions. Though adding $200-400 per fan, energy savings provide 2-year payback.
Step 1: Assess Current Temperature Issues
Monitor greenhouse temperatures for one week, recording highs, lows, and times. Identify hot spots using multiple thermometers. Note when temperatures exceed ideal ranges.
Step 2: Calculate Ventilation Needs
Measure greenhouse dimensions accurately. Multiply length × width × average height for cubic footage. Divide by 3 for minimum CFM requirements in hot climates.
Step 3: Install Passive Venting First
Add roof vents equaling 20% of floor area. Install automatic openers set to activate at 75°F. Position intake vents low on north walls for coolest air entry.
Step 4: Add Fans for Air Circulation
Mount exhaust fans high on south or west walls. Install HAF fans to eliminate temperature stratification. Ensure proper electrical supply for all equipment.
Step 5: Implement Evaporative Cooling
Choose between misting systems, swamp coolers, or wet walls based on budget. Install during spring before peak heat arrives. Test systems thoroughly, adjusting for optimal coverage.
Step 6: Apply Shading as Needed
Install shade cloth when temperatures consistently exceed 85°F. Start with 30% shade, adding density if needed. Position to block afternoon sun primarily.
Step 7: Monitor and Adjust
Track temperature changes after each improvement. Fine-tune vent openings, fan speeds, and misting cycles. Document what works for future reference.
March marks the beginning of cooling season preparation. Clean all fans, removing winter dust accumulation. Test automatic vent openers, lubricating mechanisms. Order shade cloth and cooling supplies before peak demand.
April brings first cooling needs in many regions. Install shade cloth on south-facing sections initially. Begin daily ventilation routines. Monitor for first days exceeding 80°F.
Service evaporative cooling systems before first use. Replace worn cooling pads, check pump operation, and clean water reservoirs. Algae prevention treatment saves mid-summer headaches.
June through August demands maximum cooling efforts. Run exhaust fans continuously during daylight hours. Activate evaporative cooling by 10 AM on hot days. Apply supplemental shading if temperatures exceed 95°F.
Maintain consistent moisture levels in cooling pads for best efficiency. Check and clean misting nozzles weekly to prevent clogging. Monitor plants for heat stress signs despite cooling efforts.
Adjust watering schedules to accommodate increased transpiration. Early morning irrigation reduces mid-day stress. Mulch heavily to conserve soil moisture during peak heat.
September cooling needs vary dramatically by region. Begin removing shade cloth sections as sun angle decreases. Reduce fan operation to daylight hours only. Continue monitoring for unexpected heat waves.
October typically marks cooling system shutdown. Clean and store evaporative cooling equipment properly. Drain water lines to prevent freeze damage. Leave passive vents operational for mild day ventilation.
Proper storage extends equipment life significantly. Remove and clean fan blades thoroughly. Cover fan openings to prevent pest entry. Store cooling pads flat in rodent-proof containers.
Drain all water systems completely, including pipes and pumps. Remove batteries from controllers for inside storage. Document any repairs needed for spring preparation.
Create a detailed inventory of cooling supplies. Note what worked well and what needs improvement. Order replacement parts during off-season sales for spring readiness.
The best cooling method combines passive ventilation with evaporative cooling. Install roof and side vents for natural airflow, add exhaust fans for forced ventilation, then incorporate evaporative cooling for maximum temperature reduction. This layered approach provides reliable cooling while minimizing energy costs.
Basic cooling systems start around $200 for DIY solutions using fans and shade cloth. Mid-range systems with evaporative coolers and automated controls cost $1,000-3,000. Professional commercial installations range from $5,000-25,000 depending on greenhouse size and cooling requirements.
Yes, passive cooling methods work without power. Automatic vent openers use temperature-sensitive wax cylinders. Strategic shading, reflective mulches, and proper greenhouse orientation reduce heat gain. Water features provide evaporative cooling through natural air movement.
High humidity reduces evaporative cooling effectiveness. Focus on maximum air exchange using exhaust fans and circulation fans. Shade cloth becomes critical for temperature reduction. Consider installing a small dehumidifier to reduce moisture while cooling.
Begin cooling preparations when daytime temperatures consistently exceed 75°F. Install systems before peak summer heat arrives. Most regions require active cooling from May through September, though this varies by climate and crop requirements.
Mastering greenhouse cooling transforms summer from a season of struggle to one of abundance. The key lies in combining multiple strategies—natural ventilation, evaporative cooling, strategic shading, and proper air circulation—to create an integrated cooling system.
Start simple with passive ventilation and basic fans. As you gain experience, add evaporative cooling and automated controls. Even modest investments in cooling infrastructure pay dividends through healthier plants and increased yields.
Remember that every greenhouse has unique cooling challenges based on size, location, and crops grown. Monitor your specific conditions, experiment with different methods, and document what works best for your situation.
Don’t wait until plants show heat stress to implement cooling strategies. Begin preparations in early spring, installing systems before summer heat arrives. Your plants will reward proactive cooling management with vigorous growth and bountiful harvests all season long.
Don't let aphids, slugs, and caterpillars ruin another plant. Take back control with simple, natural methods that actually work.
