

If you’re reading this in the middle of summer with sweat dripping down your face while sitting in your second-floor bedroom, I get it. I spent three summers dealing with a second floor that felt like a sauna while my first floor stayed perfectly cool. After testing dozens of solutions and consulting with HVAC professionals, I’ve found what actually works to increase airflow upstairs without breaking the bank or wasting energy.
The temperature difference between floors in a two-story home can reach 10-15 degrees Fahrenheit, and that’s not just uncomfortable – it’s expensive. Your AC system works overtime trying to cool that hot upper floor, driving up energy bills by 20-30% during peak cooling months. The good news? You can fix this problem with the right approach, and many solutions pay for themselves through energy savings within a single cooling season.
This guide covers everything from free DIY fixes you can do today to professional upgrades that permanently solve the problem. I’ll show you exactly how to diagnose your specific airflow issues, implement the most cost-effective solutions, and optimize your home’s cooling efficiency for long-term savings.
Before diving into solutions, understanding why your second floor suffers from poor airflow helps you choose the right fix. Hot air rises – we all learned that in elementary school – but that’s just the beginning of the problem.
Your HVAC system faces several challenges when cooling a second floor. First, the return air ducts pull cooled air back to the system, but most returns sit on the first floor. This creates negative pressure upstairs, making it harder for cool air to reach those rooms. Second, your ductwork loses cooling power as it travels through hot attics or walls, with temperature losses of 2-3 degrees per 10 feet of duct run.
The stack effect compounds these issues. As hot air rises and escapes through tiny gaps in your home’s envelope (around windows, electrical outlets, and attic access points), it creates a vacuum that pulls hot outdoor air into your lower levels. This constant air movement fights against your HVAC system’s efforts to maintain consistent temperatures.
Solar heat gain hits second floors harder too. Your roof absorbs massive amounts of heat during the day – surface temperatures can exceed 150°F in summer. Even with good attic insulation, some of that heat radiates down into upper floor ceilings. West-facing rooms suffer the most, receiving direct afternoon sun when outdoor temperatures peak.
Finally, many homes have undersized or poorly designed ductwork for their second floors. Builders often use the same size ducts for upper floors as lower ones, ignoring the extra pressure needed to push air up and maintain flow over longer distances. The result? Your second floor gets 30-40% less airflow than designed, even when your HVAC system runs perfectly.
Not all airflow problems require the same solution. Spending 15 minutes on proper diagnosis saves hundreds of dollars on unnecessary fixes. Here’s my systematic approach to pinpointing your exact issue.
Start with the tissue test at each second-floor vent. Hold a single tissue against each vent while the AC runs. It should stick firmly in place. If it falls or barely holds, that vent has insufficient airflow. Document which vents fail this test – patterns reveal whether you have a whole-floor problem or specific room issues.
Next, check your temperature differentials. Use a digital thermometer to measure temperatures at floor level and ceiling level in the same room. A difference over 4 degrees indicates poor air circulation within the room. Then compare first and second floor temperatures at the same time of day. Differences over 6 degrees suggest systemic airflow problems rather than insulation issues.
Inspect your ductwork for obvious problems. Look for disconnected ducts in your attic, crushed flex ducts, or closed dampers in the ductwork. I once found a client’s second floor getting no air because a damper had been accidentally closed during construction ten years earlier. Also check that all vents are fully open – furniture often blocks vents without homeowners realizing it.
Test your HVAC system’s static pressure if you have access to the air handler. High static pressure (over 0.5 inches of water column) indicates restricted airflow from clogged filters, undersized returns, or ductwork problems. This requires professional equipment but many HVAC companies offer free diagnostics.
Finally, perform a simple return air test. Turn on your HVAC system and hold a piece of paper against each return vent. Strong suction on first floor returns but weak suction upstairs confirms insufficient return air pathways – a common culprit in two-story airflow problems.
Let’s start with fixes that cost nothing but make a real difference. I’ve seen these simple changes drop second floor temperatures by 3-5 degrees within hours.
First, check and adjust all your vent dampers. Many homeowners don’t realize their vents have adjustable dampers behind the grilles. During cooling season, partially close first floor vents to force more air upstairs. Start by closing them 50% and adjust based on results. Never close more than 20% of your total vents though – this strains your HVAC system and can damage the compressor.
Change your fan setting from “Auto” to “On” during peak heat hours. This keeps air circulating even when the AC isn’t actively cooling, evening out temperatures between floors. Yes, this uses more electricity (about $10-15 per month), but it’s far cheaper than running your AC longer to overcome temperature imbalances. Switch back to “Auto” at night to save energy when temperatures drop.
Open interior doors throughout your home, especially at night. Closed doors restrict return air flow, creating pressure imbalances that prevent proper cooling. If privacy is needed, consider undercutting doors by 1 inch or installing transfer grilles. Just opening doors at night can drop bedroom temperatures by 2-3 degrees.
Close blinds and curtains on south and west-facing windows before 11 AM. Solar heat gain through windows accounts for up to 30% of cooling load. Light-colored window treatments reflect more heat than dark ones. If you’re home during the day, open north-facing windows for natural light without the heat penalty.
Clear all obstructions from vents and returns. I regularly find vents blocked by furniture, drapes, or rugs. Each blocked vent reduces system efficiency by 5-10%. Pay special attention to return vents – blocking even one return can cripple airflow throughout your entire home. Maintain at least 6 inches of clearance around all vents.
Seal obvious air leaks on your second floor. Use your hand to feel for air movement around electrical outlets, window frames, and the attic access door. Apply weatherstripping or caulk to these gaps. Focus on the attic door first – an unsealed attic hatch leaks as much air as leaving a window half open.
When free fixes aren’t enough, these affordable solutions deliver significant improvements without requiring professional installation.
Install a magnetic vent deflector system ($20-30 per vent). These attach to ceiling vents and direct airflow horizontally instead of straight down. This improves air circulation and prevents the common problem of cooled air falling straight to the floor before spreading through the room. I’ve measured 2-degree improvements from this simple change alone.
Add door undercuts or transfer grilles ($30-50 per door). Bedrooms with closed doors need a return air path. Cutting 1 inch off the bottom of doors allows air to flow freely. For better aesthetics, install decorative transfer grilles above doors. This single modification can improve room cooling by 15-20%.
Upgrade to a smart thermostat with scheduling ($150-250). Smart thermostats like the Ecobee or Nest learn your patterns and pre-cool your home before peak heat hours. More importantly, they can run fan cycles strategically to circulate air when temperature differentials exceed your set threshold. The Ecobee’s room sensors help balance temperatures between floors automatically.
Install ceiling fans in all second floor rooms ($75-150 per fan). Ceiling fans don’t cool air, but they make you feel 4 degrees cooler through evaporation. Run them counterclockwise in summer to push air down. Choose Energy Star certified fans – they use 60% less energy than standard models. The Hunter Signal with WiFi control has served me well for three years.
Apply reflective film to west-facing windows ($6-8 per square foot). This film blocks up to 80% of solar heat while maintaining visibility. I recommend 3M Prestige series for the best heat rejection without the mirror effect. Professional installation costs more but DIY application takes just an hour per window with practice.
Add inline duct fans to boost airflow ($100-200 per duct). These fans install inside existing ductwork to increase airflow to problem rooms. The AC Infinity CLOUDLINE series offers variable speed control and runs nearly silent. Install them at least 10 feet from vents to prevent noise. This works especially well for that one room that never cools properly.
Invest in portable air circulators ($50-150 each). Vornado circulators move air throughout entire floors, not just in front of them like traditional fans. Place one at the top of your stairs pointing down to push cool air up through convection currents. The Vornado 660 moves air up to 100 feet and uses just 43 watts on low speed.
These solutions require more investment but deliver dramatic improvements in comfort and energy efficiency.
Install a whole house fan ($500-1,500 installed). These powerful fans mount in your attic and pull hot air out while drawing cool air in through open windows. They work best in climates where nighttime temperatures drop below 70°F. My QuietCool system drops indoor temperatures 10 degrees in 20 minutes using 90% less energy than AC. Run it at night and early morning to pre-cool your home’s thermal mass.
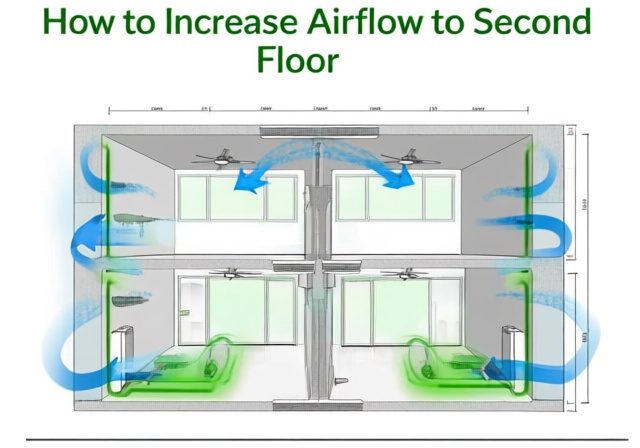
Add return air ducts to your second floor ($800-1,500 per return). This solves the root cause of many airflow problems. New returns create proper air circulation loops on your second floor instead of relying on stairway air movement. Each bedroom should have either a supply and return vent or a clear path to a central return. This upgrade alone solved my second-floor cooling problems.
Upgrade your attic insulation to R-38 or higher ($1-3 per square foot). Proper insulation acts as a thermal barrier between your scorching attic and living space. Blown-in cellulose or fiberglass provides the best value. Focus on achieving uniform coverage – thermal imaging often reveals gaps where installers missed spots. This investment pays for itself through energy savings in 2-3 years.
Install a ductless mini-split for problem rooms ($2,000-3,500 per unit). These energy-efficient appliances provide targeted cooling without extending ductwork. Modern units achieve SEER ratings over 20, making them 30% more efficient than central AC. The Mitsubishi Hyper-Heating series works for both cooling and heating, replacing window units or space heaters. WiFi control lets you cool rooms only when needed.
Add a zoning system to your existing HVAC ($2,000-3,000). Motorized dampers in your ductwork direct air only where needed. Your second floor becomes its own zone with independent temperature control. This prevents overcooling the first floor while trying to cool upstairs. Zoning typically reduces energy consumption by 20-30% while improving comfort.
Install solar-powered attic fans ($500-800 each). These fans run free using solar panels, exhausting hot attic air during peak sun hours when you need it most. Unlike traditional powered attic fans, they don’t create negative pressure that pulls conditioned air from your home. The Natural Light 36-watt model moves 1,550 CFM and installs in under two hours.
When moderate fixes don’t suffice, these professional upgrades permanently solve airflow problems while improving overall efficiency.
Complete duct replacement and resizing ($5,000-8,000). Many homes have undersized or leaking ductwork that wastes 20-30% of cooled air. Professional duct design ensures proper sizing for each room’s cooling load. Sealed and insulated ducts in conditioned space (not the attic) eliminate temperature losses. This upgrade often qualifies for utility rebates up to $1,000.
Install a variable-speed HVAC system ($6,000-10,000). These systems adjust output based on demand instead of cycling on/off at full capacity. They maintain more consistent temperatures while using 40% less energy than single-speed units. The longer run times at lower speeds also remove more humidity, making you feel cooler at higher temperatures. Look for units with SEER ratings above 18.
Add a dedicated second-floor HVAC system ($5,000-8,000). Some homes need separate systems for each floor to achieve proper comfort. This eliminates the battle between floors for cooling and lets you set different temperatures for day and night zones. While expensive upfront, dual systems often use less total energy than one overworked system.
Upgrade to a geothermal heat pump system ($15,000-25,000). Geothermal systems use stable ground temperatures for ultra-efficient heating and cooling. They achieve efficiency ratings of 400-500%, meaning they produce 4-5 units of cooling for every unit of electricity used. Federal tax credits cover 30% of installation costs through 2034. These systems last 25+ years with minimal maintenance.
Install a whole-home dehumidification system ($2,000-3,000). High humidity makes you feel warmer at the same temperature. Dedicated dehumidifiers let you maintain comfortable humidity levels (30-50%) without overcooling. This allows setting your thermostat 2-3 degrees higher while feeling just as cool, saving 6-9% on cooling costs.
Improving airflow while ignoring efficiency wastes money and energy. These strategies maximize comfort while minimizing environmental impact and costs.
Implement temperature setback schedules strategically. Pre-cool your home to 72°F before 2 PM when electricity rates and outdoor temperatures peak. Let temperatures rise to 78°F during peak hours (2-8 PM), then cool back down in the evening. This load-shifting reduces costs by 15-20% on time-of-use rate plans while maintaining comfort.
Use thermal mass to your advantage. Cool your home extra at night when electricity costs less and outdoor temperatures drop. Your home’s structure absorbs this cooling and releases it slowly during the day. Tile and concrete floors work especially well for this passive cooling strategy. I cool to 68°F at night and coast until afternoon without discomfort.
Optimize your fan and AC coordination. Run ceiling fans to create 4-degree effective cooling, letting you raise thermostat settings while maintaining comfort. Remember fans cool people, not rooms – turn them off when leaving. The EPA estimates proper fan use allows raising thermostats 4 degrees, saving 10-15% on cooling bills.
Monitor and improve your home’s envelope efficiency. Use an infrared thermometer to find hot spots on walls and ceilings. These indicate insulation gaps or air leaks. Sealing these saves more energy than any HVAC upgrade. Focus on the attic first – it’s responsible for 25-30% of cooling load. A professional energy audit ($200-500) identifies the most cost-effective improvements.
Consider time-of-use electricity plans if available. These plans charge less for off-peak usage, rewarding you for shifting cooling to nights and mornings. Combined with a smart thermostat, you can automatically optimize cooling schedules for maximum savings. Some utilities offer 50% discounts for overnight usage.
Install window treatments designed for energy efficiency. Cellular shades with honeycomb construction provide insulation while blocking solar heat. The Achim Home Furnishings honeycomb shades cost under $30 per window but reduce heat gain by 40%. Automated shades that close during peak sun hours save even more while you’re away.
Regular maintenance prevents airflow problems and maintains efficiency. This schedule keeps your system running optimally year-round.
Monthly tasks take just minutes but make a big difference. Check and change filters monthly during heavy use seasons. Dirty filters restrict airflow by up to 15% and force systems to work harder. Buy filters in bulk online for half the retail price. I use MERV 8 filters for good filtration without restricting airflow. Also vacuum vent grilles monthly to prevent dust buildup.
Perform quarterly seasonal adjustments. In spring, clean outdoor condenser coils with a garden hose to remove winter debris. Clear vegetation within 2 feet of the unit. In summer, check condensate drains for clogs that cause shutdowns. Fall means checking weatherstripping and adding insulation before heating season. Winter requires reversing ceiling fans and adjusting vent dampers for heating mode.
Schedule annual professional maintenance before cooling season. Technicians check refrigerant levels, test electrical connections, measure airflow, and clean components you can’t access. This $150-200 service prevents breakdowns and maintains efficiency. Systems with annual maintenance last 5-7 years longer than neglected ones. Many companies offer maintenance plans with priority service and repair discounts.
Every 2-3 years, have your ductwork professionally cleaned and sealed. Duct cleaning removes accumulated dust that restricts airflow. More importantly, duct sealing fixes leaks that waste cooled air. The average home loses 20% of airflow through duct leaks. Aeroseal duct sealing costs $1,500-2,500 but reduces cooling costs by 20-30%.
Monitor system performance with smart home tools. WiFi thermostats track runtime data showing efficiency changes over time. Increasing runtime to maintain the same temperature indicates developing problems. The Ecobee provides monthly energy reports comparing your usage to similar homes. This early warning system prevents small issues from becoming expensive repairs.
Well-intentioned fixes sometimes backfire. Avoid these common mistakes I see homeowners make repeatedly.
Closing too many vents damages your system. Closing over 20% of vents increases duct pressure, causing leaks and premature blower motor failure. It also freezes evaporator coils, leading to compressor damage. Instead of closing vents completely, adjust dampers to balance airflow while maintaining proper system pressure.
Running exhaust fans excessively creates negative pressure. Bathroom and kitchen fans pull conditioned air outside, forcing hot outdoor air to infiltrate through gaps. Limit exhaust fan use to when actually needed. Install timer switches that automatically turn fans off after 20-30 minutes.
Oversizing replacement HVAC systems reduces efficiency and comfort. Bigger isn’t better with HVAC. Oversized systems short-cycle, failing to dehumidify properly while wearing out components faster. Proper sizing requires Manual J calculations based on your home’s specific characteristics, not square footage rules of thumb.
Installing powered attic fans without proper air sealing wastes energy. These fans often pull expensive conditioned air from your living space into the attic, increasing cooling costs. Solar attic fans or ridge vents provide better passive ventilation without the negative pressure problems.
Blocking returns with furniture devastates airflow. That couch against the wall might look perfect, but if it’s covering a return vent, your entire system suffers. Returns need even more clearance than supply vents – maintain 12 inches minimum. Consider relocating furniture or installing transfer grilles to alternative return paths.
Setting thermostats too low wastes energy without improving comfort. Your AC doesn’t cool faster at lower settings – it just runs longer. Setting the thermostat to 65°F won’t cool to 75°F any quicker than setting it directly to 75°F. Each degree below 78°F increases cooling costs by 3-4%.
Modern smart home technology offers sophisticated solutions for managing second-floor cooling efficiently.
Smart thermostats with room sensors balance temperatures automatically. The Ecobee SmartThermostat uses wireless sensors to monitor individual room temperatures, averaging them for whole-home comfort. During the day, prioritize downstairs sensors. At night, focus on bedroom sensors. This eliminates the hot/cold spot problem without manual adjustments.
Motorized smart vents provide room-by-room temperature control. Products like Keen Home Smart Vents open and close automatically based on room temperature and occupancy. While expensive ($80-100 per vent), they work with existing HVAC systems to direct air where needed most. Use them sparingly – no more than 30% of total vents should be smart vents.
WiFi-controlled ceiling fans adjust automatically based on temperature. The Haiku fan with SenseME technology monitors room conditions and adjusts speed accordingly. Integration with smart thermostats creates coordinated cooling that maintains comfort while minimizing energy use. Schedule different fan speeds for day versus night operation.
Smart window treatments block heat automatically. Motorized blinds from Lutron or Somfy close during peak sun hours and open for natural light when appropriate. Integration with smart home systems considers sun angle, outdoor temperature, and occupancy. This passive cooling strategy reduces cooling load by 20-25%.
Whole-home energy monitors identify efficiency opportunities. Devices like Sense or Emporia Vue track individual circuit usage, showing exactly when and where you use energy. This data reveals opportunities like adjusting cooling schedules or identifying failing equipment before complete breakdown. Real-time feedback helps reduce consumption by 10-15% through behavior changes alone.
Integration platforms coordinate all systems for maximum efficiency. Smart home hubs like Hubitat or Home Assistant create rules linking thermostats, fans, blinds, and sensors. For example: “When upstairs temperature exceeds downstairs by 5 degrees, increase fan speeds and close west blinds.” These automations optimize comfort without constant manual adjustments.
Understanding the return on investment helps prioritize improvements based on your budget and needs.
Free and low-cost solutions offer the best immediate returns. Opening doors, adjusting vents, and changing fan settings cost nothing but can reduce temperature differentials by 3-5 degrees. Door undercuts ($30) and vent deflectors ($20) pay for themselves within one month through reduced AC runtime. These should always be your starting point.
Mid-range investments balance cost with impact. Ceiling fans ($150 installed) save $30-50 annually in cooling costs while improving comfort immediately. Smart thermostats ($250) typically save 15-20% on cooling bills, paying for themselves within two years. Return air duct additions ($1,000) solve fundamental airflow problems with 3-4 year payback periods through efficiency gains.
Major upgrades require longer-term thinking. New ductwork ($6,000) might take 8-10 years to pay back through energy savings alone, but the comfort improvement is immediate. Variable-speed systems ($8,000) save 30-40% on cooling costs, suggesting 10-12 year paybacks. However, these systems last 15-20 years, making them worthwhile for long-term homeowners.
Consider utility rebates and tax incentives. Many utilities offer rebates for efficient HVAC upgrades, smart thermostats, and insulation improvements. Federal tax credits cover 30% of heat pump installations through 2032. These incentives can reduce payback periods by 30-50%. Check the Database of State Incentives for Renewables & Efficiency (DSIRE) for local programs.
Factor in comfort and home value, not just energy savings. Solving second-floor cooling problems improves quality of life and can increase home value by 2-3%. Buyers pay premiums for homes with efficient, properly functioning HVAC systems. Document all improvements for future sale discussions.
Create a phased approach based on available funds. Start with free adjustments and low-cost fixes. Use the savings to fund medium investments like smart thermostats and ceiling fans. Eventually, accumulated savings can fund major upgrades without loans. This gradual approach spreads costs while providing immediate relief.
Knowing when to DIY versus hiring professionals saves money and prevents costly mistakes.
DIY-friendly projects include most solutions under $500. Installing ceiling fans, smart thermostats, window film, and door undercuts requires basic tools and skills. YouTube University teaches everything needed for these projects. Always turn off power at the breaker for electrical work and follow manufacturer instructions exactly. These projects typically take 2-4 hours for handy homeowners.
Call professionals for anything involving refrigerant, gas, or major electrical work. HVAC refrigerant requires EPA certification to handle legally. Gas line work risks carbon monoxide poisoning or explosions if done incorrectly. Electrical work over 20 amps should have professional installation to meet code and insurance requirements. The saved labor cost isn’t worth the risk.
Ductwork modifications fall in the gray area. Simple inline fan installations work for DIY with proper research. However, adding new ducts or resizing existing ones requires understanding of air pressure, flow rates, and system balance. Poor duct design causes more problems than it solves. Most homeowners should get professional design even if self-installing.
Professional energy audits provide valuable guidance before major investments. Certified auditors use blower doors, thermal cameras, and duct testers to identify problems invisible to homeowners. Their recommendations prioritize improvements based on cost-effectiveness. The $300-500 audit cost prevents spending thousands on the wrong solutions.
Get multiple quotes for major work and ask detailed questions. Quality contractors explain their approach, provide load calculations, and offer multiple solution options. Beware anyone suggesting equipment sizes without measurements or pushing the most expensive option immediately. Good contractors want educated customers who understand the value they provide.
Some projects benefit from hybrid approaches. You might hire professionals for technical work while doing prep and finish work yourself. For example, pros install mini-splits while you handle the electrical disconnect and wall repairs. This can save 20-30% while ensuring critical components are done correctly.
Why is my second floor 10 degrees hotter than my first floor?
Temperature differentials this large usually indicate multiple issues working together. Hot air naturally rises, but 10-degree differences suggest insufficient return air on the second floor, undersized ductwork, or inadequate insulation. Start with free fixes like opening doors and adjusting vents, then evaluate whether professional assessment is needed for ductwork or insulation upgrades.
Will closing downstairs vents force more air upstairs?
Partially closing first-floor vents (no more than 50%) can help balance airflow, but never close more than 20% of total vents. Excessive vent closure increases system pressure, potentially damaging your equipment and actually reducing overall airflow. Instead, focus on adding return air paths upstairs and ensuring all second-floor vents are fully open.
Is it worth installing a separate AC unit for the second floor?
Separate systems make sense when temperature differentials exceed 8 degrees consistently or when your current system runs constantly without achieving comfort. Mini-splits for specific rooms cost $2,000-3,500 and work well for 1-3 problem rooms. Whole second-floor systems cost $5,000-8,000 but provide independent control and often use less total energy than one overworked system.
How much can ceiling fans really help with cooling?
Ceiling fans make you feel 4 degrees cooler through evaporative cooling, allowing you to raise thermostat settings while maintaining comfort. This translates to 10-15% savings on cooling bills. Energy Star certified fans use 60% less electricity than standard models, costing just $15-20 annually to operate. Remember to turn them off when leaving rooms since they cool people, not spaces.
Should I add more insulation or fix ductwork first?
Address major duct leaks first since they waste 20-30% of cooled air immediately. However, if your ducts are reasonably sealed, adding attic insulation often provides better return on investment. Ideally, get an energy audit to identify which improvement offers greater benefits for your specific situation. Many homeowners need both for optimal results.
Do portable AC units work for cooling second floors?
Portable units provide spot cooling for individual rooms but aren’t efficient whole-floor solutions. They typically achieve only 50% of their rated efficiency due to heat infiltration through exhaust hoses. Window units work better if aesthetics allow, offering twice the efficiency at half the cost. For permanent solutions, consider mini-splits instead.
How often should I change my HVAC filter to maintain good airflow?
Check filters monthly and change when visibly dirty, typically every 1-3 months depending on usage, pets, and allergies. Restrictive filters (MERV 11+) need more frequent changes. Buy filters in bulk online for 50% savings. Set phone reminders for checking since dirty filters are the number one cause of airflow problems and system failures.
Will a whole house fan help cool my second floor?
Whole house fans excel in climates where nighttime temperatures drop below 70°F. They pull hot air out while drawing cool air through open windows, dropping indoor temperatures 10+ degrees in minutes. Running costs are 90% less than AC. However, they don’t work well in humid climates or when outdoor temperatures stay high at night.
Fixing second-floor airflow problems doesn’t require suffering through another sweltering summer or spending thousands on oversized solutions. Start with the free fixes today – adjust your vents, open doors, and change your fan settings. These simple changes often provide enough relief while you plan larger improvements.
For lasting results, focus on addressing the root causes rather than symptoms. Adding return air to your second floor solves circulation problems permanently. Improving insulation and air sealing reduces the cooling load your system must handle. These eco-friendly home improvements pay for themselves through energy savings while making your home more comfortable year-round.
Remember that the best solution depends on your specific situation. A home with disconnected ductwork needs different fixes than one with insufficient insulation. Take time to properly diagnose your issues using the tests I’ve outlined. This prevents wasting money on improvements that won’t address your actual problems.
Consider your long-term plans when choosing solutions. If you’re staying in your home for years, investing in efficient systems and proper ductwork makes sense. Short-term residents might focus on portable solutions and minor modifications. Either way, document improvements for energy savings tracking or future resale value.
The path to a comfortable second floor starts with understanding the problem, implementing smart solutions, and maintaining your improvements properly. Whether you choose DIY fixes or professional upgrades, you now have the knowledge to make informed decisions that balance comfort, efficiency, and cost. Your second floor doesn’t have to be the hot zone anymore – take action today and enjoy consistent comfort throughout your entire home.