

If you’re planning to transform your lawn into a native plant garden, vegetable patch, or drought-tolerant landscape, using a tiller to remove grass is one of the most efficient methods available. I’ve helped dozens of homeowners make this transition, and I’ll share everything you need to know to do it right while supporting environmental sustainability.
Last spring, I used a tiller to convert 2,000 square feet of traditional lawn into a pollinator-friendly garden that now saves me 15,000 gallons of water annually. The process took just two weekends, and the results have been transformative – both for my yard and local ecosystem. Whether you’re creating space for native plants, preparing a vegetable garden, or transitioning to sustainable landscaping, this guide will walk you through the entire process.
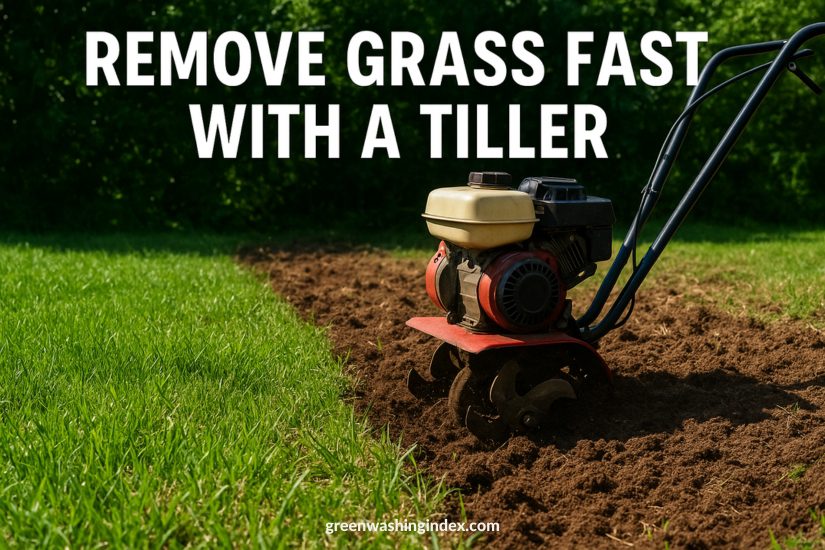
A tiller, also called a rototiller or cultivator, uses rotating tines to break up and turn over soil. When it comes to grass removal, tillers work by cutting through the grass roots and mixing the vegetation into the soil, where it decomposes and enriches the earth naturally. This method eliminates the need for chemical herbicides and creates nutrient-rich soil perfect for your next planting project.
The key to successful grass removal with a tiller lies in understanding how these machines work. The rotating tines penetrate the soil to depths ranging from 2 to 10 inches, depending on your model and settings. This action severs grass roots below the crown, preventing regrowth while simultaneously aerating and preparing the soil for whatever comes next.
I’ve found that tilling offers significant environmental advantages over other grass removal methods. Unlike sod cutters that remove valuable topsoil, tillers preserve and improve your existing soil structure. The decomposing grass adds organic matter, improving soil health and water retention – crucial benefits for sustainable landscaping projects.
Choosing the right tiller makes all the difference in your grass removal project. After testing various models over the years, I’ve learned that each type serves specific needs and yard sizes.
Front-tine tillers place the tines ahead of the wheels, making them ideal for small to medium yards up to 2,500 square feet. These machines typically cost $300-$600 to purchase or $50-$75 per day to rent. They work best on relatively soft soil and established lawns that haven’t been heavily compacted.
The forward-rotating tines on these models pull the machine forward, which can make them challenging to control in tough conditions. However, for typical residential lawns transitioning to lawn and garden ideas, they provide adequate power while remaining manageable for most homeowners.
Rear-tine tillers position the tines behind the wheels, offering superior stability and power for larger areas or tougher soil conditions. These machines excel at breaking through compacted clay soils and thick grass mats. Expect to pay $600-$2,000 to purchase or $75-$100 per day to rent.
Counter-rotating tines, found on many rear-tine models, turn opposite to the wheel direction, providing maximum soil breakup and grass elimination. I recommend these for areas over 2,500 square feet or when dealing with particularly stubborn grass varieties like Bermuda or Zoysia.
Don’t overlook mini-tillers for small spaces or border areas. These lightweight machines, weighing 20-30 pounds, handle areas up to 1,000 square feet effectively. They’re perfect for converting small lawn sections to flower beds or preparing strips for native plant borders.
While they won’t handle large-scale grass removal efficiently, mini-tillers excel at precision work around existing landscaping. They typically cost $150-$400 and use less fuel, making them an eco-friendly choice for smaller projects.
Proper preparation ensures successful grass removal and prevents damage to your tiller or underground utilities. I’ve learned these steps are non-negotiable for safe, effective results.
Contact your local utility marking service at least 48 hours before tilling. This service marks underground utilities including gas, electric, water, and cable lines. Hitting a utility line can cause serious injury, expensive repairs, and service disruptions to your neighborhood.
Before you begin, remember that proper utility locating is essential for safe digging, and choosing a reliable local service helps prevent dangerous mistakes. For instance, underground utilities in Las Vegas run close to residential and commercial areas, so professional marking ensures you avoid costly hazards. Taking this simple step can protect both your property and your community.
Mark the utility locations with additional flags or paint to ensure visibility while operating the tiller. Keep a buffer zone of at least 24 inches from marked utilities when tilling.
Soil moisture significantly impacts tilling effectiveness. Test by squeezing a handful of soil – it should crumble when poked but hold together when squeezed. Soil that’s too wet will clump and compact, while overly dry soil creates excessive dust and resists tilling.
If your soil is too dry, water the area 24-48 hours before tilling, applying about 1 inch of water. For wet soil, wait for drier conditions. Tilling at proper moisture levels reduces fuel consumption and wear on your equipment while producing better results.
Remove rocks, sticks, toys, and debris from the tilling area. Even small objects can damage tiller tines or become dangerous projectiles. I use a systematic grid pattern, walking the area in parallel lines to ensure nothing is missed.
Mow the grass as short as possible – ideally under 2 inches. Shorter grass is easier to till and decomposes faster. Collect the clippings for composting rather than leaving them on the lawn, as excessive organic matter can create nitrogen imbalances during decomposition.
Now we’ll walk through the actual tilling process. Following these steps ensures thorough grass elimination while preparing your soil for its sustainable transformation.
Start with a shallow depth of 2-3 inches for your first pass. This initial shallow tilling breaks up the grass surface and begins severing root systems without overwhelming the tiller. Most residential lawns have grass roots extending 4-6 inches deep, so multiple passes at increasing depths work better than trying to go deep immediately.
Adjust the depth bar or skid shoes on your tiller according to the manufacturer’s instructions. Remember that different grass types require different approaches – shallow-rooted fescues need less depth than deep-rooted Bermuda grass.
Begin tilling along the longest edge of your area, moving at a steady walking pace. Let the tiller do the work – forcing it forward reduces effectiveness and increases operator fatigue. Overlap each pass by 2-3 inches to ensure complete coverage.
I’ve found that maintaining consistent speed produces uniform results. Too fast leaves untilled strips; too slow can create ruts. Most tillers work best at a moderate walking pace of about 2-3 miles per hour.
After completing your first pass across the entire area, make a second pass perpendicular to the first. This cross-tilling pattern ensures complete grass destruction and creates a more uniform soil texture. Set the tiller 2-3 inches deeper for this pass, typically reaching 4-6 inches total depth.
The perpendicular pass catches any grass strips missed during the first pass and further breaks up root systems. This technique particularly helps with rhizomatous grasses that spread through underground runners.
Wait 5-7 days, then perform a final deep tilling at 6-8 inches. This delay allows partially damaged grass to attempt regrowth, making it easier to identify and eliminate survivors. The deep till also incorporates decomposing grass deeper into the soil profile.
During this final pass, you might notice some green shoots attempting to emerge. This is normal and actually helpful – it shows you exactly where additional attention is needed. Focus on these areas with extra passes.
After your final tilling pass, rake the area to remove any remaining large grass clumps and create a level surface. These clumps can be composted or used as mulch in other garden areas. Leveling now saves significant effort when you begin your new landscaping project.
Use a landscape rake to create gentle slopes for drainage where needed. Proper grading prevents water pooling and erosion issues in your future sustainable landscape.
Choosing to till rather than use chemical herbicides or remove sod offers substantial environmental advantages that align with sustainable landscaping goals.
When grass decomposes in place, it adds valuable organic matter to your soil. This organic matter improves soil structure, increases water retention, and provides nutrients for future plants. I’ve measured organic matter increases of 1-2% after tilling grass into soil, which significantly improves soil health.
The tilling process also increases soil aeration, promoting beneficial microbial activity. These microorganisms break down organic matter, cycle nutrients, and create a living soil ecosystem that supports plant health without synthetic fertilizers.
Removing traditional lawn grass opens opportunities for water-wise landscaping. Native plants and drought-tolerant alternatives typically use 50-75% less water than traditional lawns. By tilling your grass for removal, you’re taking the first step toward significant water conservation.
Well-tilled soil with incorporated organic matter holds moisture more effectively, reducing irrigation needs for whatever you plant next. This improved water retention particularly benefits deep-rooted native plants that naturally adapt to local rainfall patterns.
Traditional lawns provide minimal habitat value for wildlife. By removing grass to create diverse plantings, you support local ecosystems. Native plant gardens attract pollinators, birds, and beneficial insects that control pests naturally.
The areas I’ve converted from lawn to native plants now host 10 times more butterfly species and countless native bees. This biodiversity creates a more resilient landscape that requires fewer inputs and provides year-round interest.
Operating a tiller safely protects you and ensures project success. These safety measures come from personal experience and industry best practices.
Always wear sturdy, closed-toe boots with slip-resistant soles. Steel-toed boots provide extra protection. I learned this lesson when a hidden rock kicked up and hit my foot – thankfully I was wearing proper footwear.
Safety glasses or goggles protect your eyes from flying debris. Even small soil clods can cause serious eye injury. Hearing protection is essential for gas-powered tillers, which typically operate at 85-95 decibels.
Wear long pants and fitted clothing that won’t catch on the tiller. Loose clothing can entangle in moving parts. Heavy work gloves improve grip and reduce vibration fatigue while protecting your hands from blisters.
Never operate a tiller on slopes greater than 10 degrees. Till across slopes rather than up and down to maintain control. On any incline, work slowly and be prepared to disengage the tines if the tiller begins to bounce or lose traction.
Keep children and pets at least 50 feet away from operating tillers. Flying debris can travel surprising distances. establish a clear work zone and ensure everyone understands the boundaries.
Take regular breaks to prevent fatigue-related accidents. Tiller vibration can cause numbness in hands and arms, reducing control. I stop every 30 minutes to rest and assess progress.
Choosing the right time for tilling significantly impacts success and ease of work.
Spring and early fall provide ideal conditions for grass removal tilling. Spring tilling (April-May in most regions) allows immediate planting of warm-season plants. Soil moisture is typically optimal, and cooler temperatures make the work more comfortable.
Fall tilling (September-October) offers advantages for spring planting projects. The grass has time to decompose over winter, enriching the soil. Cold temperatures prevent regrowth, and spring planting can begin immediately when weather warms.
Avoid tilling during summer heat stress or winter freeze periods. Summer tilling is physically demanding and can damage soil structure if it’s too dry. Frozen soil can damage equipment and won’t till effectively.
Plan tilling for dry periods with no rain forecast for 48 hours. This ensures proper soil moisture and prevents equipment from bogging down. Check extended forecasts and have backup dates ready.
Morning tilling offers cooler temperatures and often calmer winds, reducing dust. I prefer starting early to complete the hardest work before afternoon heat.
After successfully removing your grass, exciting sustainable landscaping possibilities await. These eco-friendly alternatives reduce maintenance while supporting environmental health.
Native plants adapted to your local climate require minimal water and no fertilizers once established. Research plants indigenous to your area through local native plant societies or extension offices. Group plants by water needs to optimize irrigation efficiency.
I transformed my tilled areas into themed native gardens – a butterfly garden near the patio, a bird habitat along the fence, and a rain garden in a low-lying area. Each serves ecological functions while providing beauty and interest throughout the seasons. These budget-friendly landscaping options often cost less than maintaining traditional lawns.
Fresh-tilled soil provides an excellent foundation for vegetable gardens. Add 2-3 inches of compost to boost fertility and improve soil structure. Raised beds built atop tilled areas offer superior drainage and easier maintenance.
Growing your own food reduces transportation emissions and packaging waste while providing fresh, organic produce. A 400-square-foot vegetable garden can produce $600 worth of organic vegetables annually.
Consider combining planted areas with permeable hardscaping like gravel paths or permeable pavers. These surfaces allow rainwater infiltration while reducing runoff and erosion. They provide structure to your landscape while maintaining environmental benefits.
Decomposed granite paths through native plant beds create accessible, low-maintenance walkways. These materials cost less than traditional concrete and support groundwater recharge.
Even experienced gardeners encounter tilling challenges. Here’s how to address common issues effectively.
Some grass varieties, particularly Bermuda and quackgrass, persistently regrow from root fragments. If you notice significant regrowth after initial tilling, wait 10-14 days for shoots to emerge, then till again at maximum depth.
For extremely persistent grasses, consider sheet mulching problem areas after tilling. Layer cardboard and 4-6 inches of mulch to smother regrowth. This method takes longer but ensures complete elimination without chemicals.
Rocky soil can damage tiller tines and create dangerous projectiles. Make an initial shallow pass to identify rock locations, removing larger stones by hand. Use a rear-tine tiller with counter-rotating tines for better rock handling.
Clay soil requires patience and proper timing. Till when soil moisture is optimal – not too wet or dry. Add organic matter like compost during tilling to improve clay structure. Multiple passes at increasing depths work better than forcing deep tilling in one pass.
Avoid working soil that’s too wet, as this causes compaction that negates tilling benefits. If you notice soil sticking to tiller tines or forming clumps, stop and wait for drier conditions.
After tilling, avoid walking on the prepared soil unnecessarily. Use boards or stepping stones to distribute weight when you must cross tilled areas. This preserves the improved soil structure you’ve created.
Proper maintenance extends tiller life and ensures safe operation throughout your project.
Before each use, check oil levels in four-stroke engines or fuel mixture ratios in two-stroke models. Inspect tines for damage or excessive wear. Bent or broken tines reduce effectiveness and can cause dangerous vibrations.
Clean air filters prevent engine damage and maintain power. Dusty tilling conditions quickly clog filters, so check them more frequently during grass removal projects. A spare filter allows quick swaps to maintain productivity.
Clean your tiller thoroughly after each use. Remove grass and soil buildup from tines and housing using a putty knife or wire brush. Grass wrapped around tine shafts can cause premature wear and reduce performance.
Spray metal surfaces with light oil to prevent rust. Pay special attention to tines and exposed steel components. Store tillers in dry locations to prevent corrosion and extend equipment life.
While tilling effectively removes grass, understanding alternatives helps you choose the best method for your situation.
Sheet mulching, or lasagna gardening, smothers grass using layers of cardboard and organic matter. This method takes 3-6 months but builds excellent soil while eliminating grass. It works well for patient gardeners planning future projects.
This no-till method preserves soil structure and beneficial organisms. However, it’s impractical for immediate planting needs and requires substantial organic material.
Sod cutters remove grass and a thin layer of soil, creating instant bare ground. This method works faster than tilling for small areas but removes valuable topsoil. Sod disposal can be challenging and expensive.
I recommend sod cutting only when you need to preserve existing soil chemistry or plan to install hardscaping immediately.
Covering grass with clear plastic for 6-8 weeks during summer uses solar heat to kill vegetation. This chemical-free method works well in hot climates but requires patience and proper timing.
Solarization also reduces soil pathogens and weed seeds, providing additional benefits beyond grass removal.
Before tilling, develop a comprehensive plan for your grass-free landscape. This ensures you’re prepared to act quickly after grass removal.
Map existing features like trees, utilities, and structures. Identify microclimates – sunny, shady, wet, or dry areas – to guide plant selection. Plan pathways for maintenance access and foot traffic patterns.
Consider sight lines from windows and outdoor living spaces. Place taller elements strategically to create privacy or frame views. Design with mature plant sizes in mind to prevent overcrowding.
Calculate costs for tiller rental ($75-$100/day), soil amendments ($50-$200), plants ($200-$1,000+), and mulch ($100-$300). Front yard landscaping projects often require additional investment in curb appeal elements.
Phase larger projects over multiple seasons to spread costs. Start with soil preparation and basic plantings, adding features like paths or water features later.
The time required depends on area size and grass type. A 1,000-square-foot area typically takes 2-3 hours for initial tilling, plus additional time for subsequent passes. Plan for 2-3 tilling sessions over 2-3 weeks for complete grass elimination. Dense or rhizomatous grasses may require extra passes.
Never till wet grass or saturated soil. Wet conditions cause soil compaction, create clumps that won’t break down properly, and make grass harder to eliminate. Wait until soil crumbles in your hand but still holds together when squeezed – this indicates ideal moisture for tilling.
Some regrowth is normal, especially with persistent varieties like Bermuda grass. Multiple tilling passes at increasing depths, combined with proper timing, prevents most regrowth. Monitor the area for 3-4 weeks after final tilling and spot-treat any emerging grass manually or with additional targeted tilling.
Remove large clumps (bigger than a golf ball) to prevent regrowth and create a level surface. Smaller pieces can remain to decompose and enrich the soil. Rake out excessive grass material if you plan to seed or plant immediately, as decomposing grass can temporarily tie up soil nitrogen.
For areas under 1,500 square feet, a 5-6 HP front-tine tiller suffices. Areas from 1,500-5,000 square feet benefit from a 6-8 HP rear-tine tiller. Larger areas or tough conditions warrant commercial-grade rear-tine tillers with 8+ HP. Consider renting larger tillers for one-time projects rather than purchasing.
Till to a minimum depth of 6 inches, with 8 inches preferred for persistent grasses. Most grass roots extend 4-6 inches deep, so tilling deeper ensures complete root disruption. Start shallow (2-3 inches) and increase depth with each pass to avoid overwhelming your tiller.
Both seasons work well, depending on your goals. Spring tilling allows immediate planting of warm-season plants and vegetables. Fall tilling gives grass time to decompose over winter, enriching soil for spring planting. Avoid summer heat and winter freezes for easier work and better results.
Adding 2-3 inches of compost after tilling improves soil structure and fertility, especially in clay or sandy soils. The decomposing grass adds organic matter, but additional compost accelerates soil improvement. Test your soil pH and adjust if needed for planned plantings.
Having the right essential gardening tools ensures project success and safety.
Using a tiller to remove grass opens the door to exciting sustainable landscaping possibilities. This method preserves and enriches your soil while eliminating the need for harmful chemicals. Whether you’re creating a native plant paradise, productive vegetable garden, or water-wise landscape, proper tilling provides the foundation for success.
The process requires planning, patience, and physical effort, but the environmental and aesthetic rewards justify the investment. By removing traditional lawn areas, you reduce water consumption, eliminate fertilizer and pesticide use, and create habitat for beneficial wildlife.
Remember that grass removal is just the beginning of your sustainable landscaping journey. Take time to plan your new landscape thoughtfully, considering local climate, native plants, and long-term maintenance requirements. The effort you invest in proper grass removal and soil preparation pays dividends through years of reduced maintenance and enhanced environmental benefits.
Start small if this is your first tilling project. Convert a manageable area successfully before tackling larger spaces. Each project teaches valuable lessons about your soil, local conditions, and effective techniques. Soon, you’ll transform your entire landscape into a sustainable, beautiful space that supports both your lifestyle and local ecology.
The shift from resource-intensive lawns to sustainable landscapes represents one of the most impactful changes homeowners can make for environmental health. By choosing mechanical grass removal over chemicals, incorporating native plants, and designing for water conservation, we create resilient landscapes that thrive with minimal inputs while supporting biodiversity and ecosystem health.