

If you’ve ever wrestled with a wheelbarrow that’s constantly in the way or discovered rust spots from improper storage, you know the struggle is real. I’ve spent years testing different storage methods in my own garage and shed, and I’ve learned that proper wheelbarrow storage isn’t just about getting it out of the way – it’s about protecting your investment and keeping your workspace organized.
After helping dozens of neighbors organize their garages and interviewing professional organizers, I’ve discovered that the average homeowner wastes about 25% of their garage floor space on improperly stored garden tools, with wheelbarrows being the biggest culprit. The good news? With the right storage solution, you can reclaim that space while actually extending your wheelbarrow’s lifespan by years.
In this guide, we’ll explore proven storage methods that work for different spaces and budgets, from simple DIY solutions costing under $20 to more sophisticated systems that transform your entire garage organization. Whether you’re dealing with a cramped single-car garage or have plenty of shed space to work with, you’ll find a solution that fits your needs.
Before diving into specific storage solutions, let’s assess what makes a good storage system. The size and type of your wheelbarrow matters significantly – a lightweight plastic garden wheelbarrow requires different support than a heavy-duty contractor model. I’ve found that most storage failures happen when people don’t match the solution to their specific wheelbarrow type.
Consider your available space next. Wall storage works brilliantly in narrow garages where floor space is premium, while ceiling storage can be perfect for seasonal users who only need their wheelbarrow a few times per year. Climate also plays a role – if your storage area experiences temperature swings or moisture, you’ll need solutions that provide better protection from the elements.
Frequency of use determines accessibility needs. If you use your wheelbarrow weekly during growing season, you’ll want quick, easy access. For occasional users, a more involved storage system that maximizes space savings makes sense. I’ve seen too many people install elaborate pulley systems only to abandon them because daily access became a hassle.
Wall mounting remains the most popular wheelbarrow storage method, and for good reason. It frees up valuable floor space while keeping your wheelbarrow easily accessible. The key is choosing the right mounting system for your wheelbarrow’s weight and your wall type.
Commercial wall brackets designed specifically for wheelbarrows typically cost between $15 and $40. These systems usually consist of two sturdy hooks or brackets that support the wheelbarrow’s tray while the handles rest against the wall. Installation takes about 30 minutes with basic tools. The brackets should be mounted into wall studs for maximum support – I’ve seen drywall anchors fail spectacularly under a loaded wheelbarrow’s weight.
When installing brackets, position them at chest height for easy lifting. Space them according to your wheelbarrow’s width, typically 16 to 24 inches apart. The beauty of this system is its simplicity – no moving parts to break, and the wheelbarrow remains visible so you won’t forget where you stored it.
For the budget-conscious or DIY enthusiast, creating your own wall mount system costs under $20. Two 2×4 boards cut to 18-inch lengths and mounted horizontally to studs create perfect wheelbarrow supports. Add a simple lip by attaching a 1×2 board along the front edge to prevent the wheelbarrow from sliding off.
I’ve built several of these systems using scrap lumber, and they work just as well as commercial options. The trick is ensuring proper stud attachment – use at least 3-inch screws driven directly into studs. Some people add padding with old carpet or foam pipe insulation to protect the wheelbarrow’s finish, though this isn’t strictly necessary.
Ceiling storage maximizes vertical space, making it ideal for garages with high ceilings or seasonal storage needs. However, it requires more initial investment in both materials and installation time.
A pulley system allows you to hoist your wheelbarrow to the ceiling, completely clearing floor and wall space. Commercial systems run $30 to $80 and include everything needed for installation. The weight capacity typically ranges from 100 to 200 pounds, more than adequate for most wheelbarrows.
Installation requires careful planning. The mounting points must attach to ceiling joists or blocking between joists. I recommend testing with a lighter load first to ensure everything is secure. The main drawback is the effort required for frequent access – if you use your wheelbarrow weekly, this probably isn’t your best option.
For those who prefer a simpler ceiling solution, fixed mounting brackets work well. These involve installing heavy-duty hooks or a platform system directly to ceiling joists. The wheelbarrow hangs inverted or sits on a platform above head height. This method costs about $25 to $40 in materials and provides excellent long-term storage for seldom-used wheelbarrows.
Safety is paramount with ceiling storage. Always use proper eye protection during installation, and ensure mounting hardware is rated for at least twice your wheelbarrow’s weight. Regular inspection of mounting points prevents dangerous failures.
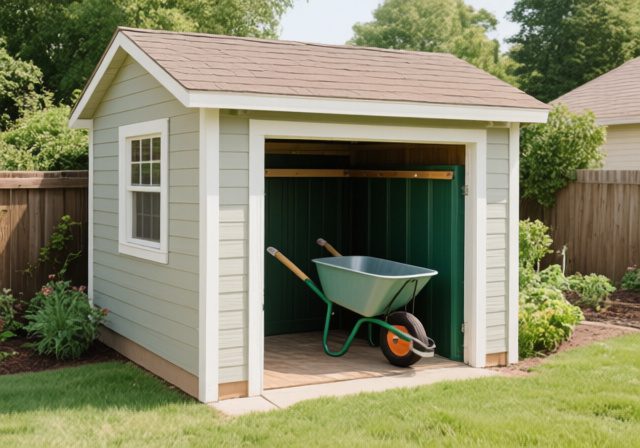
Sometimes, keeping your wheelbarrow on the floor makes the most sense, especially for frequent users or those with ample floor space. The key is organizing floor storage to maximize efficiency and prevent damage.
Creating a designated wheelbarrow corner costs virtually nothing but provides organization benefits. Mark the area with tape or paint to ensure consistent placement. Position the wheelbarrow handles-up against the wall at a slight angle to prevent tipping. This simple solution works well in sheds or garages with spare corner space.
To protect both the wheelbarrow and walls, consider adding bumper guards. Pool noodles cut lengthwise and attached to the wall at contact points work perfectly. This prevents scratches and dings while making it easier to position the wheelbarrow correctly each time.
Free-standing racks provide stability and organization without wall mounting. DIY versions using 2×4 lumber and plywood cost about $25 to $35 in materials. The basic design creates a cradle that holds the wheelbarrow at an angle, similar to a bike rack. These work particularly well for multiple wheelbarrows or when wall mounting isn’t possible.
Commercial stands range from $40 to $100 and often include additional features like tool hooks or shelving. While more expensive than DIY options, they typically offer better stability and appearance. Consider these if you’re organizing a professional workspace or want a polished garage appearance.
Winter storage requires special attention to prevent damage from temperature extremes and moisture. Before storing for the season, clean your wheelbarrow thoroughly, removing all dirt and debris. Dry it completely to prevent rust formation. I apply a light coat of WD-40 to metal parts and wipe down wooden handles with linseed oil.
Tire maintenance during storage often gets overlooked. Inflate pneumatic tires to recommended pressure to prevent flat spots from developing. Some people prefer to hang wheelbarrows to completely remove weight from tires during long-term storage. For solid rubber tires, simply ensure they’re clean and dry.
Consider using a wheelbarrow cover for additional protection, especially in damp environments. A simple tarp secured with bungee cords works fine, or invest in a fitted cover for about $20. This extra protection can add years to your wheelbarrow’s life, particularly for models with wooden handles or painted surfaces.
Small garage owners need creative solutions. Vertical storage becomes essential when floor space is limited. I’ve seen clever solutions like storing wheelbarrows behind open doors – just ensure adequate clearance when the door swings.
Multi-purpose storage systems maximize efficiency. Wall-mounted brackets that also hold other long-handled tools create an organized tool station. Some systems include adjustable arms that accommodate different tools as seasons change.
Consider foldable or collapsible wheelbarrows if storage space is extremely limited. While not suitable for heavy-duty work, they’re perfect for light garden tasks and store in a fraction of the space. Models range from $50 to $150 and can hang flat against a wall when not in use.
Understanding the real costs helps make informed decisions. DIY wall brackets using lumber cost $10 to $20 but require about two hours of labor. Commercial brackets at $15 to $40 install in 30 minutes. Ceiling pulley systems run $30 to $80 plus installation time. Professional garage organization systems start around $100 but include additional storage features.
Factor in long-term value when comparing costs. A $40 bracket system that extends your wheelbarrow’s life by preventing moisture damage pays for itself quickly. Conversely, an expensive system you won’t use consistently wastes money regardless of features.
Hidden costs include potential wall repairs if you change systems, tool purchases for DIY projects, and time investment for installation. Budget accordingly and consider these factors when choosing between DIY and commercial solutions.
Proper maintenance during storage prevents costly repairs. Monthly inspections catch problems early – look for rust spots, loose bolts, or degrading handles. Keep a can of lubricant nearby for quick touch-ups on moving parts.
Wooden handles require periodic treatment to prevent cracking and splintering. Sand rough spots smooth and apply linseed oil or handle preservative twice yearly. This simple maintenance extends handle life significantly and improves grip comfort.
Check tire pressure monthly for pneumatic tires, even during storage. Slow leaks are common and flat spots form quickly on deflated tires. Keep a portable pump in your garage for quick inflation. This small effort prevents the frustration of flat tires when you need your wheelbarrow.
Learning from others’ mistakes saves time and money. The biggest error I see is overloading storage systems. That bracket rated for 50 pounds won’t safely hold your 75-pound contractor wheelbarrow. Always check weight ratings and err on the side of caution.
Improper wall mounting causes failures and damage. Drywall anchors alone never suffice for wheelbarrow storage – always mount to studs. If stud placement doesn’t work for your space, install blocking between studs rather than compromising on mounting security.
Neglecting cleaning before storage accelerates deterioration. Concrete residue, fertilizer, and soil retain moisture that promotes rust. Even a quick rinse and dry makes a significant difference in longevity. Five minutes of cleaning saves hundreds in replacement costs.
Can I store my wheelbarrow outside?
While possible, outdoor storage significantly reduces lifespan. If you must store outside, invest in a quality waterproof cover and elevate the wheelbarrow off the ground to prevent moisture damage. Consider a small storage shed if indoor space isn’t available.
How much weight can wall-mounted brackets hold?
Commercial brackets typically support 50 to 150 pounds when properly mounted to studs. Check manufacturer specifications and never exceed 75% of the rated capacity for safety. Remember to account for any loads you might leave in the wheelbarrow.
Should I remove the wheel for storage?
Generally unnecessary unless storing for extended periods or if the wheel has damage. Removing the wheel can actually make storage more difficult and risks losing hardware. Focus instead on proper tire maintenance and pressure.
What’s the best storage method for multiple wheelbarrows?
Vertical wall mounting works best for multiple units, allowing you to stack them vertically along one wall. Alternatively, a custom rack system with multiple bays provides organized storage. Plan for 24 to 30 inches of width per wheelbarrow.
How do I prevent rust during storage?
Clean and dry thoroughly before storage, apply rust preventive spray to metal parts, ensure good ventilation in storage area, and use a cover in damp environments. Regular inspection and touch-ups catch rust early before it spreads.
Is ceiling storage safe for heavy wheelbarrows?
Yes, when properly installed with appropriate hardware. Use mounting points rated for at least double your wheelbarrow’s weight, attach only to structural members like joists, and inspect mounting hardware regularly for signs of stress or failure.
Proper wheelbarrow storage transforms cluttered spaces into organized, efficient work areas while protecting your equipment investment. Whether you choose a simple DIY wall bracket or invest in a comprehensive ceiling system, the key is matching the solution to your specific needs and space constraints.
Start with an honest assessment of your usage patterns and available space. Frequent users benefit from accessible wall mounting, while seasonal users might prefer ceiling storage that maximizes space. Remember that the best storage system is one you’ll actually use consistently.
Taking time to implement proper storage now prevents future headaches and expenses. Your wheelbarrow will last longer, your space will function better, and you’ll wonder why you didn’t organize sooner. With options ranging from free corner organization to sophisticated pulley systems, there’s a perfect solution for every situation and budget.
Don't let aphids, slugs, and caterpillars ruin another plant. Take back control with simple, natural methods that actually work.
