
When the first heavy snowfall hits and you’re staring at your snow blower in the garage, knowing exactly how to start it can save you precious time and frustration. I’ve been through countless winter mornings where my snow blower decided to be stubborn, and through trial, error, and consultation with equipment experts, I’ve learned the precise steps that work every time.
Starting a snow blower correctly involves more than just pulling a cord or pressing a button. Whether you have a gas-powered workhorse or an electric model, the right preparation and technique make all the difference between smooth operation and a morning spent fighting with frozen equipment. In this comprehensive guide, we’ll walk through everything you need to know about starting both types of snow blowers, troubleshooting common problems, and keeping your equipment ready for winter’s worst.
Safety comes first when operating any power equipment, especially in cold, slippery conditions. Before we dive into the starting procedures, let’s establish the foundation for safe and successful snow blower operation that will protect both you and your equipment throughout the winter season.
Before attempting to start any snow blower, completing a thorough safety check prevents accidents and equipment damage. I make this routine non-negotiable, regardless of how urgent the snow removal seems.
Proper protective gear shields you from flying debris, loud engine noise, and cold weather hazards. Always wear safety glasses or goggles to protect your eyes from ice chunks and debris that the blower might kick up. Heavy-duty gloves provide grip on cold metal controls while protecting your hands from freezing temperatures. Steel-toed or reinforced winter boots with good traction prevent slips and protect your feet if you accidentally contact the equipment.
Hearing protection becomes crucial for gas-powered models, which typically operate at 85-100 decibels. Even short exposure to these noise levels can cause hearing damage. I keep a pair of earmuffs hanging right next to my snow blower so they’re impossible to forget.
Walk around your snow blower and check for visible damage or loose parts. Look for cracks in the housing, bent auger blades, or damaged discharge chute components. Check that all safety shields and guards are properly attached and undamaged. Ensure the discharge chute rotates freely and the deflector moves up and down without resistance.
For gas models, inspect the spark plug wire connection, ensuring it’s firmly attached. Check the oil level using the dipstick – low oil can prevent starting or cause severe engine damage. Verify that the fuel shutoff valve (if equipped) is in the open position. Electric models require inspection of the power cord for cuts, cracks, or exposed wires that could create shock hazards.
Remove any obstacles from the area you’ll be clearing before starting the machine. Newspapers, door mats, extension cords, garden hoses, and toys become dangerous projectiles when caught by the auger. Mark the edges of driveways and walkways with stakes to avoid hitting curbs or garden borders hidden under snow.
Never attempt to start or operate a snow blower indoors, including in garages, even with doors open. Carbon monoxide from gas engines accumulates quickly in enclosed spaces and can be fatal. Always move the equipment outside before starting.
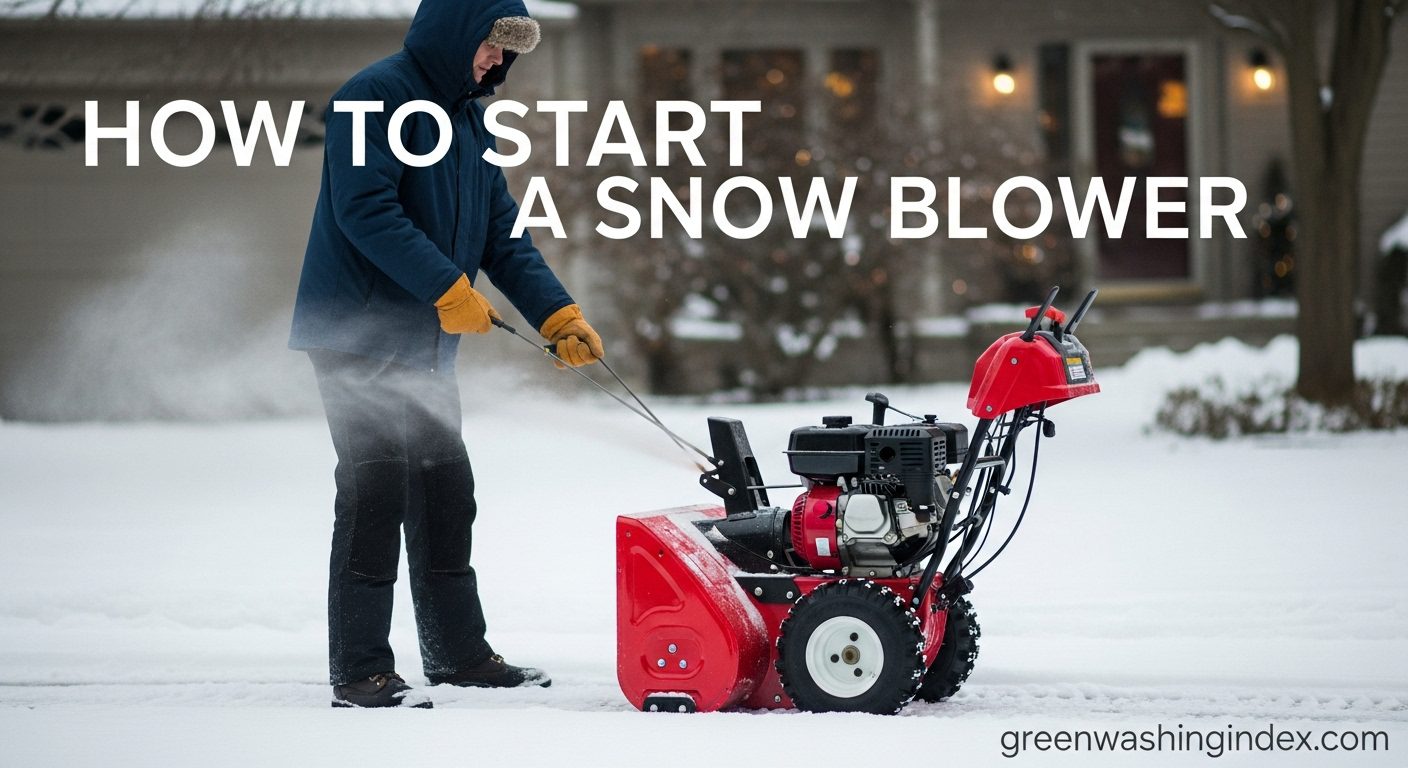
Gas-powered snow blowers require a specific sequence of steps for reliable starting, especially in cold weather. Following this proven method eliminates most starting problems and gets your equipment running smoothly.
Use fresh gasoline that’s less than 30 days old for best results. Stale fuel causes more starting problems than any other issue I encounter. If your snow blower sat unused since last winter with fuel in the tank, drain it completely and add fresh gas. Most manufacturers recommend regular unleaded gasoline with an octane rating of 87 or higher.
Add fuel stabilizer to every tank, especially if you don’t use your snow blower frequently. This prevents fuel degradation and keeps the carburetor clean. Fill the tank to about 95% capacity, leaving room for fuel expansion. Wipe up any spills immediately to prevent slipping hazards on icy surfaces.
Cold engines consume more oil, and running with low oil destroys engines quickly. Remove the oil cap/dipstick, wipe it clean, reinsert it fully, then remove again to check the level. The oil should reach between the “min” and “max” marks. If low, add the manufacturer-recommended oil type – typically 5W-30 for winter use.
New snow blowers often ship without oil, so always check before the first start. Change the oil after the first five hours of use for new engines, then annually or every 50 hours of operation.
Move the throttle control to the “fast” or “run” position, typically indicated by a rabbit symbol. This setting provides the proper engine speed for starting and operation. Some models have a separate throttle for starting – consult your manual for specific positions.
Set the choke to the “closed” or “full” position for cold starts. The choke restricts airflow to create a richer fuel mixture needed for cold engine starting. On warmer days or if the engine ran recently, you might need less or no choke. Finding the right choke setting for conditions takes practice.
Locate the primer bulb, usually a small rubber button near the carburetor. Press it firmly and release, allowing it to return to its original position between presses. For temperatures above 15°F, three presses typically suffice. Below 15°F, increase to 5-6 presses. Below 0°F, you might need 8-10 presses.
Over-priming floods the engine, making starting impossible until excess fuel evaporates. If you smell strong gasoline after priming, you’ve likely over-primed. Wait 10 minutes before trying again with fewer primer pushes.
Insert the safety key fully into its slot. This plastic key prevents unauthorized starting and should be removed when storing the equipment. Ensure the auger and drive controls are disengaged – the snow blower shouldn’t move or throw snow immediately upon starting.
Some models feature a dead-man switch that must be held during starting. Others have a separate safety bail that needs squeezing. Familiarize yourself with your model’s specific safety features.
For Electric Start Models: Connect the power cord to the snow blower and plug into a grounded outlet. Press and hold the electric start button until the engine starts, typically 1-3 seconds. Once running, immediately unplug the power cord to prevent damage.
For Pull-Start Models: Grip the recoil starter handle firmly. Pull slowly until you feel resistance (the compression point), then pull quickly and firmly straight out. Don’t yank the cord at an angle or let it snap back – guide it back gently to prevent damage.
Cold engines often require 3-5 pulls to start. If it doesn’t start after 6 pulls, wait two minutes and verify your choke and prime settings before trying again.
Once the engine starts, gradually move the choke to the “open” or “run” position over 30-60 seconds. Moving too quickly causes stalling, while leaving it closed too long fouls the spark plug. The engine should run smoothly without surging or sputtering when properly adjusted.
Let the engine warm up for 3-5 minutes before engaging the auger or drive. This allows oil to circulate and prevents damage to cold engine components. Use this time to do a final safety check of your work area.
Electric snow blowers offer simpler starting procedures but require different safety considerations. Whether corded or battery-powered, these models eliminate many gas engine hassles while introducing electrical safety requirements.
Starting a corded electric snow blower requires proper electrical setup for safe operation. Use only outdoor-rated extension cords designed for cold weather use. The cord must match the amperage requirements of your snow blower – typically 12 or 15 amps. A 12-gauge cord handles 15 amps up to 50 feet, while longer runs require heavier 10-gauge cords.
Connect the extension cord to the snow blower first, then plug into a GFCI-protected outlet. This order prevents arc damage to the outlet. Ensure the cord routes away from the clearing path to prevent accidentally running over it. I use bright orange cords for visibility against snow.
To start, simply squeeze the safety bail or trigger and press the start button. The motor should engage immediately. If it doesn’t, release all controls, check connections, and verify the outlet has power. Never attempt to override safety switches – they prevent serious injuries.
Battery-powered snow blowers require charged batteries for operation. Cold weather reduces battery capacity by 30-50%, so store batteries indoors when not in use. Insert the battery firmly until it clicks into place. Most models have indicator lights showing charge level and proper connection.
Check that the safety key is inserted and all controls are in neutral positions. Press and hold the safety button while squeezing the bail or trigger to start. The motor engages instantly when properly connected. If nothing happens, remove and reseat the battery, ensuring full engagement.
Keep spare batteries warm indoors while working. Swap them out as needed for continuous operation. Most batteries provide 20-45 minutes of runtime depending on snow conditions and model specifications.
Electric models start instantly without warming up, priming, or choking. They operate quieter than gas models and produce no emissions. Maintenance involves mainly keeping batteries charged or cords in good condition. However, they typically handle less snow volume and struggle with heavy, wet snow that gas models power through easily.
Corded models limit range to within 100 feet of an outlet, while battery models need recharging every 30-45 minutes. Plan your clearing pattern accordingly, starting nearest the outlet and working outward for corded models, or tackling priority areas first with battery models.
Even well-maintained snow blowers occasionally refuse to start. Working through these common issues systematically usually identifies the problem quickly.
Problem: Engine won’t turn over
Check that the safety key is fully inserted and the fuel shutoff valve is open. Verify the spark plug wire connects firmly to the plug. For electric start models, ensure the power cord connects properly and the outlet has power. The recoil starter might be frozen – bring the snow blower into a warm garage for 30 minutes to thaw.
Problem: Engine turns over but won’t start
This usually indicates fuel or spark issues. First, verify fresh fuel in the tank and proper choke setting. Over-choking floods the engine – try starting with no choke if you smell gasoline. Under-priming in extreme cold prevents starting – add 2-3 more primer pushes.
Remove and inspect the spark plug. A wet plug indicates flooding; dry and reinstall it. A dry plug after multiple start attempts suggests fuel isn’t reaching the engine. Check for clogged fuel lines or a dirty carburetor that needs cleaning.
Problem: Engine starts then dies
This typically means the choke opens too quickly or fuel supply issues exist. Open the choke more gradually after starting. Check for water in the fuel (it settles as ice at the tank bottom). Drain and refill with fresh gas if suspected. A clogged fuel cap vent creates vacuum preventing fuel flow – clean or replace the cap.
Problem: No response when engaging start
Verify power at the outlet using another device. Check that all connections are secure and the cord shows no damage. Test the GFCI outlet reset button. For battery models, confirm the battery is charged and properly seated. Cold batteries might need warming to room temperature before use.
Problem: Motor hums but doesn’t turn
The auger is likely frozen or jammed. Disconnect power completely, then carefully clear any ice or debris from the auger housing. Never attempt to clear jams with power connected. Apply silicone spray to the auger and housing to prevent re-freezing.
Problem: Motor starts then stops
Overload protection engaged due to heavy snow or obstruction. Clear the auger housing and discharge chute completely. Reduce the width of your passes through deep snow. Let the motor cool for 15 minutes before restarting if thermal protection activated.
Proper seasonal maintenance ensures your snow blower starts reliably when needed and extends its operational life significantly.
Start your pre-season prep in early fall before the first snow. Change the engine oil and replace the spark plug annually for gas models. Old oil thickens in cold weather, making starting difficult. A fresh spark plug ensures strong ignition in cold conditions.
Inspect and adjust the auger and drive belts. Loose belts slip under load, reducing throwing distance and drive power. Replace worn or cracked belts before they fail during a storm. Lubricate all pivot points with appropriate cold-weather grease.
Test start your snow blower monthly during fall to ensure it’s ready when needed. This keeps internal components lubricated and identifies problems while repair shops aren’t overwhelmed with emergency repairs.
Check tire pressure on wheeled models every few uses. Cold weather reduces pressure, affecting traction and maneuverability. Maintain manufacturer-recommended pressure for optimal performance.
Clear the discharge chute after each use to prevent freeze-up. Apply silicone spray to the chute and auger housing to prevent snow adhesion. Never use cooking spray or WD-40 – they attract dirt and lose effectiveness in extreme cold.
Monitor shear pin condition on gas models. These sacrificial pins protect the gear case by breaking when the auger hits solid objects. Keep spare pins on hand and replace broken ones immediately to maintain full throwing capacity.
Proper storage prevents starting problems next winter. Run the engine dry or add fuel stabilizer to prevent carburetor gumming. I prefer running it dry – start the engine, close the fuel valve, and let it run until it stops.
Change the oil while the engine is warm for better drainage. Clean the entire machine thoroughly, removing salt and debris that cause corrosion. Touch up any paint chips to prevent rust.
Store in a dry location with the unit slightly elevated to prevent tire flat-spots. Remove the battery from electric start models and store indoors. Cover the snow blower to prevent dust accumulation but ensure adequate ventilation to prevent moisture buildup.
Operating a snow blower safely requires constant attention to your surroundings and adherence to established safety practices.
Never leave a running snow blower unattended. The combination of rotating parts and slippery conditions creates serious hazard potential. Always disengage the auger and drive before adjusting the discharge chute or clearing clogs.
Maintain firm footing and balance throughout operation. Take small steps and never pull the machine toward you. If you must clear a slope, work across it rather than straight up and down. Avoid operating on slopes greater than 10 degrees.
Keep all people and pets at least 25 feet away from operating equipment. Thrown objects can cause serious injuries at considerable distances. Never direct discharge toward buildings, vehicles, or people.
Clogs occur when wet, heavy snow overwhelms the discharge chute. Never use your hands to clear clogs, even with the engine off – the auger can spin unexpectedly. Always shut off the engine and remove the safety key before attempting to clear any blockage.
Use the provided cleaning tool or a stick to remove packed snow. Work from the discharge end toward the auger, breaking up compacted snow gradually. If ice forms in the chute, bring the unit into a warm area to thaw rather than chipping at it.
Take frequent breaks when operating in extreme cold. Frostbite can develop quickly on exposed skin, especially with wind chill from the discharge. Watch for signs of hypothermia including shivering, confusion, and loss of coordination.
Stay hydrated despite not feeling thirsty in cold weather. Physical exertion in cold conditions dehydrates you quickly. Keep water inside where it won’t freeze and drink during each break.
How many times should I prime my snow blower?
Temperature determines primer requirements. Above 15°F, use 3 pushes. From 0-15°F, use 5-6 pushes. Below 0°F, use 8-10 pushes. Adjust based on your specific model and conditions – too little prevents starting while too much floods the engine.
Why won’t my snow blower start after summer storage?
Stale fuel causes most post-storage starting problems. Drain old fuel completely and refill with fresh gasoline. Check for clogged carburetor jets from evaporated fuel residue. Replace the spark plug and verify the air filter isn’t clogged with debris.
Should I use the choke when the engine is warm?
No, warm engines don’t need choke. Using choke on a warm engine causes flooding and poor performance. If restarting within 30 minutes of shutting down, start with no choke and throttle at run position.
Can I use automotive oil in my snow blower?
Yes, but choose the right viscosity. Use 5W-30 synthetic oil for best cold-weather performance. Conventional 5W-30 works above 0°F. Never use single-weight oils like SAE 30 in winter – they’re too thick when cold.
How long should I warm up my snow blower?
Gas engines need 3-5 minutes of warm-up before engaging the auger or drive. This allows oil circulation and prevents damage to cold components. Electric models require no warm-up and can operate immediately.
What causes electric snow blower breakers to trip?
Overloading from too much snow, using an undersized extension cord, or a jammed auger typically trips breakers. Use proper gauge cords, take narrower passes in deep snow, and ensure the auger spins freely before starting.
How often should I change the spark plug?
Replace spark plugs annually or every 100 hours of operation. A worn plug makes starting difficult and reduces power. Keep a spare plug on hand for emergency replacement during the season.
Why does my pull cord stick or won’t retract?
Ice buildup or a damaged recoil spring causes cord problems. Store in a warmer area to thaw ice. If the spring is broken, professional repair is recommended as spring replacement can be dangerous.
Successfully starting your snow blower depends on understanding your specific model’s requirements and following proper procedures consistently. Gas models demand attention to fuel quality, choke settings, and priming techniques, while electric models require appropriate electrical setup and battery management. Regular maintenance throughout the season prevents most starting problems and extends equipment life.
Remember that safety always takes priority over speed when operating power equipment in winter conditions. Taking time to perform pre-start checks, wearing appropriate protective gear, and following safe operating procedures prevents accidents and equipment damage. When problems arise, systematic troubleshooting usually identifies simple solutions.
Keep this guide handy for reference throughout the winter season. With proper starting techniques and regular maintenance, your snow blower will provide reliable service for many winters to come. Stay safe, stay warm, and tackle winter’s worst with confidence knowing your equipment will start when needed.
Don't let aphids, slugs, and caterpillars ruin another plant. Take back control with simple, natural methods that actually work.
