

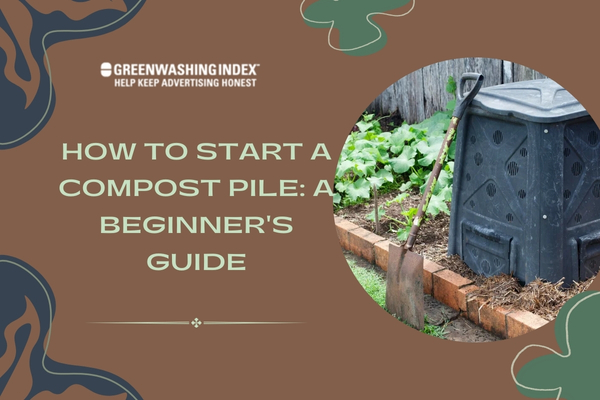
Looking to recycle your organic waste and create sustainable gardening practices? Starting a compost pile is the perfect solution! Not only does it reduce landfill waste, but it also provides nutrient-rich soil for your plants.
In this beginner’s guide, I’ll walk you through the simple steps of building and maintaining your own compost pile. Get ready to embrace the power of DIY composting and discover the benefits it brings to your garden.
Wondering how to start a compost pile? It’s easier than you think! Follow these step-by-step instructions to get started:
What You’ll Learn From Here
Now, let’s dive in and turn your organic waste into black gold!
If you’re new to the idea of composting, it’s a simple way to recycle your kitchen and garden waste into something useful for your plants. Not only does this help the planet by cutting down on landfill waste, but it also enriches your garden soil, making it healthier for whatever you’re growing.

Creating my own compost pile was easier than I thought, and you can do it too. Follow these simple steps and in no time, you’ll have your very own compost pile up and running.
1. Pick the Right Spot
First things first – find the right spot for your compost pile or bin. It should be easily reachable – think about that moment when winter comes around or when it rains. You’ll want a place that’s somewhat sheltered and has good drainage so excess water can flow out without leaving your pile too wet.
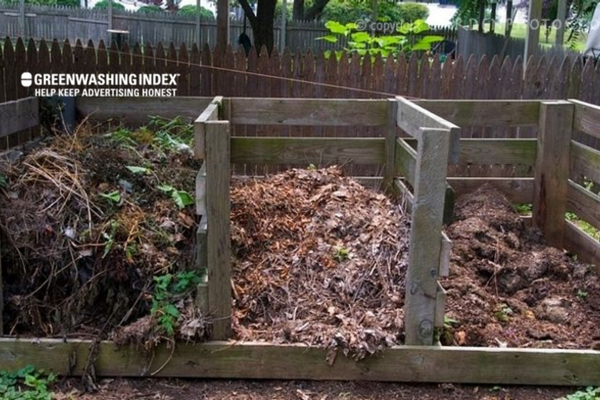
2. Set Up Your Bin or Pile
You don’t need anything fancy; a simple heap will do, but if you prefer to keep things neat, use a bin. I started with an easy DIY bin made from old pallets enclosed with chicken wire. Make sure there is airflow because those little microbes and bugs that break down the organic material love oxygen.
3. Gather Your Greens and Browns
These are the ingredients of your compost pile: greens (like vegetable scraps, coffee grounds, and fresh leaves), which provide nitrogen, and browns (like dry leaves, straw, or paper), which give carbon – two fundamental elements for successful composting.
Try to aim for a balance between these two types of materials; I found maintaining about equal amounts by volume works great.
4. Begin Layering
Start with a layer of brown at the bottom to allow air to reach what will soon be more dense material above it, like kitchen scraps or recently pulled weeds from garden beds. Then add some green material on top. Repeat this process until all of your materials are in the pile.
5. Keep It Moist
Moisture plays an essential role in breaking everything down properly. Make sure that each layer is like a sponge wet after adding them by giving each layer a quick sprinkle with water if necessary. However, keep an eye on not making it soaking wet; Aim for just enough moisture that pushes light squeeze and gives the release a few drops of free water. Now, again, is teammate perfect consistency.
6. monitor temperature
Monitor temperature waitt turns itself overdue time scheduled; helps kill off any potentially harmful pathogens weeds seeds survive might try competitions gain nutrients-seeds hatching growImagein plantingForget too turning stirring mix helps evenly distribute heat throughout entirety speeding process along.
After setting up the initial composition moving forward, minimum efforts are required maybe once every other week, giving things turn over airflow consistent expiration progress saw faster rates.
Now, sit back and watch the magic happen!
Time patience gradually starts seeing the structure darker and crumblier, indicating active decomposition taking place ready to use the finished product fertilizer enhancer comes complete proud Moments full circle journey oneself depending on natural cycles beautiful ways
Also Read: Rice Composting: Ultimate Guide to Nutrient-Rich Soil
When I start a compost pile, I think of it like making a special kind of outdoor recipe. This recipe will help my garden grow beautiful plants and vegetables. “But what do I use for this recipe?” you might ask. Well, lots of stuff from your house can go into the compost pile! Here’s what belongs in it:
There’s more that can go in there, too, but these are some common items to start with.
Now, let’s chat about “browns” and “greens.” These aren’t colors you’re painting with; they’re the types of stuff you put into your pile that work together to make everything break down into rich soil.
Browns are things like dead leaves, branches, twigs, or shredded newspaper. They’re mostly carbon-rich materials that add structure to your pile so air can get through – super important!
Greens, on the other hand, are like food scraps from vegetables and fruits or freshly cut grass from your lawn – they provide nitrogen, which is like the fuel that gets the compost “cooking”.
Here’s why getting the mix right matters: if you have too many greens (the wet stuff), your pile might get smelly because it’d be too soggy – yuck! Too many browns (the dry stuff), though? That would slow things down. Think of a slow cooker in a low-heat setting.
Most folks who know DIY composting agree that the magic mix is about three parts brown to one part green:
There’s no need for an exact science; just eye it out roughly when adding materials.
So remember:
Getting this mix just right means my compost stays happy – not stinky – and before I know it’s ready to feed back to my garden!
Also Read: Pistachio Shells Compostability: Breaking the Myths
When I want to start a compost pile, I always think about where I’m going to put it first. You see, the spot you choose is pretty important. It’s not just about throwing scraps into a pile and hoping for the best! I need to look at a few things before I decide on the perfect place for my compost.
The first thing I consider when picking out a spot is how much sunlight that area gets. Sunlight is great because it helps heat up my compost pile, and that heat makes the stuff in there break down faster.
But too much sun can dry out my pile, which isn’t good either since moisture is needed for all those tiny decomposers like bugs and bacteria to do their work.
Then there’s moisture – not too wet, not too dry; it’s got to be just right! A place with some shade can help keep things from getting dried out. Also, during rainy days, if it’s too exposed, my pile might get too soggy and start to smell bad because there wouldn’t be enough air for those microorganisms.
I also think about how close or far my compost spot is from where I will be bringing my organic waste regularly. If it’s super far away from my kitchen or garden, trust me, it becomes less fun trying to carry scraps out all the time.
Here are some simple points that guide me in choosing where to set up:
Picking the right location takes a little thinking ahead of time, but doing this means less trouble later on as you’re turning food scraps into rich soil for sustainable gardening through DIY composting—trust me!
Plus, organic waste recycling feels really good when you know everything’s working as it should in your own backyard setup! And remember: simple steps make starting a new habit way easier — especially when we’re talking about something as cool as making earth magic happen in a DIY compost bin setup!
When you start a compost pile, you are like a chef making a special kind of dish. Your ingredients are things that used to be alive, like apple peels or old leaves. Layering them right helps them break down into good stuff for the soil. That’s like turning old food and yard trash into gold for your garden!
Here’s my step-by-step guide to layering:
1. Start with twigs or straw on the bottom
At the bottom of where your compost will be, put down a layer of small sticks or straw, maybe a few inches thick. This isn’t just being neat; it lets air underneath and stops water from making everything too wet.
Pro Tip: Keep this base layer loose so air can flow – good air keeps bad smells away.
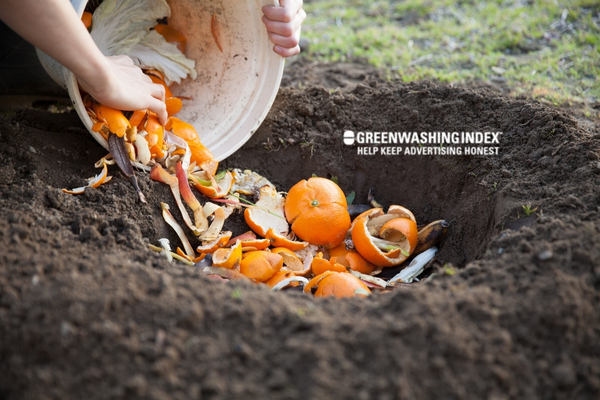
2. Add your greens
‘Greens’ might sound like it means lettuce, but really, it means anything that was recently alive and is wet – veggie scraps, coffee grounds, fresh grass clippings. These greens are full of nitrogen and help get the pile cooking. Lay these on top of your twig layer.
Pro Tip: Chop up big pieces to help them break down faster.
3. Now plop in some ‘browns’
Browns balance out the greens – they’re dry stuff like dead leaves, shredded paper (not glossy stuff), bits of wood, and cardboard egg cartons cut up small. These have carbon, which feeds tiny creatures in the compost that do all the hard work of breaking everything down.
Pro Tip: Make sure browns are mixed well with greens so they can hold hands and turn into compost together faster.
4. Keep adding green and brown layers
Just keep stacking green layers, then brown layers – aim for about equal amounts overall, but don’t worry if it’s not perfect! Each layer should be about as thick as a few newspapers stacked on top of each other.
Pro Tip: When you add more kitchen scraps (greens), throw in some browns afterward so no one thing takes over the pile’s taste.
Feeling unsure? Perfectly okay! Being great at this comes with time; watch how your compost gets along by checking now and then how wet or dry it is; if there’s any smell that doesn’t fit right – that’s how you’ll learn what works best!
Remember: Your compost is alive in its own way – take care of it with these simple steps, and soon, you’ll have a dark, crumbly treasure to make your garden super happy!
Also Read: Food Waste Reduction: Simple Tips for Major Impact
Having a compost pile is like having a tiny ecosystem in your backyard. For it to thrive, you need to look after it. One of the best things you can do is turn your compost pile regularly. Let me walk you through why and how to do this for a quicker decomposition.
Think of your compost pile as a living thing that breathes. Just like us, it needs air to stay healthy. When we turn the pile, we’re giving it a breath of fresh air.
Here’s why this is important:
Now, let’s get into how you can turn your compost with some simple steps:
By following these steps every few weeks or when you see that decomposition slows down – which could be more often in warm weather when things decompose faster – you’re on track to making rich compost for your garden.
Remember: Consistency is key! Keep turning regularly; this makes sure nothing goes wrong, like bad smells or pests coming in – things we definitely don’t want!
And there you have it! Regular maintenance like turning really does make all the difference for a speedy breakdown of waste in your sustainable garden’s own little recycling center – your own DIY compost.
Bad Odors: If your compost pile starts to smell, it usually means there’s too much wet, green material like food scraps and not enough dry, brown material like leaves or straw. When there’s too much green stuff, the pile can get very wet and start smelling. To fix this:
Pests: If you see bugs or critters around your compost bin setup, chances are your balance of materials might be attracting them. Pests usually come for kitchen scraps that haven’t been buried well enough inside the compost.
If you follow these simple steps when problems pop up, you’ll keep your organic waste recycling process running smooth without any nasty smells or critter visits! Keeping an eye on what goes into the compost and how well it’s mixed is what sustainable gardening is all about – turning leftovers into plant gold!
Also Read: Composting Orange Peels: The Hidden Truth
When I start composting, the most exciting part for me is knowing I will end up with a rich and useful product for my garden. But it is important to know when the compost pile is really ready to use.
How can you tell finished compost from stuff that’s not been broken down yet? First, look at your pile. If you see bits of what you threw in there, like whole banana peels or leaves that look just like when you added them, then it’s not ready. A ready-to-use compost looks dark and rich; it almost resembles soil or coffee grounds.
The smell can tell you a lot, too. The right kind of compost shouldn’t smell bad; it should have an earthy odor like the forest floor after rain – pleasant and natural. If it smells rotten or still has a strong odor from kitchen scraps, give it more time.
Touching your compost can also give clues. It should feel crumbly when you rub some between your fingers, not sticky or clumpy. And if most of everything has broken down into small bits that are hard to recognize, then that’s another sign your compost pile did its job.
The last test – temperature. As organic stuff breaks down in your pile, it gets hot – this is part of how nature does her recycling work. You know your compost is ready if the center of the pile feels cool rather than warm since all the material has decomposed enough that it isn’t cooking itself anymore.
Now for the best part: using what I call ‘black gold’ in my garden! What are some creative ways to use this fantastic resource?
Benefits: Why bother with all this? Well! Finished compost helps hold onto water so plants stay quenched longer; feeds microbes and worms, making the soil healthier; provides nutrients naturally without chemicals to grow stronger plants; helps prevent plant diseases since they’re getting what they need in their roots system – basically, think about having vibrant green leaves above ground because there’s gold beneath them!
So there we have some simple tips on harvesting our ‘black gold’ – a matured treasure from our very own backyard recycling system – and putting it to good use, giving back life and nourishment to our garden beds, elegantly completing nature’s cycle!
Starting a compost pile is a simple and rewarding way to recycle organic waste and create nutrient-rich soil for your garden. By following the basic steps outlined in this article, anyone can get started with their own composting journey.
Remember to consider the balance of browns (like dried leaves and twigs) and greens (such as fruit peels and coffee grounds) in your compost pile. Finding the right spot for your pile is crucial, taking into account factors like sunlight, moisture level, and convenience.
Layering techniques play a crucial role in maximizing decomposition. Turn your compost pile regularly to speed up the process and maintain optimum moisture levels. Troubleshoot common issues like bad odors or pests by adjusting the balance of materials.
Once your compost is dark, crumbly, and earthy-smelling, it’s ready to be used in your garden. Use it as a nutrient-rich soil amendment or organic fertilizer for healthier plants.