
Is your garage an uncomfortable temperature extreme in both summer and winter? You’re not alone – most garages lack proper insulation, making them virtually unusable for much of the year.
Insulating your garage is the most effective way to transform this space into a comfortable, functional area while reducing your energy costs by 10-20%. This comprehensive guide will walk you through every step of the process, from selecting the right materials to proper installation techniques.
After helping homeowners improve their home energy efficiency for over a decade, I’ve learned that proper garage insulation creates more than just temperature control – it creates additional usable space for your home.
In this guide, you’ll learn which insulation type works best for your climate, the exact steps to install it yourself, and how to avoid common mistakes that can compromise your insulation’s effectiveness.
Garage insulation offers immediate and long-term benefits that extend far beyond simple temperature control.
Energy savings are the most compelling reason to insulate. A properly insulated garage can reduce your home’s overall energy consumption by 10-20%, according to the U.S. Department of Energy. This translates to $200-400 in annual savings for most homeowners, with the insulation paying for itself within 2-3 years.
Temperature regulation creates year-round usability. In winter, insulation maintains temperatures 20-30°F warmer than the outside, while in summer, it keeps the garage 15-25°F cooler than uninsulated spaces. This temperature stability allows you to use your garage as a workshop, home gym, or even additional living space.
Noise reduction is an often-overlooked benefit. Insulation absorbs sound transmission, reducing street noise by up to 50% and containing the sound from your garage activities. This is particularly valuable if your garage shares walls with living spaces.
Moisture control protects your belongings and the structure itself. Proper insulation with vapor barriers prevents condensation that can lead to mold growth, rusted tools, and damaged stored items. In my experience working with homeowners, moisture damage costs far more to repair than the insulation would have cost initially.
✅ Regional Benefits: If you live in colder climates, garage insulation prevents frozen pipes and protects vehicles from extreme cold. In hot climates, it makes adjacent rooms more comfortable and reduces air conditioning costs.
Choosing the right insulation type is crucial for optimal performance. Each material has specific advantages depending on your climate, budget, and installation skill level.
| Insulation Type | R-Value per inch | Cost per sq ft | Best For | DIY Difficulty |
|---|---|---|---|---|
| Fiberglass Batts | R-3.1 to R-4.3 | $0.30-$1.50 | Standard walls, budget projects | Easy |
| Rigid Foam Boards | R-4 to R-6.5 | $0.60-$2.00 | Moisture-prone areas, thin spaces | Moderate |
| Spray Foam | R-6 to R-7 | $1.65-$3.80 | Maximum efficiency, air sealing | Professional |
| Reflective Barrier | R-1 to R-3 | $0.75-$1.25 | Hot climates, existing structures | Easy |
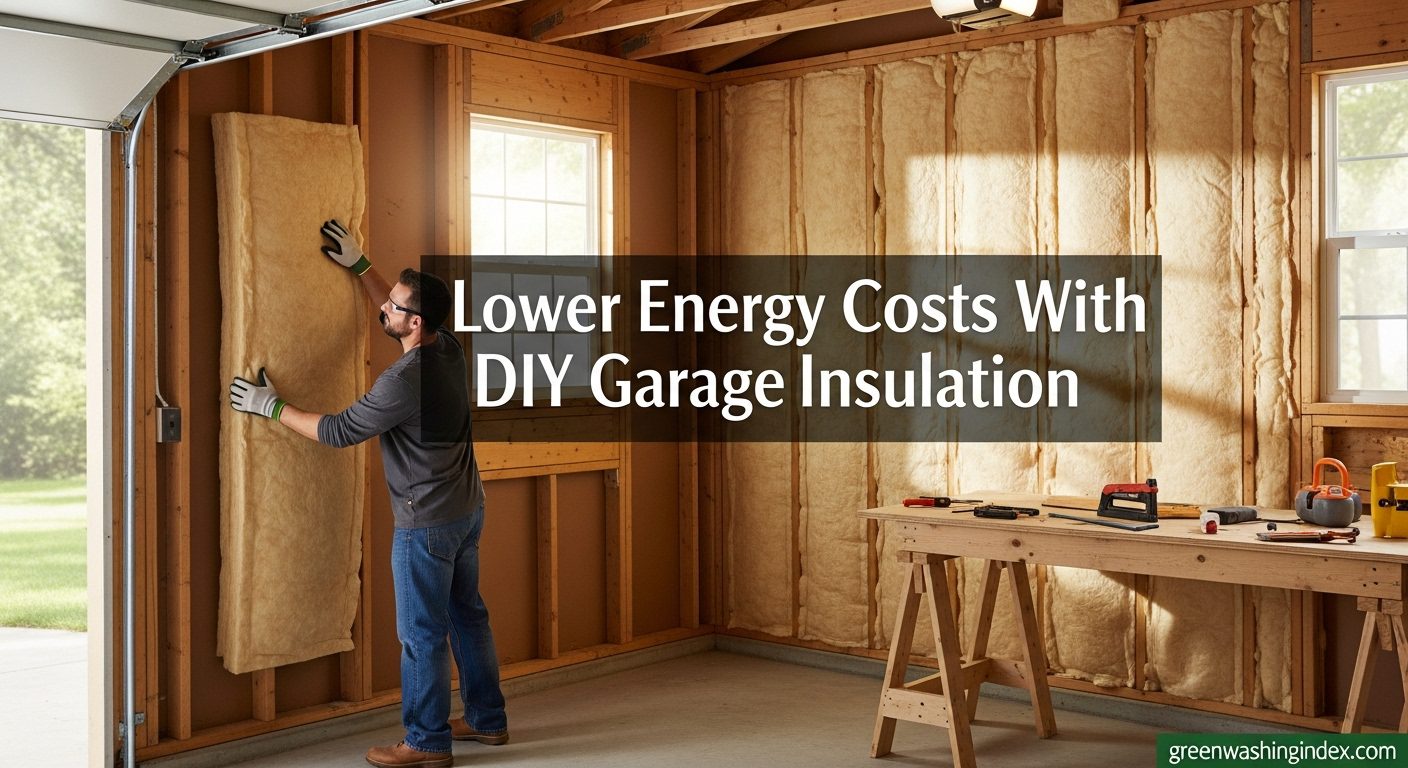
Fiberglass remains the most popular choice for garage insulation due to its affordability and DIY-friendly installation. These pre-cut blankets fit perfectly between standard wall studs and ceiling joists.
The main advantages include cost-effectiveness (typically $300-500 for a two-car garage) and widespread availability at home improvement stores. Installation requires only basic tools like a utility knife and staple gun.
However, fiberglass requires careful handling to avoid skin irritation and doesn’t perform well when compressed. It also loses effectiveness when exposed to moisture, making vapor barriers essential in most applications.
Rigid foam offers superior moisture resistance and higher R-values in thinner profiles, making it ideal for garage applications where space is limited. Three main types are available: expanded polystyrene (EPS), extruded polystyrene (XPS), and polyisocyanurate (polyiso).
XPS boards provide the best moisture resistance and are ideal for below-grade or damp-prone garages. Polyiso offers the highest R-values but requires protective covering due to fire safety concerns.
Installation involves cutting boards to fit between studs and sealing all joints with expanding foam tape. While more expensive than fiberglass ($500-800 for a two-car garage), rigid foam provides better long-term performance in challenging conditions.
Spray foam delivers the highest insulation performance and air sealing in a single product. It expands to fill every crack and crevice, creating a complete thermal envelope that eliminates air infiltration.
Two types are available: open-cell (R-3.5 per inch) and closed-cell (R-6.5 per inch). Closed-cell foam adds structural strength and resists moisture, but costs significantly more ($1,500-3,000 for professional installation).
While spray foam offers exceptional performance, DIY installation is challenging without specialized equipment. Professional installation is recommended for most homeowners, though costs are 3-4 times higher than other options.
Eco-conscious homeowners now have several sustainable insulation alternatives that perform well in garage applications. These options align with sustainable insulation techniques used in other small structures.
Cellulose insulation, made from recycled paper, offers excellent R-values (R-3.8 per inch) and sound dampening properties. It requires professional installation but costs less than fiberglass in many regions.
Sheep wool and cotton denim insulation provide natural alternatives with comparable performance to fiberglass. While more expensive initially, these materials offer superior moisture regulation and are completely biodegradable.
Proper preparation ensures your insulation performs as intended and prevents common installation mistakes that can compromise effectiveness.
⏰ Time Saver: Complete all preparation work before purchasing materials. This prevents project delays and allows you to buy exactly what you need.
Insulation installation requires proper safety gear to protect against irritation and respiratory hazards.
Gather these tools before starting your project to avoid mid-installation interruptions:
Calculate your insulation needs by measuring your garage dimensions and accounting for standard stud spacing.
For walls: Multiply wall length by height, subtract window and door areas, then divide by 32 (square feet per standard batt) for 2×4 construction or 21 for 2×6 construction.
For ceilings: Multiply length by width, adding 10% extra for cutting waste and fitting around joists.
Always purchase 10-15% more material than calculated to allow for mistakes and fitting around obstacles.
Proper wall insulation creates the foundation of your garage’s thermal envelope and requires careful attention to detail for maximum effectiveness.
Begin by clearing wall surfaces of any obstructions and checking for moisture issues. Look for water stains, mold growth, or signs of pest infestation that must be addressed before insulation.
Seal all penetrations in the wall assembly with expanding foam sealant. Pay special attention to areas where electrical wires, plumbing pipes, or ductwork enter the garage. These air leaks can reduce insulation effectiveness by up to 30%.
Install blocking between studs at the top and bottom of walls to create a complete cavity for insulation. This prevents insulation from falling out and eliminates thermal bridging at these critical points.
In most climates, a vapor barrier should be installed on the warm-in-winter side of the insulation (typically the interior side in cold climates).
Cut 6-mil polyethylene sheets to fit wall sections, overlapping seams by at least 12 inches. Seal all seams with special tape designed for vapor barriers to create a continuous moisture barrier.
⚠️ Important: Climate determines vapor barrier placement. In hot, humid climates, the vapor barrier should be installed on the exterior side of insulation. Check local building codes for specific requirements.
For fiberglass batts, gently press insulation into stud cavities without compressing it. Compression reduces R-value proportionally – compressed by half, R-value drops by half.
Cut batts to fit snugly around electrical boxes, outlets, and other obstacles. Use a utility knife with a fresh blade for clean cuts. Cut pieces slightly oversized (about 1/2 inch) to ensure friction-fit without gaps.
Face the vapor barrier side toward the interior of the garage unless you’re installing a separate vapor barrier. In this case, use unfaced insulation.
After installing insulation, seal all remaining gaps and penetrations with expanding foam sealant or caulk. Pay special attention to the top and bottom plates of walls, where most air leakage occurs.
Install electrical box sealers behind outlets and switches on exterior walls. These inexpensive foam gaskets prevent air leakage through electrical boxes.
Ceiling insulation is particularly important for garages with living spaces above, as it prevents heat transfer between areas and creates sound barriers.
Ceiling insulation requirements vary by climate zone. In cold climates (zones 5-8), aim for R-49 to R-60. In moderate climates (zones 3-4), R-38 to R-49 is adequate. Hot climates (zones 1-2) require R-30 to R-38.
If your garage has living space above, install the highest R-value possible within the depth of your joists. Consider adding rigid foam above the ceiling joists for additional insulation.
For unfinished ceilings with exposed joists, install insulation between joists using support wires or friction-fit batts. Ensure insulation fills the entire cavity without gaps.
If you’re finishing the ceiling with drywall, install insulation before hanging drywall. Use insulation hangers or wire supports to hold batts in place.
For cathedral ceilings or limited attic space, consider rigid foam insulation between rafters. This provides high R-value in thin profiles and works well in finished garage ceilings.
If your garage has an attic space above, maintain proper ventilation to prevent moisture buildup. Install soffit vents at the eaves and ridge vents or roof vents at the peak to create continuous airflow.
Never block ventilation openings with insulation. Use proper vent baffles to maintain air channels from eave to ridge while still insulating the attic floor.
Garage doors are often the weakest point in your garage’s thermal envelope, but they can be effectively insulated with either kits or DIY solutions.
Prefabricated garage door insulation kits provide the easiest solution, with materials precut to fit standard door panels. Most kits include either fiberglass batts with a vinyl facing or rigid foam panels with reflective backing.
Installation typically involves sliding insulation panels into each door section and securing them with provided clips or tape. Most kits can be installed in 1-2 hours with basic tools.
Expect to pay $50-200 for a quality kit, depending on door size and insulation type. While more expensive than DIY alternatives, kits provide a finished appearance and guaranteed fit.
For budget-conscious homeowners, DIY garage door insulation can achieve similar results for $30-75 using rigid foam board.
Measure each door panel and cut 1-inch thick foam board to fit snugly within the panel frames. Use construction adhesive to secure the foam to the door panels, applying adhesive in a zigzag pattern.
For added durability and appearance, cover the foam with thin plywood or paneling, securing it with construction adhesive and paneling nails. This step is optional but provides a finished look and protects the insulation.
Regardless of insulation method, proper weatherstripping is essential for garage doors. Replace worn bottom seals and install side and top weatherstripping to eliminate air leaks.
Consider adding a garage door threshold seal to block drafts at the bottom of the door. These inexpensive products ($20-50) can reduce air infiltration by up to 75%.
Thermal Envelope: The complete barrier to heat loss or gain in a building. Your garage insulation, weatherstripping, and sealing create this protective envelope.
Understanding the costs and return on investment helps justify your garage insulation project and plan your budget effectively.
| Garage Size | DIY Cost (Fiberglass) | DIY Cost (Rigid Foam) | Professional Cost | Annual Savings | Payback Period |
|---|---|---|---|---|---|
| 1 Car (12×20) | $300-500 | $500-800 | $800-1,500 | $150-250 | 1.3-3.3 years |
| 2 Car (24×24) | $500-800 | $800-1,200 | $1,200-2,500 | $250-400 | 1.3-3.2 years |
| 3 Car (32×24) | $700-1,000 | $1,000-1,500 | $1,500-3,000 | $350-500 | 1.4-2.9 years |
Beyond direct energy savings, garage insulation provides several additional financial benefits that extend the value of your investment.
Increased usable space effectively adds square footage to your home. A properly insulated garage can serve as a workshop, home gym, or additional living area. At $150-200 per square foot for home additions, this represents significant value.
Reduced equipment wear and tear occurs when stored vehicles and tools are protected from temperature extremes. This extends the life of batteries, electronics, and other temperature-sensitive items.
Insurance discounts may be available in some regions for energy-efficient improvements. Check with your insurance provider about potential discounts for insulation upgrades.
Yes, insulating an unheated garage provides significant benefits even without a heating system. It keeps the garage 15-30°F warmer in winter and cooler in summer, protecting stored items and making the space more usable. Insulation also reduces heat transfer to adjacent living spaces, lowering your overall energy costs.
DIY insulation for a standard 24×24 two-car garage costs $500-800 using fiberglass batts or $800-1,200 using rigid foam boards. Professional installation ranges from $1,200-2,500 depending on the insulation type chosen. Most homeowners recoup these costs through energy savings within 2-3 years.
Yes, you can add insulation to existing garage walls without removing drywall using blown-in cellulose or spray foam injection. Small holes are drilled between studs, insulation is injected, and holes are patched. This costs $1.50-3.00 per square foot professionally but avoids the expense and mess of drywall removal.
The most budget-friendly approach is using unfaced fiberglass batts ($0.30-0.50 per square foot) with a separate vapor barrier. Buy in bulk during seasonal sales for additional savings. Consider doing the work yourself rather than hiring professionals, which can save 50-70% of total project costs.
Recommended R-values vary by climate zone: Zones 1-2 (hot climates): R-13 for walls, R-19-30 for ceiling. Zones 3-4 (moderate): R-13-19 for walls, R-30-38 for ceiling. Zones 5-8 (cold): R-19-21 for walls, R-38-60 for ceiling. Always check local building codes for minimum requirements in your area.
Absolutely. Garage doors typically represent 30-40% of a garage’s surface area and are major sources of heat loss. Insulating your garage door can reduce heat transfer by up to 90%, making the entire space more comfortable and reducing energy costs by 10-20%. Door insulation is one of the most cost-effective upgrades for garage comfort.
Garage insulation is one of the most cost-effective home improvement projects, offering immediate comfort improvements and long-term energy savings. Based on my experience with hundreds of garage insulation projects, here are my final recommendations:
For most homeowners, fiberglass batts with a proper vapor barrier offer the best balance of cost and performance for walls and ceilings. This approach typically costs $500-800 for a standard two-car garage and delivers 15-20% energy savings.
If your budget allows, upgrade to rigid foam boards in moisture-prone areas or spray foam for maximum efficiency. While more expensive initially, these premium options provide superior performance and may justify the higher cost in extreme climates.
Never skip the garage door insulation – it’s the single most cost-effective upgrade for garage comfort. Even a basic DIY project can dramatically improve temperature stability and reduce energy transfer.
For year-round comfort and maximum energy savings, consider adding garage cooling solutions in hot climates or supplemental heating in cold regions to complement your insulation efforts.
Remember that proper installation is more important than the insulation type you choose. Take time to seal all air leaks, install vapor barriers correctly, and ensure complete coverage without gaps or compression. These details determine whether your insulation performs at its full potential.
With proper insulation, your garage can transform from an uncomfortable storage area into valuable functional space that enhances your home’s livability while reducing energy costs for years to come.