
Your car’s AC suddenly stopped blowing cold air, and you suspect a refrigerant leak. Finding AC leaks can save you hundreds of dollars in unnecessary repairs and recharges. The most effective methods include visual inspection for oil residue, using UV dye with a blacklight, electronic leak detectors, and the simple soap bubble test. Each technique works best for different leak types and locations, from tiny pinhole leaks to major component failures.
This comprehensive guide walks you through every proven method to detect AC leaks in your vehicle, whether you’re a DIY enthusiast or preparing for a professional repair. You’ll learn exactly where leaks commonly occur, which detection tools provide the best results, and how to avoid costly mistakes that could damage your AC system.
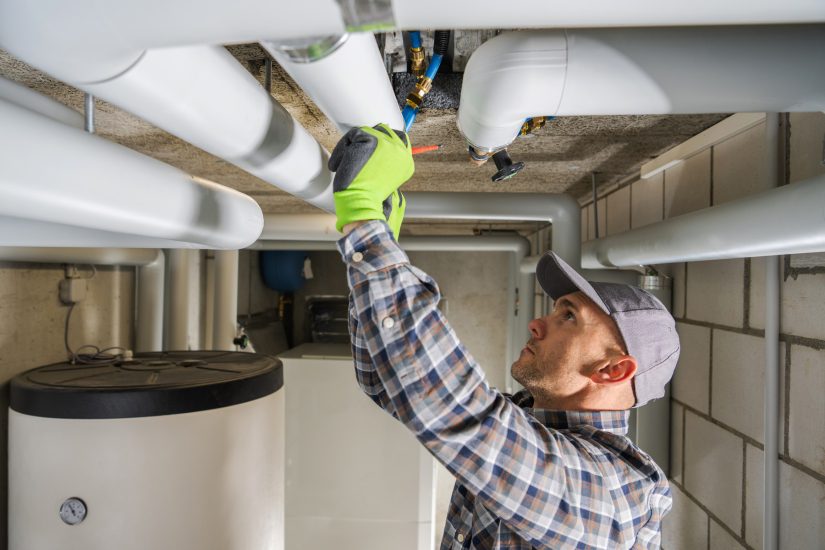
Before diving into detection methods, understanding your AC system’s components helps you search more effectively. Your car’s air conditioning operates as a closed-loop system, circulating refrigerant through various components to cool your cabin air.
The refrigerant travels from the compressor (which pressurizes it) to the condenser (where heat dissipates), through the expansion valve, and into the evaporator (where it absorbs cabin heat). Any breach in this sealed system causes refrigerant loss and reduced cooling performance.
Common car AC leak locations include:
The compressor shaft seal represents one of the most frequent failure points. Located at the front of the compressor where the clutch attaches, this seal endures constant rotation and extreme pressure changes. Metal fatigue and wear create gaps that allow refrigerant to escape.
Condenser leaks often result from road debris impact or corrosion. Positioned at the front of your vehicle behind the grille, the condenser faces rocks, salt, and other hazards that create pinhole leaks over time.
The evaporator, hidden deep within your dashboard, develops leaks from internal corrosion. Moisture combining with refrigerant creates acidic compounds that eat through aluminum fins and tubes. These leaks prove particularly challenging to detect without specialized access.
AC hose connections and crimped fittings deteriorate with age. The rubber hoses themselves can develop cracks, while the aluminum fittings corrode at connection points. O-rings at every joint represent another common failure point, hardening and cracking after years of heat cycling.
Start your leak detection with a thorough visual examination. This free method often reveals obvious problems before investing in specialized tools.
Look for telltale signs of refrigerant oil residue around AC components. Since refrigerant carries lubricating oil through the system, leaks leave distinctive oily films or dirt accumulation. Focus your inspection on:
The refrigerant oil appears as a thin, slightly yellow or clear film that attracts dust and dirt. Fresh leaks show wet oil, while older leaks display dark, grimy buildup. Even small leaks eventually create visible traces if you know where to look.
Remember that engine oil leaks can create confusion. AC refrigerant oil has a different consistency and location pattern than motor oil. When in doubt, clean the suspicious area and monitor for new accumulation.
The soap bubble test remains a time-tested technique for how to find car AC leak without dye. This method works especially well for moderate to large leaks that create enough pressure differential.
Create your detection solution by mixing dish soap with water in a spray bottle. Use a ratio of one part soap to three parts water for optimal bubble formation. The mixture should be sudsy but not too thick.
With your AC system holding at least some pressure (ideally 50 PSI or more):
Focus on these high-probability areas:
This method has limitations. It won’t detect evaporator leaks hidden inside the dash or very slow leaks that don’t produce enough gas flow. Additionally, the soap solution doesn’t work well on vertical surfaces where it quickly runs off.
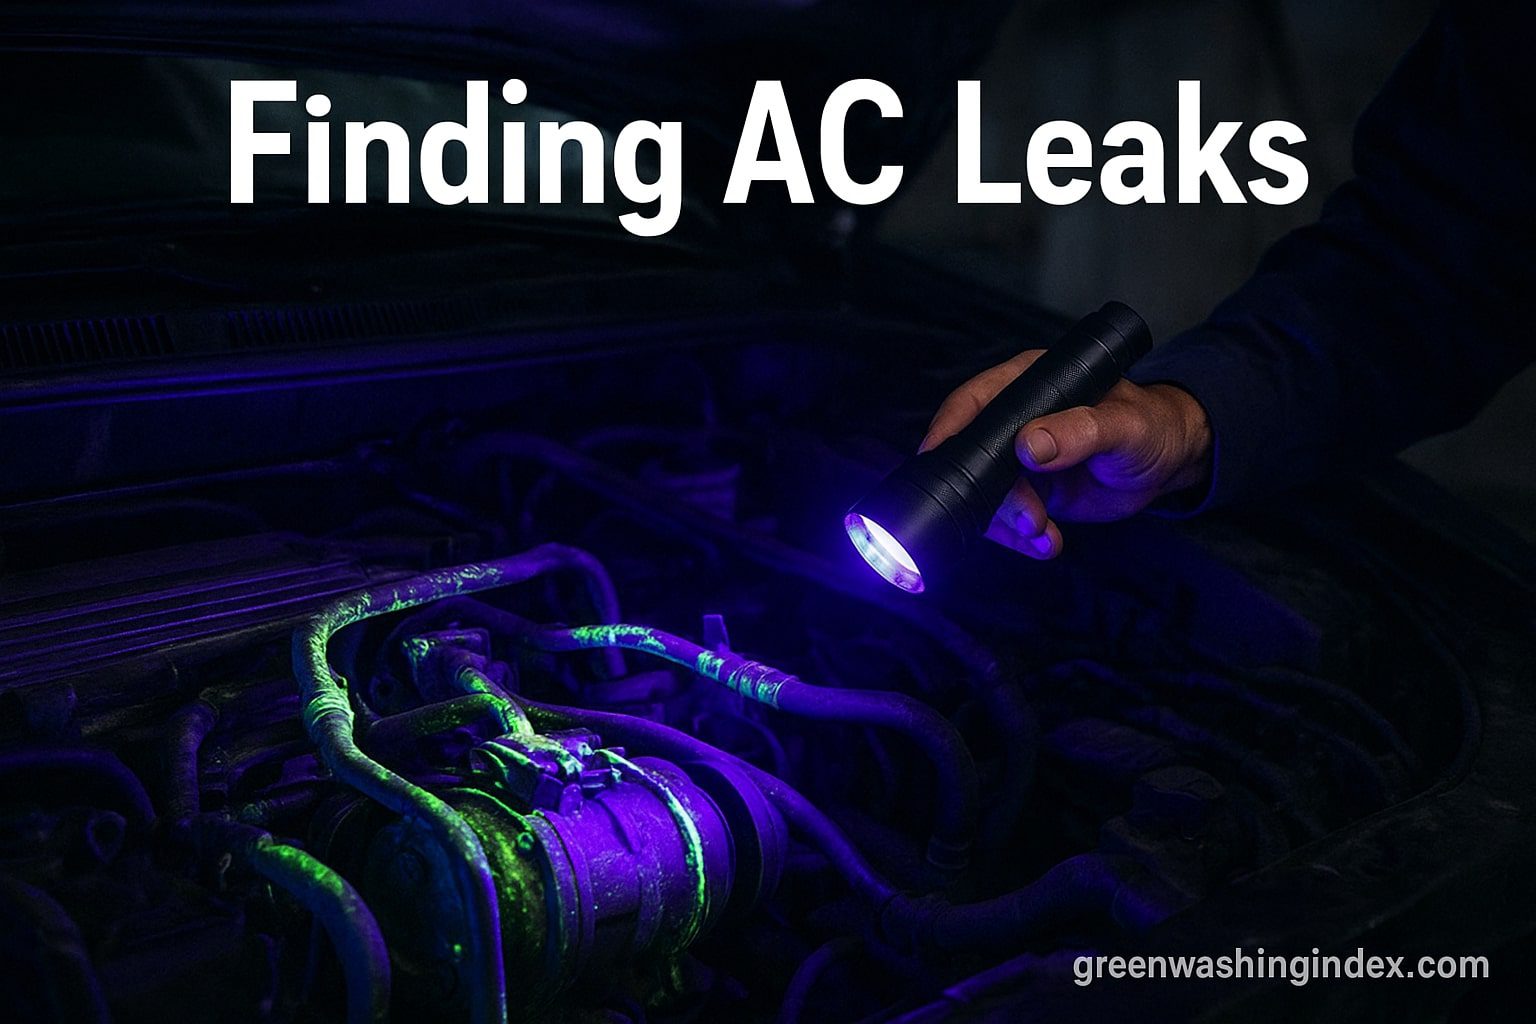
UV dye detection has become the industry standard for finding elusive AC leaks. This method involves adding fluorescent dye to your AC system, where it circulates with the refrigerant and escapes at leak points.
The process requires:
Most automotive UV dyes fluoresce bright yellow-green under ultraviolet light. Quality matters significantly – cheap dyes may not show clearly or could damage system components. Look for dyes meeting SAE J2297 standards.
Professional UV detection follows these steps:
The UV method excels at finding small leaks other techniques miss. Dye accumulates over time at leak sites, making even tiny leaks visible. The fluorescent residue remains detectable for weeks or months after application.
However, UV detection has drawbacks. You need the system to maintain enough charge to circulate the dye. Very large leaks may empty the system before dye can accumulate. Additionally, some leaks in the evaporator or behind components remain inaccessible to visual inspection.
Electronic refrigerant detectors offer sophisticated leak detection using various sensor technologies. These “sniffers” detect refrigerant molecules in the air, alerting you with audio or visual signals.
Three main types dominate the market:
These units use a heated ceramic sensor that reacts to halogen gases. They offer excellent sensitivity, detecting leaks as small as 0.1 ounces per year. The heated diode technology provides consistent performance but requires sensor replacement every few years.
Advanced infrared sensors measure refrigerant concentration using light absorption. These detectors offer the highest accuracy and longest sensor life. They excel in windy conditions where other detectors struggle.
Budget-friendly corona sensors create an electrical field that refrigerant disrupts. While less sensitive than other technologies, they work adequately for finding larger leaks.
Using electronic detectors effectively requires proper technique:
Electronic detectors work best in calm conditions. Even small air currents can disperse refrigerant before detection. These tools also react to other gases, potentially creating false positives around exhaust fumes or cleaning chemicals.
When standard techniques fail, professionals employ specialized methods for challenging leaks.
This technique involves removing all refrigerant and pressurizing the system with nitrogen gas. Technicians then monitor pressure drop over time or listen for audible leaks. Nitrogen testing excels at finding large leaks but requires complete refrigerant recovery.
Sophisticated ultrasonic detectors “hear” the high-frequency sound of escaping gas. These tools work in noisy environments where electronic sniffers struggle. They pinpoint the exact leak location but require significant pressure differential.
Similar to UV dye but using larger fluorescent particles, this method helps find extremely small leaks. The particles accumulate more visibly than liquid dye, though the process requires specialized injection equipment.
Once you’ve located a leaking AC hose, repair options depend on the damage extent and location.
For minor hose damage:
However, most professionals recommend complete hose replacement for reliability. AC hoses endure extreme pressure and temperature cycles. Partial repairs often fail within months, leading to refrigerant loss and potential compressor damage.
Hose replacement involves:
The market offers numerous AC leak repair products, from simple sealers to complete detection kits. Understanding their capabilities and limitations helps you choose appropriately.
AC stop leak sealants remain controversial among professionals. These products contain chemicals that react with moisture at leak sites, forming a seal. While they can work for tiny leaks in metal components, they pose risks:
Quality varies dramatically between brands. Premium sealants using organosilane chemistry cause fewer problems than older formulations. However, many shops refuse to service systems containing any sealant.
Comprehensive leak detection kits typically include:
These kits offer good value for DIY enthusiasts planning multiple uses. However, single-use needs may not justify the investment compared to professional diagnosis costs.
Successful leak detection requires avoiding these frequent errors:
Overcharging the system: Adding refrigerant without fixing leaks wastes money and can damage components. Excess pressure strains seals and may cause new leaks.
Ignoring safety: Refrigerant contact can cause frostbite. Always wear safety glasses and gloves. Work in ventilated areas to avoid inhaling gases.
Contaminating the system: Using incorrect dyes, oils, or sealants can necessitate expensive component replacement. Stick to products meeting vehicle manufacturer specifications.
Incomplete diagnosis: Finding one leak doesn’t mean others don’t exist. Thoroughly check the entire system before recharging.
Mixing refrigerant types: Never mix R-134a with R-1234yf or older R-12. Different refrigerants require specific oils and operating pressures.
Deciding between professional service and DIY repair depends on several factors:
Professional AC diagnosis typically costs $100-200 but includes sophisticated equipment and expertise. They can also properly handle refrigerant recovery and disposal, which environmental regulations require.
Understanding potential repair costs helps you make informed decisions:
AC compressor leak repair cost: $600-1,200 for seal replacement, $1,800-2,800 for complete compressor replacement
Evaporator replacement: $650-2,400 depending on vehicle accessibility
Condenser replacement: $400-1,200 including refrigerant
Minor leak repairs: $200-500 for accessible components
Detection only: $100-330 for professional leak testing
These costs vary significantly by vehicle make, model, and location. Luxury vehicles and those requiring dashboard removal for evaporator access sit at the higher end.
Regular maintenance extends AC system life and prevents many leaks:
Consider adding UV dye during routine service. This makes future leak detection much easier without system contamination.
Refrigerant leaks impact more than your comfort – they harm the environment. R-134a refrigerant is a potent greenhouse gas with 1,430 times the warming potential of CO2. Newer R-1234yf refrigerant reduces this impact but still requires proper handling.
Never intentionally vent refrigerant to atmosphere. Federal regulations impose substantial fines for improper refrigerant handling. Always use certified technicians for refrigerant recovery and recycling.
Proper leak repair benefits both your wallet and the environment. A properly sealed AC system maintains efficiency, reduces fuel consumption, and eliminates continuous refrigerant loss.
Finding AC leaks in your car doesn’t require expensive equipment or professional training for many common issues. Start with visual inspection and soap testing before investing in UV dye or electronic detectors. Understanding where leaks commonly occur – from compressor shaft seals to condenser damage – focuses your search effectively.
Remember that successful leak detection is only the first step. Proper repair using quality components and following safety procedures ensures lasting results. Whether you tackle repairs yourself or seek professional help, addressing AC leaks promptly prevents costlier damage and keeps you comfortable year-round.
For more automotive maintenance tips and eco-friendly repair advice, explore our guides on sustainable car care practices and reducing your vehicle’s environmental impact. Taking care of your car’s AC system represents just one way to maintain your vehicle efficiently while minimizing environmental harm.
Don't let aphids, slugs, and caterpillars ruin another plant. Take back control with simple, natural methods that actually work.
