


Unlike composting vegetables, dairy products need special handling due to their high fat content and slower decomposition rate. When done correctly, composting milk transforms waste into valuable nutrients for your garden.
This comprehensive guide reveals exactly how to compost dairy products safely and effectively. You’ll discover the science behind milk decomposition, step-by-step methods for success, and alternative ways to use spoiled milk that might surprise you.
Whether you’re wondering what to do with spoiled milk or looking to enhance your composting game, this article provides expert insights backed by research and practical experience. Let’s turn that sour situation into garden gold.
Yes, you can put spoiled milk in compost, but it requires careful management to avoid common problems like odors and pests.
Milk in compost behaves differently than typical organic materials due to its unique composition. The high fat content creates water-resistant barriers around waste particles, significantly slowing the decomposition process. According to research from Cornell University, dairy products can take up to six months to fully break down.
The protein and lactose in spoiled milk attract specific types of microorganisms during decomposition. These microbes work differently than those breaking down plant matter, requiring higher temperatures and more oxygen to function effectively.
Additionally, the calcium and phosphorus in milk compost contribute valuable nutrients to your finished product. However, these benefits only materialize when proper composting conditions are maintained throughout the process.
The challenges of dairy in compost stem from its tendency to create anaerobic conditions when not properly managed. Without adequate oxygen, harmful bacteria proliferate, producing the characteristic sour smell that attracts unwanted visitors to your compost pile.
Pest attraction represents another significant concern when composting dairy products. Rodents, raccoons, and flies find the protein-rich content irresistible, potentially turning your compost area into a wildlife feeding station.
Temperature control becomes critical with dairy composting, as insufficient heat allows harmful pathogens to survive. Unlike composting rice, which breaks down relatively quickly, milk requires sustained high temperatures for safe decomposition.
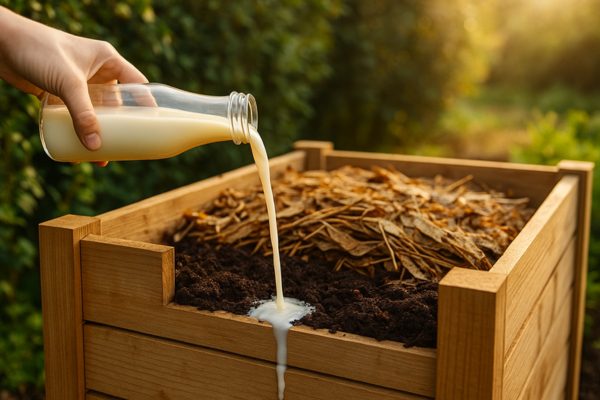
Before adding spoiled milk to your compost, assess its condition carefully. Slightly sour milk differs from completely curdled products in how they should be handled. Pour out any excess liquid to prevent oversaturating your compost pile.
Small quantities work best when learning how to not waste spoiled milk through composting. Start with no more than a cup at a time, gradually increasing as you gain experience managing the process.
Dilution provides an extra safety margin for beginners. Mix one part spoiled milk with one part water before adding it to your compost, reducing the concentration and making it easier for microbes to process.
Achieving the right balance is crucial when you compost milk successfully. Dairy products are nitrogen-rich “greens,” requiring three parts carbon-rich “browns” to one part dairy for optimal decomposition.
Excellent brown materials for balancing milk include:
Mix these materials thoroughly with the milk, ensuring complete coverage. This prevents pocket formation where anaerobic conditions could develop and cause odor problems.
Hot composting offers the safest method for processing dairy products. Your pile must maintain temperatures between 135°F and 160°F to kill pathogens and accelerate decomposition effectively.
Build your pile with a sturdy base of brown materials, creating a depression in the center. Pour the diluted milk into this pocket, immediately covering with 12-18 inches of additional browns.
Monitor temperature daily using a compost thermometer. Turn the pile every few days to maintain oxygen levels and distribute heat evenly throughout the decomposing materials.
Bokashi composting provides an excellent alternative for those wondering can milk be composted in small spaces. This fermentation method uses beneficial microorganisms to break down dairy products without producing offensive odors.
Trench composting offers another option for dealing with spoiled milk in compost. Dig a hole at least 12 inches deep, pour in the milk, and cover immediately with soil. This method keeps odors underground while enriching specific garden areas.
Sealed tumbler systems work well for controlled dairy composting. The enclosed environment prevents pest access while allowing easy turning for proper aeration and mixing.

Proper burial depth remains your first defense against dairy composting odors. Always maintain at least 12-18 inches of carbon-rich covering material above any dairy additions to your pile.
Regular aeration through turning prevents anaerobic pockets from forming. The beneficial compost bugs that break down dairy require oxygen to function without producing foul smells.
Moisture control plays a vital role in odor management. Your compost should feel like a wrung-out sponge—moist but not dripping. Excess moisture from milk requires additional dry materials for balance.
Physical barriers provide the most reliable pest prevention for compost dairy projects. Hardware cloth or tight-fitting lids keep out rodents and larger animals attracted to protein-rich materials.
Strategic placement of your compost bin matters significantly. Position it away from buildings and fence lines where pests typically travel, reducing discovery chances.
Natural deterrents can supplement physical barriers effectively:
| Milk Type | Decomposition Rate | Nutrient Value | Special Considerations |
|---|---|---|---|
| Whole Milk | Slowest (6 months) | High calcium, phosphorus | Requires most browns due to fat |
| Skim Milk | Moderate (4 months) | Good nitrogen source | Easier to balance, less odor |
| Powdered Milk | Fast (2-3 months) | Concentrated nutrients | Mix with water first |
| Plant-Based | Fastest (1-2 months) | Varies by type | Generally easier to compost |
Understanding these differences helps optimize your approach based on what type of spoiled milk you’re composting.
Discovering what to do with spoiled milk opens surprising gardening possibilities. Diluted milk serves as an effective foliar spray, providing calcium directly to plant leaves. Mix one part milk with four parts water for optimal results.
Tomato plants particularly benefit from milk’s calcium content, preventing blossom end rot. Apply diluted milk solution weekly during fruit development for best results.
Research from The National Gardening Association indicates milk’s antifungal properties help combat powdery mildew. Spray affected plants every few days until symptoms disappear.
Spoiled milk works wonderfully as a buttermilk substitute in baking recipes. The natural acidity activates baking soda, creating light, fluffy textures in pancakes and biscuits.
Use it as a meat tenderizer by soaking tough cuts for 30 minutes before cooking. The enzymes break down proteins, resulting in more tender finished dishes.
With proper dilution, spoiled milk can supplement pet food occasionally. However, always consult your veterinarian first, as some animals are lactose intolerant.
Avoid these common mistakes when learning can you put milk in compost:
Many municipal programs accept dairy in compost collection bins, offering a convenient alternative for those uncomfortable with home dairy composting. These industrial facilities maintain optimal temperatures and conditions for safe decomposition.
Check your local guidelines carefully, as some cities restrict dairy at drop-off locations while allowing it in curbside collection. This distinction relates to different processing capabilities at various facilities.
City programs particularly benefit apartment dwellers or those with limited outdoor space. The professional management eliminates concerns about pests or odors affecting neighbors.
Home composting dairy requires commitment to proper management and monitoring. Assess your experience level honestly before attempting to compost milk at home.
Consider these factors:
Success depends on maintaining proper conditions consistently throughout the decomposition process.
| Problem | Cause | Solution |
|---|---|---|
| Ammonia smell | Too much nitrogen | Add more brown materials immediately |
| White mold growth | Normal decomposition | No action needed – indicates active breakdown |
| Slow breakdown | Insufficient heat or oxygen | Turn more frequently, check moisture levels |
| Attracting animals | Improper burial or barriers | Deepen covering layer, secure bin |
Seasonal timing affects dairy composting significantly. Summer’s heat naturally maintains higher pile temperatures, making it ideal for beginners learning is spoiled milk good for compost.
Combine dairy with other nitrogen-rich kitchen waste for better results. This diversifies the microbial population and speeds overall decomposition.
Test compost readiness before use by checking temperature and appearance. Finished dairy compost should smell earthy, not sour, with no recognizable milk residue remaining.
With proper hot composting methods, spoiled milk typically decomposes within 3-6 months. Factors affecting timeline include temperature maintenance, turning frequency, and the amount added.
Yes, most dairy products can be composted using similar methods. Hard cheeses take longer than soft varieties, while yogurt behaves similarly to milk during decomposition.
Diluted spoiled milk can benefit plants directly when applied carefully. Use a 1:1 ratio with water and apply to soil, not leaves, to avoid fungal issues.
For a standard home compost bin, limit dairy additions to 1-2 cups per week. Larger systems can handle more, but always maintain proper brown material ratios.
Only compost milk cartons specifically labeled as compostable. Most are coated with plastic or wax that won’t break down in home compost systems.
Successfully composting spoiled milk transforms potential waste into valuable garden nutrients while supporting sustainable living practices. The key lies in understanding dairy’s unique challenges and implementing proper management techniques.
Whether you choose hot composting, alternative methods, or municipal programs, remember that patience and attention to detail ensure success. Start small, monitor carefully, and adjust your approach based on results.
By mastering dairy composting, you join a community of environmentally conscious gardeners turning kitchen waste into garden gold. Your efforts reduce landfill burden while creating nutrient-rich amendments that help plants thrive naturally.