

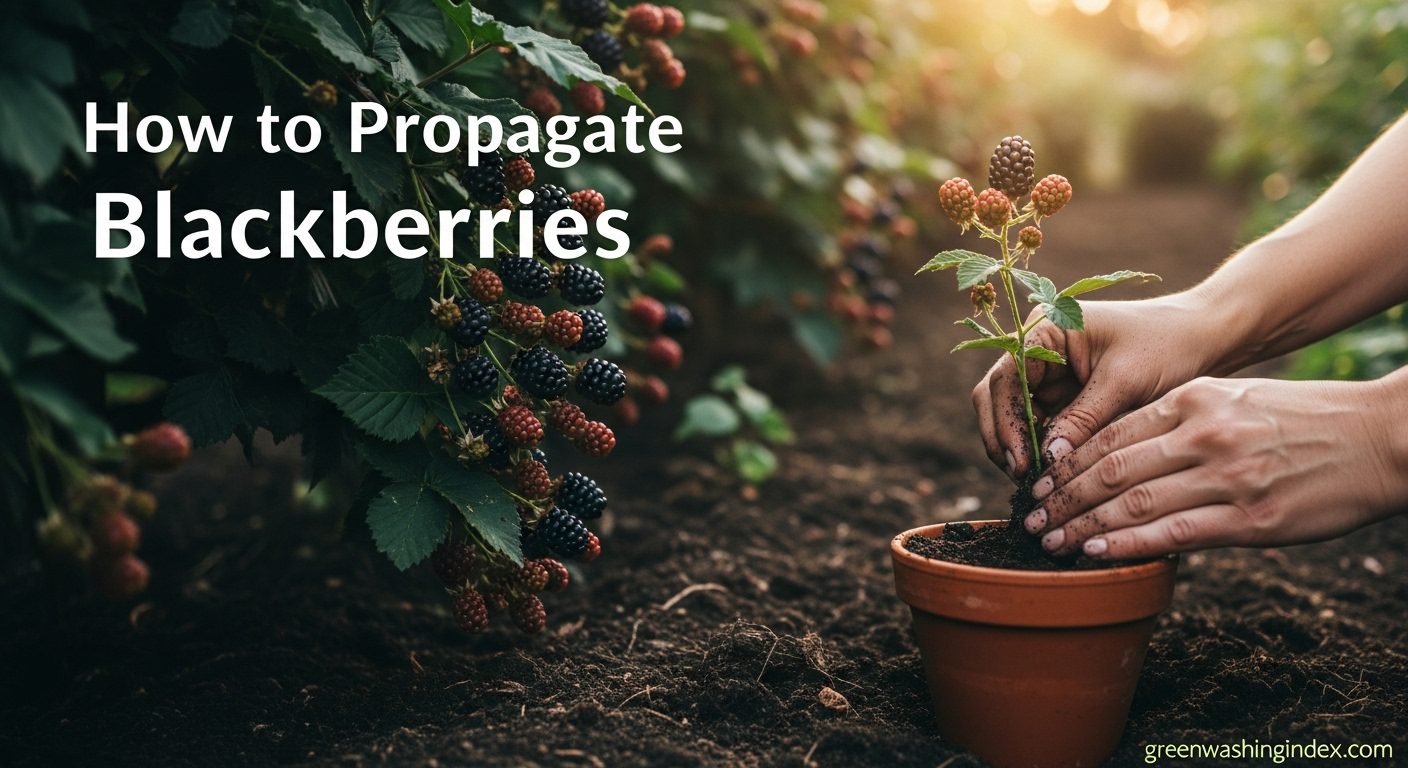
Last summer, I turned five blackberry plants into thirty-seven healthy new ones without spending a dime on rooting hormones or chemical fertilizers. The secret? Understanding how blackberries naturally reproduce and working with their biology instead of against it.
Propagating blackberries organically saves you money while creating a sustainable berry patch that produces fruit for decades. Whether you’re expanding your existing blackberry hedge or sharing plants with neighbors, these four proven methods will help you multiply your plants naturally.
I’ve tested each propagation technique over the past six years in my zone 7 garden, tracking success rates and timing. While commercial growers often rely on synthetic rooting compounds, I’ve found that organic methods produce equally strong plants—they just need a bit more patience and the right approach.
Blackberries belong to the Rubus genus, which includes raspberries and other brambles. These plants evolved to spread aggressively through multiple reproduction strategies, making them surprisingly easy to propagate once you understand their natural tendencies.
The plant’s structure gives us clues about propagation potential. Those long, arching canes that reach toward the ground? They’re designed to root wherever they touch soil. The extensive root system spreading underground? It’s programmed to send up new shoots. Even cut stems contain enough stored energy to generate new roots under the right conditions.
Most blackberry varieties fall into two categories: erect types that grow upright and trailing types that sprawl along the ground. Trailing varieties typically root more easily from tip layering, while erect types respond better to root cuttings. Knowing your variety helps you choose the most successful propagation method.
The plant’s natural dormancy cycle plays a crucial role in propagation success. During dormancy (late fall through early spring), energy concentrates in the roots and lower stems. This stored energy fuels new growth when we take cuttings or divide plants. Working with this cycle rather than against it dramatically improves success rates.
Tip layering mimics what blackberries do naturally in the wild. When a long cane touches the ground, it sends out roots and eventually becomes a new plant. This method requires no special equipment and has the highest success rate—around 95% in my experience.
Start tip layering in late summer when canes are still flexible but growth has slowed. I typically begin in August here in zone 7, but adjust based on your climate. Look for healthy first-year canes (primocanes) that are at least 4 feet long. These younger canes root more readily than older, woody growth.
Select a vigorous cane and gently bend it toward the ground. If it resists, wait a few days after rain when stems are more pliable. Never force a cane—cracking damages the vascular system and reduces rooting success.
Dig a hole 4-6 inches deep where the cane tip will touch the ground. Mix the excavated soil with compost to create a nutrient-rich rooting medium. I add a handful of worm castings for extra organic matter and beneficial microbes that encourage root development.
Remove leaves from the bottom 6 inches of the cane tip, but keep the growing point intact. Make a small scratch on the underside of the stem where it will contact soil—this wound stimulates root hormone production naturally. No synthetic rooting powder needed.
Place the cane tip in the hole with the growing point sticking up slightly. Cover with your amended soil mixture, leaving just the tip exposed. Place a rock or brick over the buried section to keep it in place. This weight also maintains good soil contact, essential for root formation.
Water thoroughly and maintain consistent moisture throughout the rooting period. In my garden, I check weekly and water when the top inch of soil feels dry. Mulch around the area with straw or shredded leaves to retain moisture and suppress weeds.
Roots typically form within 6-8 weeks. You’ll know rooting has occurred when you see new growth emerging from the tip. Resist the urge to dig up and check—disturbing developing roots sets back the process. I’ve learned patience pays off with better-established plants.
Leave the layered tip attached to the parent plant through winter. This connection provides nutrients while the new root system develops. The following spring, cut the connection and transplant your new blackberry plant to its permanent location.
Root cuttings offer the best method for propagating large numbers of blackberry plants organically. One mature plant can yield 20-30 root cuttings, each potentially becoming a new plant. This technique works especially well for erect blackberry varieties.
Timing matters significantly with root cuttings. Take them during dormancy when roots store maximum energy—typically December through February in most climates. I mark my calendar for early January, which gives me the best success rates in zone 7.
Choose a healthy parent plant at least two years old. Younger plants haven’t developed the robust root system needed for successful cuttings. Avoid plants showing any disease symptoms—you’ll propagate problems along with the plant.
Dig carefully 12-18 inches from the plant’s crown to locate pencil-thick roots. These medium-sized roots balance stored energy with regeneration capacity. Thinner roots lack energy reserves, while thicker ones may not sprout as readily.
Cut root sections 3-4 inches long using clean, sharp pruners. Make straight cuts on the end closest to the crown and angled cuts on the far end. This marking system prevents planting cuttings upside down—a common mistake that reduces success rates.
I prepare organic rooting medium using equal parts compost, peat moss (or coconut coir for sustainability), and perlite. This mixture provides nutrients, moisture retention, and drainage. Some gardeners add mycorrhizal fungi to encourage root development, though I’ve found it unnecessary with good compost.
Fill containers or a prepared bed with your rooting medium. Insert cuttings vertically with the straight-cut end up, buried so the top sits just below the soil surface. Space cuttings 2 inches apart in rows 4 inches apart.
Water gently to settle the soil around cuttings. Maintain consistent moisture without waterlogging—root cuttings rot easily in saturated soil. I use a spray bottle for the first few weeks to avoid disturbing the cuttings.
Place containers in a cool location (40-50°F) for 2-3 weeks to satisfy chilling requirements. An unheated garage or cold frame works perfectly. This cold period triggers the biological processes that initiate sprouting.
After chilling, move cuttings to a warmer area (60-70°F) with bright, indirect light. New shoots typically emerge within 3-4 weeks. Once shoots appear, gradually increase light exposure to prevent stretching.
Transplant rooted cuttings to individual pots once they develop 2-3 sets of true leaves. Grow them on for another month before hardening off and planting in the garden. This extra growing time produces stronger plants with better survival rates.
Stem cuttings root faster than other methods, producing transplantable plants in 6-8 weeks during the growing season. While success rates average 60-70%, the speed makes this method valuable for quickly increasing plant numbers.
Unlike root cuttings taken during dormancy, stem cuttings work best with actively growing wood. I take softwood cuttings in late spring and semi-hardwood cuttings in mid-summer. Each type has advantages depending on your timeline and available plant material.
For softwood cuttings, choose new growth that snaps cleanly when bent. This young tissue roots readily but requires careful moisture management. Take cuttings early morning when stems are fully hydrated for best results.
Semi-hardwood cuttings come from partially mature growth that bends without snapping. These cuttings tolerate moisture stress better than softwood but root more slowly. I prefer semi-hardwood for its reliability, especially for beginning propagators.
Cut 4-6 inch sections from healthy, disease-free canes using sharp, sterilized pruners. Each cutting needs at least two nodes—one for rooting and one for shoot development. Make cuts just below a node where natural rooting hormones concentrate.
Remove all leaves except the top two, then cut these remaining leaves in half. This reduction limits moisture loss while maintaining photosynthesis. Leaving too many leaves causes wilting before roots form.
While commercial rooting hormones speed the process, several organic alternatives work well. Willow water, made by soaking young willow branches in water for 24 hours, contains natural rooting compounds. I’ve also had success with diluted honey (1 tablespoon per cup of water) as a mild rooting stimulant and antifungal.
Prepare rooting medium using 2 parts perlite to 1 part vermiculite, or use straight perlite for maximum drainage. Stem cuttings rot easily in heavy media, so drainage trumps nutrient content initially. You’ll add nutrients once roots form.
Insert cuttings 2 inches deep in moist medium, spacing them so leaves don’t touch. This spacing improves air circulation and reduces disease problems. Firm the medium around each cutting to eliminate air pockets.
Create humidity chambers using clear plastic bags or bottles over the cuttings. This mini-greenhouse environment maintains the high humidity essential for rooting. Ventilate daily by removing covers briefly to prevent fungal growth.
Place cuttings in bright, indirect light at 65-75°F. Direct sun overheats cuttings, while too little light slows rooting. I use a north-facing window or shade cloth in my greenhouse for ideal conditions.
Mist cuttings daily or as needed to keep leaves turgid. The medium should stay moist but never soggy. After 2-3 weeks, gently tug cuttings to check for resistance indicating root development.
Once rooted, gradually reduce humidity over a week by increasing ventilation. Transplant to potting soil when roots reach 1 inch long. These young plants need protection from temperature extremes for their first season.
Blackberries naturally produce suckers—shoots emerging from spreading roots. These suckers already have partial root systems, making them ideal for quick, easy propagation. Division works year-round but succeeds best during dormancy.
Not all blackberry varieties produce suckers equally. Erect varieties tend to sucker prolifically, sometimes to the point of becoming invasive. Trailing varieties produce fewer suckers, making each one more valuable for propagation.
Look for shoots emerging 6-24 inches from the parent plant. These likely have enough roots for successful transplanting. Closer suckers may lack adequate root development, while distant ones might be completely independent plants.
Choose suckers with healthy foliage and vigorous growth. Weak or yellowing suckers often indicate poor root development or disease issues. I select suckers at least 12 inches tall with multiple leaves for best transplant success.
Mark selected suckers in late summer for dormant season division. This planning ensures you remember which suckers showed the best growth characteristics. I use biodegradable marking tape that decomposes if forgotten.
Water the area thoroughly the day before digging to soften soil and reduce root damage. Dry soil crumbles away from roots, while wet soil clings and can be gently removed without tearing delicate root hairs.
Use a sharp spade to cut straight down around the sucker, creating a circle 6-8 inches from the stem. This severs the connection to the parent plant while preserving the sucker’s developing roots. Angle the spade under the root ball and lift carefully.
Examine the root system before transplanting. Healthy white roots indicate good candidates for transplanting. Brown or black roots suggest problems—these suckers rarely establish successfully. Trim any damaged roots with clean pruners.
Prepare the new planting site with organic matter worked into the soil. Blackberries prefer slightly acidic soil (pH 5.5-7.0) with good drainage. I add compost and aged manure to improve both structure and fertility naturally.
Plant suckers at the same depth they grew originally. The soil line on the stem shows the correct planting depth. Planting too deep encourages crown rot, while shallow planting exposes roots to drying.
Water immediately after planting and maintain consistent moisture for the first month. Mulch with 3-4 inches of organic material to conserve moisture and suppress weeds. Keep mulch away from stems to prevent rot.
Protect newly transplanted suckers from extreme weather. In hot climates, provide afternoon shade for the first two weeks. In cold regions, wait until spring for transplanting or provide winter protection with straw mulch.
Success with any propagation method starts with proper soil preparation. Blackberries thrive in organic-rich soil that mimics forest edge conditions—their natural habitat. Building this environment using sustainable practices creates healthier, more productive plants.
Test your soil before propagating to understand its current condition. Blackberries prefer slightly acidic to neutral pH (5.5-7.0). If adjustment is needed, use organic amendments like sulfur to lower pH or lime to raise it. Apply amendments months before propagating for best results.
Incorporate organic matter generously into propagation beds. I add 4-6 inches of compost annually, plus aged manure when available. This organic matter improves drainage in clay soils and water retention in sandy soils while providing slow-release nutrients.
Consider cover cropping in future propagation areas. Legumes like clover fix nitrogen naturally, while buckwheat adds phosphorus. Till these crops under before flowering to maximize soil improvement. This practice builds soil biology critical for organic growing success.
Mulching plays multiple roles in organic propagation. Beyond moisture retention and weed suppression, organic mulches decompose slowly, feeding soil organisms. I use a combination of straw, leaves, and grass clippings, each contributing different nutrients as they break down.
When composting blackberries and other garden waste, you create valuable amendment for future propagation projects. Blackberry prunings, when properly composted, return nutrients to the soil in a form readily available to new plants.
Successful organic propagation depends heavily on timing. Each method has an optimal window based on plant biology and seasonal conditions. Understanding these windows helps you plan propagation activities for highest success rates.
Spring propagation takes advantage of natural growth hormones surging through plants. Stem cuttings taken in late spring root quickly in warming soil. Suckers divided in early spring establish before summer heat stress. This timing aligns with the plant’s natural growth cycle.
Summer presents challenges and opportunities for propagation. Tip layering works best in late summer when canes are long and flexible. Semi-hardwood cuttings taken in mid-summer root well with proper moisture management. Avoid propagating during extreme heat—stress reduces success rates significantly.
Fall propagation focuses on preparation for next season. Mark suckers for spring division. Begin tip layering that will root over winter. Prepare beds for root cuttings. This planning period sets up successful spring propagation.
Winter dormancy offers ideal conditions for root cuttings. The plant’s energy concentrates in roots, providing maximum resources for regeneration. Take cuttings during coldest months but before spring growth begins. This timing produces the strongest new plants.
Even experienced gardeners encounter propagation challenges. Understanding common problems and their organic solutions helps you adjust techniques for better success. Most issues stem from environmental conditions rather than technique errors.
Fungal diseases plague propagation efforts, especially in humid conditions. Gray mold and root rot destroy cuttings quickly. Prevent problems by ensuring good air circulation, avoiding overwatering, and using sterile media. Cinnamon dusted on cut surfaces provides natural antifungal protection.
Poor rooting frustrates many propagators. Causes include wrong timing, inadequate moisture, or incorrect temperature. Stem cuttings need consistent moisture and warmth. Root cuttings require cold treatment followed by gradual warming. Adjusting these factors usually solves rooting problems.
Pest damage on new growth weakens developing plants. Aphids, spider mites, and Japanese beetles target tender shoots. Inspect regularly and treat organically with insecticidal soap or neem oil. Strong plants resist pests better, so focus on optimal growing conditions.
Nutrient deficiencies appear as yellowing leaves or poor growth. New cuttings initially rely on stored energy, but soon need nutrients. Begin feeding with diluted organic fertilizer once roots establish. Fish emulsion or compost tea provides gentle nutrition without burning tender roots.
Environmental stress from temperature extremes, wind, or sun exposure reduces propagation success. Protect cuttings with shade cloth, cold frames, or cloches as needed. Gradual acclimatization to outdoor conditions prevents shock when transplanting.
Commercial rooting hormones speed propagation but aren’t necessary for success. Several organic alternatives stimulate rooting naturally while maintaining sustainable growing practices. These methods may take slightly longer but produce equally healthy plants.
Willow water remains my favorite organic rooting stimulant. Young willow shoots contain indolebutyric acid (IBA) and salicylic acid—natural rooting compounds. Soak fresh willow cuttings in water for 24-48 hours, then use this water for watering cuttings. Make fresh batches weekly for best potency.
Honey serves dual purposes as a mild rooting stimulant and antifungal agent. Mix one tablespoon raw honey per cup of warm water. Dip cuttings before planting or water with diluted solution weekly. The sugars feed beneficial microbes while enzymes protect against pathogens.
Aloe vera gel contains natural rooting hormones and antibacterial compounds. Fresh gel from leaves works better than processed products. Dip cutting ends in pure gel before planting. The gel also helps retain moisture at the cutting site.
Coconut water provides cytokinins—plant hormones that stimulate cell division and root development. Use fresh coconut water undiluted for soaking cuttings or dilute 1:1 with water for regular watering. The natural sugars and minerals support overall plant health.
Compost tea inoculates cuttings with beneficial microorganisms that enhance rooting. Brew actively aerated compost tea for 24 hours, then use immediately for best results. The microbes protect against pathogens while improving nutrient availability.
Propagating blackberries organically fits into a larger sustainable garden system. By producing your own plants, you reduce transportation emissions, plastic waste from nursery pots, and reliance on industrial agriculture. This self-sufficiency creates a more resilient food system.
Integrate propagation areas into existing garden spaces rather than maintaining separate nursery beds. Tip-layered canes along fence lines become living boundaries. Root cutting beds double as vegetable gardens once cuttings are harvested. This integration maximizes space efficiency.
Share surplus plants with neighbors and community gardens. One successful propagation session produces more plants than most gardens need. Trading plants builds community connections while increasing local food production and genetic diversity.
Document your propagation successes and failures. Recording timing, techniques, and results helps refine methods for your specific climate and varieties. This knowledge becomes valuable for teaching others and preserving heirloom varieties.
Consider propagating native blackberry species for habitat restoration projects. Native varieties support more wildlife than cultivated types while requiring less maintenance. Your propagation skills can contribute to environmental restoration efforts.
Tip layering offers the highest success rate with minimal skill required. Simply bend a cane to the ground, bury the tip, and wait. Nature does most of the work, making this ideal for first-time propagators. Success rates exceed 90% even for complete beginners.
Timing depends on your chosen method. Take root cuttings during winter dormancy (December-February). Start tip layering in late summer (August-September). Divide suckers in early spring or fall. Stem cuttings work best in late spring through mid-summer. Each method has an optimal window for success.
Rooting time varies by method and conditions. Stem cuttings typically root in 3-6 weeks during growing season. Root cuttings need 6-8 weeks including cold treatment. Tip layers develop roots in 6-8 weeks but should overwinter before transplanting. Patience produces stronger plants.
While some gardeners report success rooting blackberry cuttings in water, soil or soilless media produces better results. Water-rooted cuttings develop fragile roots that often break during transplanting. If you try water rooting, transplant immediately when roots reach 1 inch and expect some losses.
Thornless varieties propagate using identical methods with similar success rates. However, some thornless cultivars are patented, making propagation for sale illegal. Home gardeners can freely propagate for personal use. Thornless varieties sometimes revert to thorny growth—select only thornless shoots for propagation.
Cutting failure usually results from moisture problems—either too much or too little. Overwatering causes rot while underwatering leads to desiccation. Other common causes include wrong timing, disease, extreme temperatures, or poor cutting selection. Review your technique and environmental conditions to identify the issue.
Rooting hormone speeds the process but isn’t necessary for success. Organic alternatives like willow water or honey work well for sustainable gardening. Healthy cuttings taken at the right time root successfully without any treatment. Focus on proper timing and technique rather than relying on rooting hormones.
A mature blackberry plant can yield 20-30 root cuttings, 5-10 tip layers, numerous stem cuttings, and several suckers annually. Theoretically, you could produce 50+ plants yearly from one parent. Practically, expect 10-20 successful plants accounting for failures and plant stress from over-harvesting.
Propagating blackberries organically connects you with traditional gardening practices while building a sustainable food system. These four methods—tip layering, root cuttings, stem cuttings, and sucker division—offer options for every situation and skill level.
Success comes from understanding blackberry biology and working with natural processes rather than forcing quick results with chemicals. Each method has its place depending on your timeline, available plants, and desired quantity. Start with tip layering for guaranteed success, then experiment with other techniques as your confidence grows.
The organic approach takes slightly longer than conventional methods but produces resilient plants adapted to your garden’s conditions. By avoiding synthetic inputs, you create a healthier environment for beneficial insects, soil organisms, and ultimately, your family.
Whether you’re expanding your berry patch, sharing with friends, or starting a small nursery business, these propagation techniques provide unlimited plants from your existing blackberries. Combined with sustainable growing practices, you’ll enjoy abundant harvests for years while treading lightly on the earth.
Don't let aphids, slugs, and caterpillars ruin another plant. Take back control with simple, natural methods that actually work.
