

Wet snow presents one of the toughest challenges for any snowblower operator. I’ve spent countless winters battling heavy, moisture-laden snow that sticks to everything and clogs even the best machines. After years of trial and error, I’ve developed a system that works consistently, keeping both my equipment and my back in good shape.
The difference between wet and dry snow removal is like comparing shoveling sand versus moving wet concrete. Wet snow can weigh three to four times more than its fluffy counterpart, putting serious strain on your snowblower’s engine and auger system. Understanding how to handle these conditions safely and efficiently will save you hours of frustration and potentially expensive repairs.
In this comprehensive guide, we’ll cover everything from pre-storm preparation to post-use maintenance, with a strong focus on safety throughout. Whether you’re dealing with early spring slush or that heavy, back-breaking snow that falls when temperatures hover near freezing, these techniques will help you clear your driveway efficiently while protecting your investment in outdoor power equipment.
Wet snow forms when temperatures stay between 28°F and 34°F during snowfall. At these temperatures, snowflakes partially melt as they fall, creating heavy, dense accumulations that stick together like nature’s own construction material. I’ve measured wet snow that weighs up to 20 pounds per cubic foot, compared to just 5-7 pounds for dry powder.
The moisture content in wet snow creates several specific challenges for snowblower operation. First, the snow’s adhesive properties cause it to stick to every surface it touches – the auger housing, chute walls, and discharge opening. Second, the weight puts tremendous strain on belts, shear pins, and the engine itself. Third, the compacted nature of wet snow reduces throwing distance by up to 60% compared to dry conditions.
Your snowblower’s performance in wet snow depends largely on its design and power rating. Single-stage snowblowers struggle the most, as their rubber augers aren’t designed to break up dense, packed material. Two-stage models fare better with their metal augers and separate impeller systems, while three-stage snowblowers with their accelerator paddles excel at processing wet, heavy accumulations.
Weather timing plays a crucial role in wet snow management. I’ve learned to monitor temperature trends closely – if the forecast shows temperatures rising above 32°F during or after snowfall, I prepare for wet conditions. Similarly, early season storms in late fall and late season events in spring almost always produce wet, heavy snow that requires special handling techniques.
Proper preparation makes the difference between smooth operation and constant frustration when dealing with wet snow. I start my preparation routine at least 30 minutes before I plan to clear snow, giving myself time to properly set up both the equipment and the work area.
Begin with a thorough equipment inspection. Check your fuel level – you’ll burn through gas faster in wet conditions, so top off the tank. Examine the auger and impeller for any damage or wear that wet snow might exploit. Test the chute rotation and deflector controls, as these need to work smoothly when you’re constantly adjusting for reduced throwing distance. Verify that all shear pins are intact and keep spares in your pocket.
Applying a non-stick coating to critical surfaces dramatically improves performance in wet snow. I use a silicone-based spray or cooking spray on the inside of the chute, the auger housing, and the impeller chamber. Apply these coatings liberally – wet snow will strip them away quickly, so don’t be shy. Some operators swear by car wax or specialized snow release products, and I’ve found both work well when applied properly.
Adjust your snowblower’s settings specifically for wet conditions. Lower the skid shoes to raise the auger housing slightly – this prevents the machine from digging too deep into heavy snow and overloading. Set the chute angle lower than usual since wet snow won’t travel as far. If your model has variable speed control, prepare to use slower forward speeds to give the auger more time to process the dense material.
Prepare your work area by planning your clearing pattern in advance. With wet snow’s reduced throwing distance, you’ll need to adjust your usual routes. I mark any obstacles that might be hidden under the snow with tall stakes, as wet snow tends to accumulate unevenly and can obscure hazards. Clear any loose debris from the area – wet snow will pick up and throw objects with more force than dry powder.
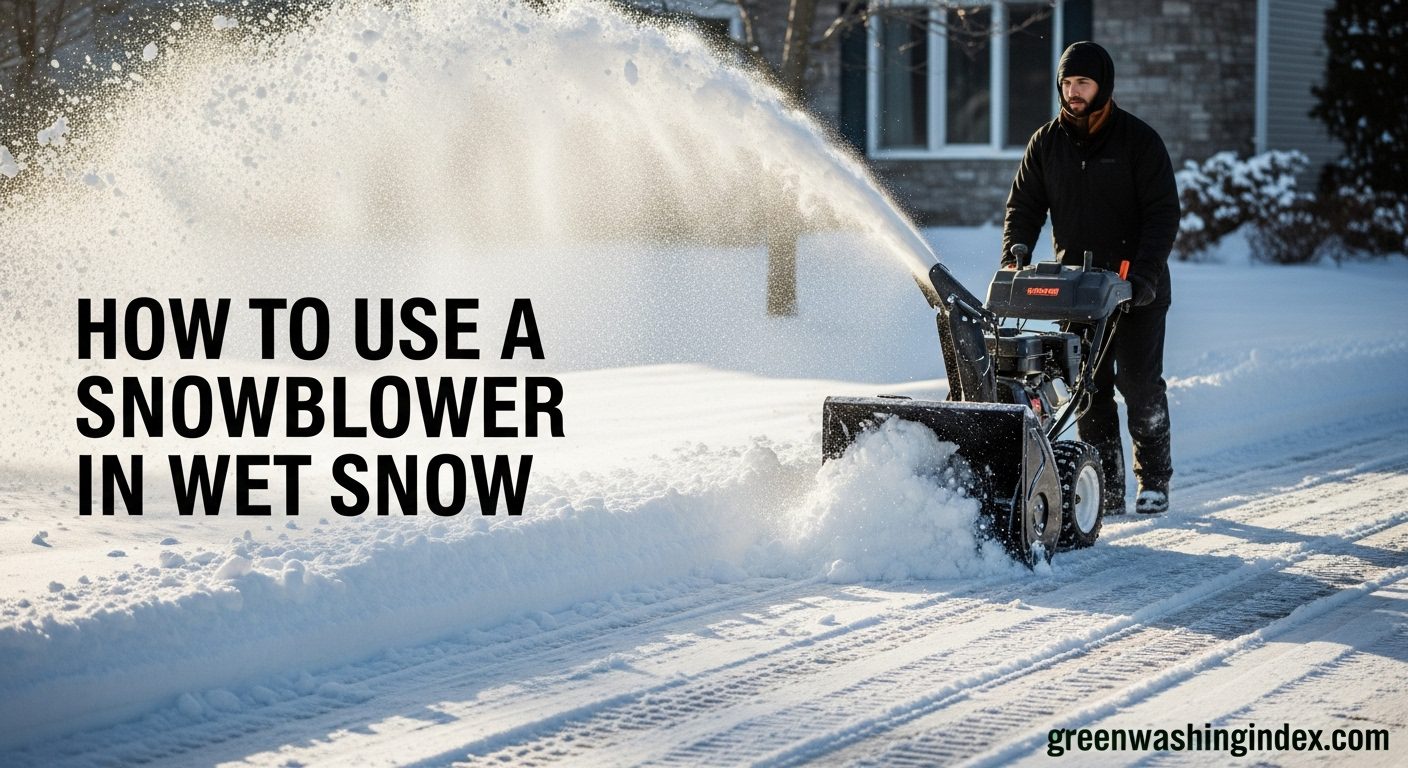
Operating a snowblower in wet snow requires patience and modified techniques compared to clearing dry powder. I’ve developed a systematic approach that prioritizes safety while maximizing efficiency, even in the worst conditions.
Start with a slow, steady pace – rushing leads to clogs and potential damage. I operate at about half my normal speed in wet snow, giving the auger system time to fully process each bite. Take narrower passes than usual, using only about two-thirds of your auger width. This reduces the load on your engine and improves the machine’s ability to throw the heavy material clear of your work area.
The key to preventing clogs lies in maintaining consistent auger speed and avoiding sudden stops. When I feel resistance building, I immediately back off the forward speed rather than forcing through. If the engine starts to bog down, I lift the front of the snowblower slightly to reduce the load, then slowly re-engage. This technique has saved countless shear pins over the years.
Chute management becomes critical in wet conditions. I adjust the discharge direction more frequently than with dry snow, always aiming away from areas I’ve already cleared. Wet snow tends to fall in clumps rather than dispersing, so poor aim means moving the same snow multiple times. Keep the deflector set low – trying to throw wet snow high only increases the chance of clogs.
Working in stages proves most effective for deep, wet accumulations. Rather than trying to clear full depth in one pass, I make an initial pass at half depth, then return for the bottom layer. This approach prevents overloading and actually saves time compared to fighting through constant clogs. For extremely wet conditions, I’ll even make three passes, each removing about one-third of the total depth.
Safety awareness intensifies in wet conditions. The extra weight and resistance mean the snowblower can suddenly grab and pull if it hits hidden obstacles. I maintain a firm grip with both hands at all times and never attempt to clear clogs or adjust the chute while the engine is running. Wet snow also creates slippery conditions underfoot, so I wear boots with aggressive treads and take smaller steps.
Clogs are inevitable when working with wet snow, but proper technique minimizes their frequency and makes clearing them safer. I’ve learned that preventing clogs is far easier than dealing with them once they occur.
Prevention starts with maintaining momentum. I never stop moving while the auger is engaged in wet snow – even pausing for a few seconds can cause accumulation in the chute. When I need to turn at the end of a pass, I disengage the auger first, make my turn, then re-engage once I’m moving forward again. This simple technique reduces clogs by about 70% in my experience.
Watch for warning signs of impending clogs. The discharge pattern changes first – instead of a steady stream, you’ll see intermittent chunks. The engine note changes as it works harder to maintain auger speed. The throwing distance decreases noticeably. When I detect any of these signs, I immediately reduce forward speed and may even back up slightly to clear the system.
When a clog does occur, safety becomes paramount. First, I disengage both the auger and drive, then shut off the engine completely. Never assume the auger has stopped spinning – wet snow can mask continued rotation. I wait at least 10 seconds after engine shutdown before approaching the clogged area. This waiting period has prevented several potential injuries over the years.
Use the proper tool for clearing clogs – never your hands, even with gloves. I keep a clearing tool attached to my snowblower at all times. If your model didn’t come with one, a sturdy wooden broom handle works well. Insert the tool into the discharge chute from the outside, working to break up the compacted snow. For auger housing clogs, work from the front, being careful not to damage the auger blades or scraper bar.
After clearing a clog, I always reapply non-stick coating before restarting. This extra step takes just a minute but significantly reduces the chance of immediate re-clogging. Start the engine and run the auger briefly without engaging the drive to ensure everything spins freely. Then ease back into work at an even slower pace until you’re confident the system is functioning properly.
Optimizing your snowblower for wet conditions involves both temporary adjustments and potentially permanent modifications. I’ve experimented with numerous setups over the years and found several that consistently improve wet snow performance.
Skid shoe adjustment proves critical for wet snow operation. I raise them about 1/4 inch higher than my dry snow setting, which lifts the auger housing slightly off the ground. This prevents the machine from digging too deep and overwhelming the auger system. On gravel driveways, I go even higher to avoid picking up stones that wet snow readily incorporates.
Belt tension affects performance significantly in heavy, wet conditions. Loose belts slip under load, reducing auger speed just when you need maximum power. I check belt tension before each wet snow event, adjusting according to manufacturer specifications. If your belts are more than two seasons old, consider replacement – worn belts simply can’t handle the extra stress of wet snow.
Some operators modify their chutes for better wet snow performance. While I don’t recommend permanent alterations that void warranties, temporary modifications can help. I’ve had success with applying automotive paste wax to the inside of metal chutes, creating a slicker surface than spray coatings alone. Some users install aftermarket polymer chute liners, though results vary by model.
Engine modifications should be approached cautiously. While some suggest adjusting the governor for more RPMs, this can cause premature wear and potential damage. Instead, I focus on ensuring the engine runs at peak efficiency within factory specifications. This means fresh spark plugs, clean air filters, and proper carburetor adjustment – basic maintenance that many operators overlook.
Consider upgrading to snow-specific accessories designed for wet conditions. Heavy-duty shear pins provide extra strength for dense snow, though they may not protect the gearbox as well as standard pins. Non-stick spray applicator systems automatically coat the chute during operation. LED lights improve visibility during the dark, overcast conditions that often accompany wet snow events.
Wet snow accelerates wear and promotes corrosion, making proper maintenance absolutely essential. I follow a strict protocol during and after each use to protect my equipment and ensure it’s ready for the next storm.
During operation, I take periodic maintenance breaks every 30-45 minutes. These breaks serve multiple purposes: allowing the engine to cool slightly, reapplying non-stick coatings, and checking for any developing issues. I inspect belt condition, verify shear pins remain intact, and clear any accumulation around the engine cooling fins. This proactive approach has prevented numerous equipment failures over the years.
Immediately after use, while the engine is still warm, I clear all remaining snow from the machine. Wet snow left on equipment quickly freezes into concrete-hard ice that’s nearly impossible to remove. I run the auger for 30 seconds in a clear area to fling out any remaining slush, then shut down and manually clear the auger housing, chute, and impeller area.
The drying process is crucial for preventing rust and corrosion. I move the snowblower into a garage or shed where it can dry completely. If possible, I position a fan to circulate air around the machine, speeding the drying process. For the auger housing and chute, I wipe down metal surfaces with a dry cloth, then apply a light coat of WD-40 or similar water-displacing spray.
Post-storm maintenance extends equipment life significantly. I check and potentially replace spark plugs more frequently when regularly dealing with wet snow, as the engine works harder and runs hotter. The air filter needs cleaning or replacement more often due to the humid conditions. I also inspect and lubricate all control cables, as wet snow and road salt accelerate cable degradation.
Following green cleaning habits for equipment maintenance reduces environmental impact while keeping your snowblower in top condition. I use biodegradable degreasers for cleaning and properly dispose of old oil and filters through recycling programs. This approach aligns with maintaining an eco-friendly home maintenance routine throughout the seasons.
Even with proper technique, wet snow creates unique problems that require specific solutions. I’ve compiled troubleshooting steps for the most common issues encountered during wet snow removal.
Reduced throwing distance tops the complaint list. If your snowblower barely moves wet snow beyond the auger housing, first check engine RPMs – the engine may not be reaching full speed due to governor issues or fuel problems. Clean or replace the spark plug, as wet conditions can cause fouling. Verify the impeller-to-housing clearance hasn’t increased due to wear. Sometimes, simply accepting that wet snow won’t throw as far and adjusting your clearing pattern accordingly is the most practical solution.
Engine bogging under load indicates several potential issues. Start with the simple fixes: ensure you’re using fresh fuel with the proper octane rating, clean the air filter, and verify the choke is fully open once warmed up. Check belt condition and tension – slipping belts cause the engine to labor without effectively driving the auger. If problems persist, the carburetor may need adjustment or cleaning to deliver proper fuel mixture under load.
Excessive vibration during wet snow removal often stems from ice buildup or auger imbalance. Stop immediately and inspect for frozen chunks adhering to the auger or impeller. Check shear pin condition – a partially sheared pin can cause irregular rotation and vibration. Verify the auger hasn’t been bent from hitting hidden obstacles. Sometimes, wet snow simply highlights existing wear issues that dry snow doesn’t reveal.
Drive system problems become apparent in wet conditions as wheels slip on icy surfaces or the extra load overwhelms the transmission. Check tire pressure first – underinflated tires lose traction dramatically on wet surfaces. Inspect drive belts for wear or improper tension. Add tire chains if working on inclines. For friction disk systems, ensure the disk is clean and properly adjusted – wet conditions quickly reveal any drive system weaknesses.
Unusual noises during operation require immediate attention. Squealing usually indicates belt slippage, while grinding suggests metal-on-metal contact from worn bearings or damaged gears. Clicking or popping sounds often mean shear pins are under stress or beginning to fail. I’ve learned to stop at the first unusual sound – continuing operation usually turns minor issues into major repairs.
Safety takes on extra importance when dealing with wet snow’s additional challenges. I’ve developed comprehensive protocols that have kept me injury-free through decades of snow removal.
Personal protective equipment becomes even more critical in wet conditions. I wear waterproof, insulated gloves with good grip – wet snow quickly soaks through regular winter gloves, leading to numbness and reduced control. Safety glasses or goggles protect against wet snow spray, which hits harder than dry powder. Steel-toed boots with aggressive treads provide protection and traction on slippery surfaces.
Never operate a snowblower in wet conditions without proper visibility. Wet snow often falls during gray, overcast conditions with poor natural light. I always use the snowblower’s headlight if equipped, and wear a headlamp for additional illumination. This extra lighting helps identify obstacles and monitor discharge patterns. During heavy snowfall, I stop periodically to clear my safety glasses and check that all lights remain unobstructed.
Electrical safety requires special attention during wet snow events. Never use electric-start features with wet hands or while standing in slush. Ensure all electrical connections remain dry and protected. For corded electric snowblowers, use only outdoor-rated extension cords with ground fault circuit interrupters (GFCI). I inspect cords before and after each use, as wet conditions accelerate insulation breakdown.
Carbon monoxide awareness becomes crucial when engines work harder in wet snow. The increased load means more exhaust production, and calm conditions during wet snowfall reduce natural ventilation. Never run a snowblower in an enclosed space, even briefly. I’ve installed CO detectors in my garage and near entry doors as an extra precaution. If you feel dizzy or nauseous while operating, stop immediately and move to fresh air.
Maintain situational awareness throughout operation. Wet snow muffles sound, making it harder to hear approaching vehicles or other hazards. The reduced visibility from snow spray and foggy conditions requires constant vigilance. I always work in a pattern that keeps me facing potential hazards and never assume drivers can see me through the heavy snow and spray.
Timing proves crucial when dealing with wet snow. I’ve learned that working with nature’s schedule rather than against it makes the job significantly easier and safer.
The ideal time to clear wet snow is during the storm rather than after. I make multiple passes as snow accumulates, removing 3-4 inches at a time rather than waiting for the storm to end. This approach prevents the bottom layers from compacting into an ice-concrete mixture that’s nearly impossible to move. It also reduces strain on equipment and operator.
Temperature monitoring helps predict optimal clearing windows. I watch for temperature drops that might briefly firm up the snow, making it easier to handle. Conversely, if temperatures are rising, I clear immediately before the snow becomes even wetter and heavier. My weather station has become an invaluable tool for timing decisions.
Early morning often provides the best conditions for wet snow removal, as overnight cooling firms up the accumulation. However, this must be balanced against noise ordinances and neighbor consideration. I’ve found that waiting until 7 AM usually provides a good compromise between optimal conditions and community courtesy.
Consider the forecast beyond the current storm. If temperatures will drop significantly after the snow ends, clearing while it’s still wet – though difficult – prevents dealing with frozen, rock-hard accumulations later. Conversely, if warming and rain are forecast, minimal clearing of critical areas might suffice, letting nature handle the rest.
Choosing the right snowblower for predominantly wet snow conditions requires understanding how different designs handle heavy, moisture-laden material.
Two-stage snowblowers generally offer the best performance in wet snow. Their metal augers break up compacted snow while the high-speed impeller provides the force needed to discharge heavy material. I recommend minimum engine sizes of 250cc for two-stage units regularly facing wet snow. Look for models with larger impeller diameters and robust auger gearboxes designed for high-torque situations.
Three-stage snowblowers excel in wet conditions thanks to their center-mounted accelerators that break up snow before it reaches the impeller. This design significantly reduces clogging and improves throwing distance in heavy, wet snow. While more expensive, the time savings and reduced frustration justify the investment for areas that regularly receive wet snow.
Single-stage snowblowers struggle with wet snow and should be avoided for these conditions unless you’re only clearing very light accumulations. Their rubber augers can’t generate enough force to throw wet snow effectively, and the lack of an impeller means frequent clogging. If a single-stage is your only option, limit use to accumulations under 3 inches and work extremely slowly.
Track-drive units provide superior traction in wet, slippery conditions compared to wheeled models. The increased surface area and positive drive eliminate the wheel spin that plagues traditional snowblowers on icy surfaces created by wet snow. While heavier and more expensive, track units prove invaluable for slopes and uneven terrain in wet conditions.
Just as you’d select the right essential gardening tools for specific tasks, choosing appropriate snow removal equipment for your typical conditions ensures better results with less effort.
Wet snow clogs snowblowers because it sticks to surfaces and compacts easily. The moisture makes it adhere to the chute walls and impeller housing, gradually building up until it blocks the discharge path. Prevent clogs by applying non-stick coatings, working at slower speeds, taking narrower passes, and never stopping while the auger is engaged in snow.
Use the slowest forward speed that maintains steady progress, typically 1st or 2nd gear on most models. This gives the auger system maximum time to process the heavy material. I operate at about 50% of my dry snow speed. If the engine bogs down, reduce speed further rather than forcing through.
Yes, wet snow can damage snowblowers if operated improperly. The extra weight and resistance can shear pins, burn out belts, or even damage the gearbox if you force the machine. Prevent damage by working slowly, taking appropriate breaks, maintaining proper belt tension, and never forcing through clogs or heavy accumulations.
No, waiting for wet snow to freeze makes removal much harder and more dangerous. Frozen wet snow becomes like concrete, putting extreme stress on equipment and creating hazardous conditions. Clear wet snow as soon as possible, even if it means multiple passes during the storm.
Silicone spray and cooking spray (PAM) work best for preventing wet snow from sticking. Apply liberally to the chute, auger housing, and impeller before starting. Reapply every 30-45 minutes during operation. Some operators prefer specialized snow-release products or automotive paste wax for longer-lasting protection.
Perform basic maintenance after every wet snow use, including cleaning, drying, and lubricating. Check belts and shear pins before each storm. Change engine oil more frequently – every 25 hours instead of 50 during wet snow season. Replace spark plugs mid-season if regularly dealing with wet conditions.
Three-stage snowblowers handle wet snow better due to their accelerator paddles that break up snow before it reaches the impeller. However, quality two-stage models with sufficient power (250cc+) work well for most wet snow conditions. The choice depends on your typical snow conditions and budget.
Essential safety equipment includes waterproof insulated gloves, safety glasses or goggles, steel-toed boots with aggressive treads, high-visibility clothing, and a clearing tool for clogs. Keep spare shear pins in your pocket and consider wearing a headlamp for improved visibility in poor conditions.
Successfully operating a snowblower in wet snow requires patience, proper technique, and respect for your equipment’s limitations. I’ve learned through years of experience that fighting wet snow with brute force only leads to frustration, equipment damage, and potential injury. Instead, working methodically with the right approach makes even the heaviest, wettest snow manageable.
The key principles remain consistent: work slowly, take narrower passes, maintain your equipment properly, and prioritize safety above speed. Regular application of non-stick coatings, proper timing of snow removal, and immediate post-use maintenance will keep your snowblower running reliably through the worst conditions winter can deliver.
Remember that wet snow challenges even the best equipment and most experienced operators. There’s no shame in taking breaks, making multiple passes, or even deciding conditions are too severe to continue safely. Your health and safety are worth more than a perfectly cleared driveway.
By following the techniques and safety protocols outlined in this guide, you’ll be prepared to handle wet snow conditions confidently and efficiently. Keep this guide handy for reference, and don’t hesitate to review sections as needed throughout the winter season. With practice and patience, you’ll develop your own rhythm for dealing with wet snow, turning a dreaded chore into a manageable task.