

Picture this: You’re ready to tackle your overgrown lawn on a Saturday morning, but your lawn mower’s throttle won’t respond. The engine either runs at full speed or won’t adjust at all. Before you haul it to a repair shop and shell out $75-$150, I’ll show you exactly how to diagnose and fix that throttle cable yourself for less than $15.
After working on dozens of lawn mowers over the years, I’ve found that throttle cable problems are one of the most common issues homeowners face – and thankfully, one of the easiest to fix. Whether your cable is stuck, frayed, or completely broken, this guide will walk you through every step of the repair process.
The throttle cable is essentially a steel wire running inside a protective housing that connects your throttle lever to the engine’s carburetor. When you move the throttle control, it pulls or releases this inner wire, which adjusts a small plate in the carburetor called the throttle plate. This controls how much air and fuel mixture enters the engine, determining its speed.
Think of it like the accelerator pedal in your car, but operated by hand. The cable needs to move smoothly within its housing while maintaining proper tension – too loose and the engine won’t reach full speed, too tight and it might run too fast or not idle properly.
Most lawn mowers use a similar throttle cable design, whether you own a push mower, self-propelled model, or riding mower. The main differences lie in cable length and routing, but the basic repair principles remain the same.
Before diving into repairs, we need to confirm the throttle cable is actually the problem. I’ve seen too many people replace perfectly good cables when the issue was something else entirely.
The most obvious sign is when your throttle lever moves but the engine speed doesn’t change. You might also notice the lever feels unusually stiff or loose compared to normal operation. Sometimes the cable sticks in one position, leaving your engine running at a constant speed regardless of lever position.
Another telltale sign is visible damage to the cable itself. Look for fraying where the inner wire exits the housing, kinks in the cable housing, or rust and corrosion around the connection points. If you see the inner wire poking through the outer housing anywhere along its length, replacement is necessary.
Engine surging or hunting – where the RPMs fluctuate up and down – can also indicate a sticky throttle cable, though this symptom might also point to carburetor issues. The key is to watch the carburetor linkage while someone moves the throttle lever. If the lever moves but the linkage doesn’t, or if it moves erratically, you’ve found your culprit.
Here’s my go-to diagnostic procedure that takes less than five minutes:
First, with the engine off, move the throttle lever through its full range of motion. It should move smoothly without binding or excessive resistance. Feel for any rough spots or positions where it sticks.
Next, disconnect the cable from the carburetor end (we’ll cover how to do this safely in the next section). Now move the throttle lever again. If it moves freely with the cable disconnected, the problem is likely in the carburetor linkage, not the cable. If it’s still stiff or stuck, the cable needs attention.
Finally, with the cable still disconnected, try pulling the inner wire by hand. It should slide in and out of the housing with minimal resistance. If you can’t move it at all, or if it requires excessive force, the cable needs cleaning or replacement.
Working on lawn mower engines requires respect for both mechanical and chemical hazards. I’ve learned these safety rules the hard way, and I strongly recommend you follow them to avoid injury.
Always disconnect the spark plug wire first. This is non-negotiable. Even with the engine off, an accidental pull of the starter cord could cause serious injury if you’re working near moving parts. Remove the wire and tuck it away from the plug.
Let the engine cool completely before starting work. Mufflers and engine blocks stay hot long after shutdown – I’ve got the scars to prove it. Give it at least 30 minutes to cool if you’ve been running it.
Work in a well-ventilated area, especially when using penetrating oils or lubricants. These chemicals can cause dizziness or headaches in enclosed spaces. If you’re working in a garage, open the door.
Wear safety glasses when working with cables under tension. A suddenly released cable can whip around unpredictably. Heavy work gloves protect your hands from sharp cable ends and hot surfaces.
Finally, never attempt repairs with fuel in the tank if you need to tip the mower. Either run it dry or siphon the fuel into an approved container. Gasoline spills are dangerous and can damage your lawn.
One of the best things about throttle cable repair is that you probably already own most of the necessary tools. Here’s what you’ll need:
You’ll need a set of screwdrivers (both flathead and Phillips), needle-nose pliers, and standard pliers. A set of combination wrenches or a socket set will help with cable bracket bolts – most use 7/16″, 1/2″, or 13mm sizes. Wire cutters come in handy if you need to trim a frayed cable end.
For cleaning and lubrication, grab a can of penetrating oil (WD-40 or similar), silicone spray lubricant, and some clean rags. A small wire brush helps remove rust and debris from connection points.
If you’re attempting the budget repair method, you’ll need aluminum crimps (about $2 at any hardware store) and a crimping tool or vise. For cable replacement, obviously you’ll need a new throttle cable – universal cables cost $10-$30, while OEM parts might run slightly higher.
A Z-bend tool makes creating new cable ends easier but isn’t essential – needle-nose pliers work in a pinch. Some people find a cable lubrication tool helpful, though I’ll show you how to lubricate without one.
Keep some zip ties handy for securing the cable along its route, and consider having a small container to hold removed screws and parts. There’s nothing worse than losing that one crucial bolt in your garage floor debris.
Now we get to the actual repair process. I’ll cover three different scenarios: cleaning and lubricating a stuck cable, repairing a broken cable end, and complete cable replacement.
This is often all that’s needed to restore smooth throttle operation, especially after winter storage. Start by removing the air filter cover to access the carburetor linkage – usually just a few screws or clips.
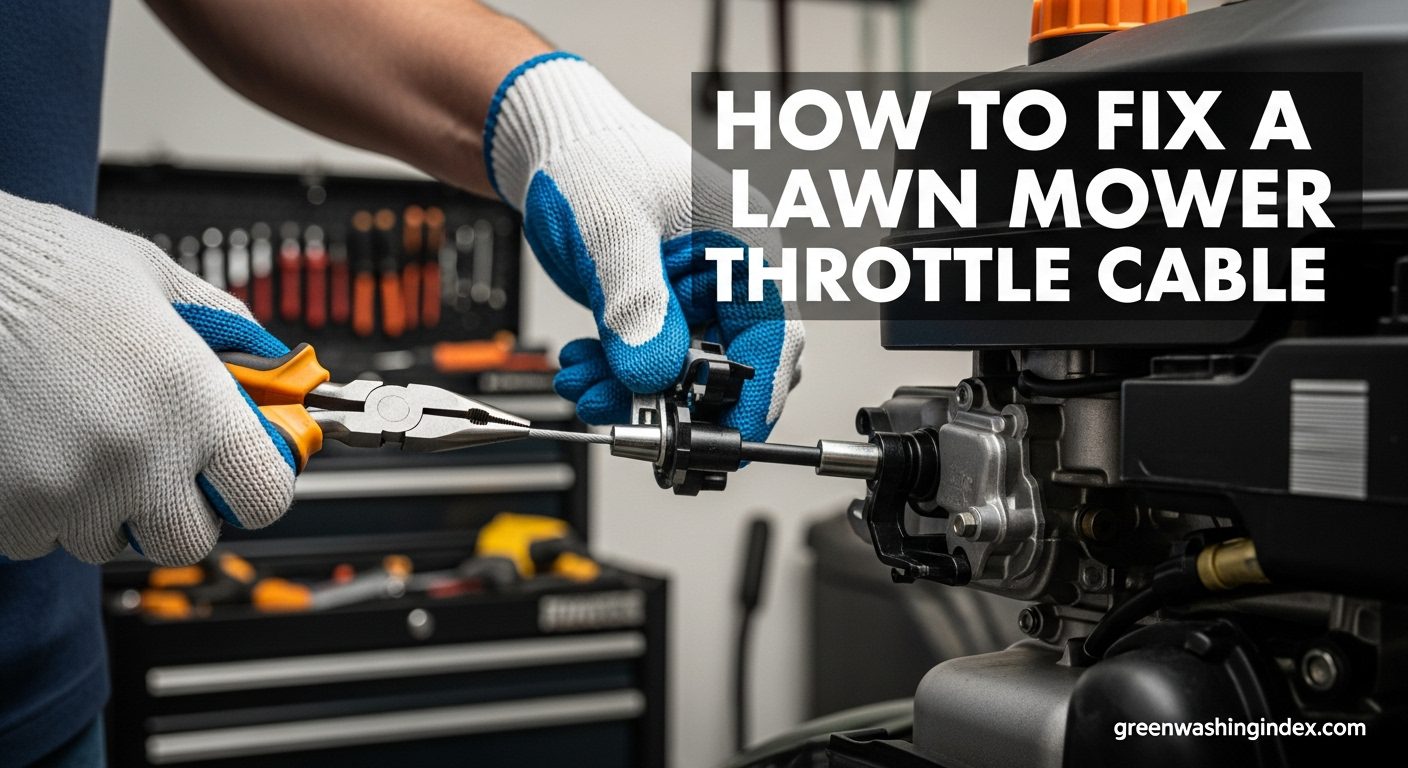
Locate where the throttle cable connects to the carburetor. You’ll see a small metal fitting (called a barrel) that sits in a bracket, with the inner wire extending through to connect to the throttle linkage. Take a photo with your phone before disconnecting anything – trust me, this reference will save you time during reassembly.
Disconnect the cable from the carburetor by either unscrewing the barrel from its bracket or releasing the wire end from the linkage. The exact method varies by mower model, but it’s usually obvious once you look closely.
Now disconnect the cable from the throttle lever end. This might require removing the engine shroud or control panel – typically held by a few screws. Again, photo documentation helps here.
With the cable completely removed, hang it vertically with the carburetor end up. Spray penetrating oil into the top of the cable housing, working the inner wire up and down to distribute the oil throughout. You’ll likely see dirty oil dripping from the bottom – this is good, it means you’re flushing out debris.
Continue flushing until the oil runs clear, then switch to silicone spray lubricant for final lubrication. Silicone won’t attract dirt like petroleum-based oils. Work the cable several dozen times to ensure smooth operation.
If the cable now moves freely, reinstall it in reverse order. Adjust the cable tension (covered in the adjustment section below) and test operation before replacing all covers.
If your inner wire has broken at the end but the cable housing is intact, you might be able to repair it for under $2 using aluminum crimps. This works when there’s enough extra cable length to create a new end.
Pull the broken wire out as far as possible from the housing. You need at least 2 inches of wire beyond where it exits the housing. If you don’t have enough length, you’ll need to replace the entire cable.
Clean the wire end with sandpaper or a wire brush to remove any rust or debris. Create a small loop at the end of the wire, about 1/4 inch in diameter. This loop will attach to your throttle linkage.
Slide an aluminum crimp over the wire, position the loop at the correct size, and crimp it firmly using crimping pliers or a vise. Make sure the crimp is tight enough that you can’t pull it off by hand.
Some people prefer making a Z-bend instead of a loop – this involves bending the wire into a Z-shape that hooks onto the linkage. Either method works, though I find loops more secure.
Test the repair by pulling firmly on the cable before reinstalling. If it holds under reasonable force, proceed with reinstallation and adjustment.
When the cable housing is damaged or the inner wire is too short to repair, complete replacement is necessary. This is still a DIY-friendly job that takes about 30-45 minutes.
Start by obtaining the correct replacement cable. You can use your mower’s model number to find an OEM part, or measure the old cable’s length and get a universal replacement. Universal cables often come longer than needed and can be trimmed to fit.
Document the cable routing with photos before removal. The cable typically runs along the mower handle or frame, held in place by clips or zip ties. Note any spots where it passes through brackets or guides.
Remove the old cable completely, including any mounting brackets if they’re damaged. Clean all connection points with a wire brush and apply a drop of oil to pivot points.
Install the new cable following the same routing as the original. Start at the carburetor end, securing the barrel fitting in its bracket. Route the cable along the frame, securing it with clips or zip ties every 6-8 inches to prevent snagging.
At the throttle lever end, you might need to create a new end fitting if using a universal cable. Follow the instructions that come with the cable, or use the crimp method described earlier.
Before tightening everything, check that the cable moves freely through its full range without binding or kinking. Pay special attention to areas where the cable bends – sharp bends will cause premature wear.
Even a new cable won’t work properly without correct adjustment. This is where many DIY repairs fail, but it’s actually straightforward once you understand the principle.
With the throttle lever in the “slow” or “idle” position, the cable should have slight slack – about 1/8 inch of play. This ensures the engine can return to idle without the cable holding it open.
Move the lever to “fast” or “full throttle” position. The carburetor’s throttle plate should be fully open. You can verify this by looking into the carburetor throat with a flashlight – the butterfly valve should be perpendicular to the throat.
Most cables have an adjustment mechanism – either a threaded barrel where the cable attaches to the bracket, or an inline adjuster along the cable housing. Loosen the lock nut, adjust the cable length to achieve proper operation at both ends of the throttle range, then tighten the lock nut.
Some mowers also have a governed idle speed that’s set at the factory. If your engine won’t idle properly after cable adjustment, consult your owner’s manual for governor adjustment procedures – this is beyond basic cable repair.
Test the adjustment by starting the engine and moving the throttle through its range several times. The engine should respond smoothly without hesitation or surging. If it doesn’t reach full speed, you need less cable slack. If it won’t idle properly, you need more slack.
Even with careful work, you might encounter some challenges during repair. Here are solutions to the most common problems I see.
If lubricating doesn’t free up the cable, the inner wire might be kinked inside the housing. Try gently flexing the cable housing along its length while working the wire – sometimes this can straighten minor kinks.
Check for sharp bends in your cable routing. Even a properly lubricated cable will bind if bent too sharply. Reroute the cable with gentler curves if necessary.
Sometimes corrosion inside the housing is too severe for cleaning. If you can see rust flakes coming out when you spray lubricant, replacement is your best option.
If the engine won’t reach full speed despite proper cable adjustment, check the air filter first. A clogged filter restricts airflow and limits engine speed regardless of throttle position.
Carbon buildup on the carburetor linkage can prevent full throttle operation. Clean all linkage pivot points with carburetor cleaner and apply a drop of light oil.
The governor spring might be disconnected or broken. This small spring helps regulate engine speed and works in conjunction with the throttle. Look for a loose or missing spring near the carburetor.
Universal cables often come with multiple end fittings – make sure you’re using the correct one for your mower. The packaging usually includes a compatibility chart.
If the cable is too long, you can create a gentle loop in the routing to take up excess length. Don’t coil it tightly as this creates friction points.
Some aftermarket cables have slightly different barrel fitting sizes. You might need to enlarge the bracket hole slightly with a drill bit, but be careful not to oversize it.
After fixing numerous throttle cables, I’ve learned that a little prevention goes a long way. These maintenance steps will extend your cable’s life significantly.
Every spring, before your first mow, spray silicone lubricant into both ends of the cable housing. Work the throttle through its range several times to distribute the lubricant. This simple step prevents most sticking problems.
Keep the cable routing secured and protected. Loose cables can snag on obstacles or rub against moving parts, causing premature wear. Check zip ties and clips annually, replacing any that are brittle or broken.
After washing your mower, dry the throttle cable connections thoroughly. Water trapped in the cable housing promotes rust, especially if your mower sits unused for extended periods.
Before winter storage, operate the throttle several times with the engine running to circulate fresh oil through the cable. Then spray the cable with lubricant one final time. This prevents moisture accumulation during storage.
If you live in a coastal area or use your mower in dusty conditions, increase lubrication frequency to every 2-3 months during the mowing season. Salt air and dust are particularly hard on cables.
Consider applying dielectric grease to the cable end connections. This prevents corrosion at the attachment points and makes future disassembly easier. A small tube costs about $5 and lasts years.
Sometimes it’s tempting to keep repairing an old cable, but knowing when to replace can save time and frustration.
Replace the cable if you see any of these conditions: visible fraying with multiple wire strands broken, kinks in the cable housing that won’t straighten, rust holes in the housing, or melted/damaged housing from heat exposure.
Consider replacement if the cable has been repaired multiple times already, or if it’s over 5 years old and showing signs of wear. The $15-30 cost of a new cable is worth the reliability, especially compared to the inconvenience of repeated failures.
However, repair makes sense for newer cables with minor issues, cables with broken ends but intact housing, or when you need a quick fix to finish the current mowing season.
Factor in your time and frustration level too. If you’ve spent an hour trying to free up a stuck cable with no success, the replacement might be worth it for peace of mind alone.
Let’s talk money – one of the main reasons to tackle this repair yourself.
Professional repair shops typically charge $75-150 for throttle cable replacement. This includes diagnosis ($25-40), parts ($15-30), and labor ($35-80). Some shops have minimum charges that make small repairs disproportionately expensive.
DIY repair costs vary by method: cleaning and lubrication costs under $5 if you already have penetrating oil and lubricant. The aluminum crimp repair method costs about $2 for crimps plus your time. Complete cable replacement runs $10-30 for the part, depending on whether you buy universal or OEM.
Even if you need to buy a few basic tools, you’re looking at $30-40 maximum for everything needed – still less than half the professional repair cost. Plus, you’ll have the tools for future repairs.
The time investment is reasonable too. Cleaning takes 20-30 minutes, crimp repair about 30 minutes, and full replacement 45-60 minutes for first-timers. Compared to loading your mower, driving to a shop, waiting for repair, and returning home, DIY is often faster.
Don’t forget the knowledge value either. Once you’ve done this repair, you’ll recognize symptoms earlier and fix problems before they leave you with an unusable mower mid-season.
While the basic principles remain the same, different mower types have unique considerations worth noting.
Push mowers typically have the simplest throttle cable setups. The cable usually runs straight from the handle-mounted control to the engine, with minimal bends. This makes them ideal for first-time DIY repairs.
The main challenge with push mowers is accessing the engine end of the cable, which might require removing the engine shroud. Take photos before disassembly to remember the order of gaskets and spacers.
These mowers often have two cables – one for throttle and one for drive control. Make sure you’re working on the correct cable. The throttle cable is usually the upper lever and connects to the carburetor.
Self-propelled mowers might route the throttle cable alongside the drive cable. Keep them separated during reassembly to prevent interference between the two systems.
Riding mowers have longer throttle cables that route through more complex paths. The cable might pass under the seat, through the frame, or along the steering column. Document the routing carefully.
Some riding mowers use a rigid throttle linkage instead of a cable for part of the connection. Ensure all linkage joints move freely and aren’t worn excessively.
The throttle control might be a lever, a twist grip, or integrated into the ignition switch area. Each style has different adjustment procedures, so consult your owner’s manual for specifics.
Zero-turn mowers often have electronic throttle controls or more complex mechanical linkages. While the basic cable maintenance applies, adjustment might require specific procedures to maintain proper governor function.
These mowers sometimes have safety interlocks tied to the throttle system. Ensure all safety switches function properly after repair to prevent dangerous situations.
When replacing throttle cables, proper disposal of the old cable matters for environmental protection.
Old cables contain steel wire and plastic or rubber housing. Most recycling centers accept these materials if separated. Cut the cable into manageable lengths and remove the inner wire from the housing.
The steel wire can go with scrap metal recycling. Many auto parts stores and mower shops have recycling programs for small metal parts.
Used penetrating oils and lubricants should never go down drains or onto the ground. Collect waste oil in a container and take it to a hazardous waste disposal facility or auto parts store that accepts used fluids.
If you’re maintaining your lawn equipment regularly, consider switching to biodegradable lubricants. They perform well and reduce environmental impact if accidentally spilled.
Keep old cable parts that are still good as spares. The barrel fittings, adjustment nuts, and brackets from old cables often fit other small engine applications.
There’s no set replacement interval for throttle cables. With proper maintenance, they can last the life of the mower. I’ve seen well-maintained cables work perfectly after 10+ years, while neglected ones fail in 2-3 years. Focus on annual lubrication and inspection rather than predetermined replacement.
While automotive throttle cables might fit physically, they’re not recommended. Lawn mower cables are designed for different tension loads and environmental exposure. The fittings rarely match properly, and automotive cables often lack the flexibility needed for mower applications. Stick with mower-specific or universal small engine cables.
Repeated failure at the same location indicates a problem with cable routing or external damage. Check for sharp edges rubbing the cable, excessive heat from the muffler, or too sharp of a bend at that point. Sometimes a missing cable guide causes the cable to flex repeatedly at one spot, creating a fatigue failure point.
No, it’s not safe. A throttle that could stick at full speed or fail completely during operation poses serious safety risks. You might lose control of engine speed when you need it most. Always repair or replace faulty throttle cables before operating your mower.
WD-40 won’t damage the cable, but it’s not the best long-term lubricant. It’s excellent for initial cleaning and freeing stuck cables, but it attracts dirt and evaporates relatively quickly. Follow up with silicone spray or cable-specific lubricant for lasting protection.
OEM (Original Equipment Manufacturer) cables are exact replacements designed for your specific mower model. They fit perfectly but cost more. Universal cables work with multiple mower brands and models but might require modification of end fittings or length adjustment. Both work well when properly installed.
Disconnect the cable from the carburetor and manually move the throttle linkage on the carburetor. If the engine responds correctly to manual control but not to cable control, the cable is the problem. If manual control doesn’t work either, you have a carburetor issue.
Yes, proper storage preparation prevents most cable problems. Run the engine and operate the throttle several times to circulate oil. Spray lubricant into both ends of the cable. Store the mower with the throttle in the slow position to minimize cable tension. Consider removing the spark plug and spraying fogging oil into the cylinder for complete engine protection.
Fixing a lawn mower throttle cable yourself saves significant money and time compared to professional repair. Whether you’re dealing with a stuck cable that needs lubrication, a broken end that requires a simple crimp repair, or complete cable replacement, the process is manageable with basic tools and patience.
The key to success lies in proper diagnosis, following safety procedures, and taking your time with the repair. Don’t skip the adjustment phase – a properly tensioned cable ensures smooth operation and prevents premature wear.
Regular maintenance, particularly annual lubrication and inspection, prevents most throttle cable problems before they occur. For the cost of a can of silicone spray and 10 minutes of work each spring, you can avoid the frustration of mid-season failures.
Remember that working on your own equipment builds valuable skills and understanding of how your tools function. The next time you face a throttle cable issue, you’ll diagnose it quickly and have it fixed in less time than it takes to load the mower for a trip to the repair shop.
By maintaining your lawn mower yourself and keeping up with gardening maintenance tips, you ensure your equipment stays reliable season after season. And having the right essential gardening tools makes both mower repair and general garden maintenance much easier.
Take care of your throttle cable, and it will take care of you – keeping your lawn mower running smoothly whenever you need it.
Don't let aphids, slugs, and caterpillars ruin another plant. Take back control with simple, natural methods that actually work.
