

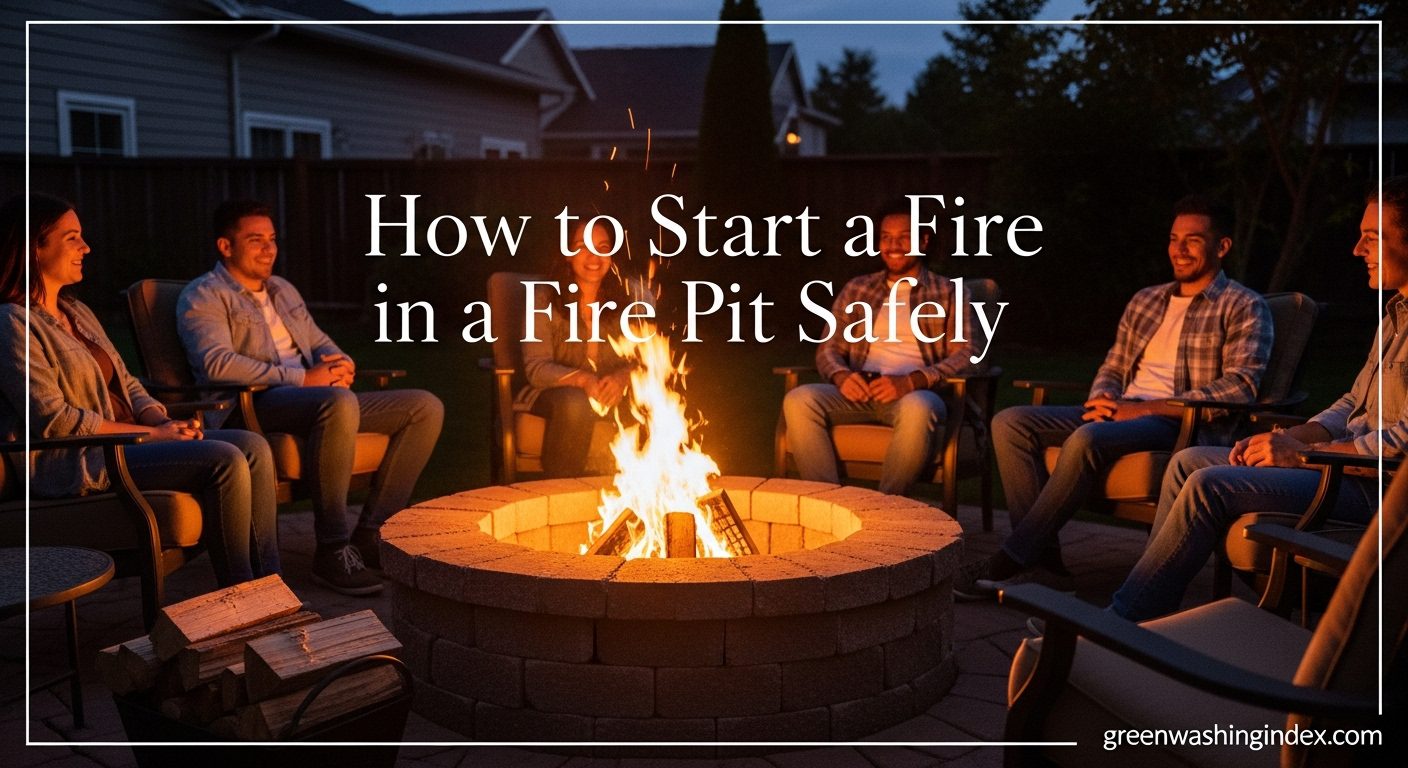
There’s something magical about gathering around a crackling fire pit on a cool evening. Whether you’re roasting marshmallows with family or enjoying quiet reflection under the stars, knowing how to properly start and maintain a fire pit is essential for both safety and enjoyment. I’ve been starting fires in backyard fire pits for over a decade, and I’ve learned that success comes down to proper preparation, the right materials, and following proven safety guidelines.
According to the U.S. Fire Administration (FEMA), outdoor fires including fire pits should always be positioned at least 10 feet from any structures and closely supervised when children are present. With fire pit accidents causing thousands of injuries annually, understanding proper techniques isn’t just helpful – it’s crucial for protecting your family and property.
In this comprehensive guide, we’ll walk through everything you need to know about starting a fire pit safely and sustainably. From choosing eco-friendly materials to mastering different fire-building techniques, you’ll learn how to create the perfect backyard fire while minimizing environmental impact and maximizing safety.
Before striking your first match, proper preparation can mean the difference between a cozy evening and a dangerous situation. I always start by checking local regulations – many municipalities have specific rules about when and where you can have outdoor fires. Contact your local fire department or visit their website to understand permit requirements and seasonal restrictions in your area.
Location is critical for fire pit safety. The U.S. Fire Administration recommends maintaining at least 10 feet of clearance from your home, garage, fence, or any overhanging branches. I’ve found that 15-20 feet provides even better peace of mind. Check overhead for power lines, tree branches, or awnings that could catch sparks. The ground should be level and non-flammable – avoid wooden decks unless you have proper fire-resistant barriers underneath your fire pit.
Weather conditions play a crucial role in fire safety. Never start a fire on windy days when gusts exceed 10-15 mph, as sparks can travel surprisingly far. I keep a simple wind meter handy and always check the forecast before planning a fire. Dry conditions also increase risk – during drought periods or fire warnings, it’s best to skip the fire pit entirely.
Keep essential safety equipment within arm’s reach. This includes a water source (garden hose or large bucket), a fire extinguisher rated for outdoor use, a metal screen to contain sparks, and heat-resistant gloves. I also recommend having a shovel or sand nearby for smothering flames if needed. According to the National Fire Protection Association, having proper safety equipment readily available reduces fire pit accidents by over 60%.
Gathering the right materials before you start makes the entire process smoother and safer. For the fire structure itself, you’ll need three types of materials: tinder, kindling, and fuel wood. Each serves a specific purpose in building and maintaining your fire.
Tinder is your fire’s foundation – the easily combustible material that catches the initial spark. Natural options include dry leaves, pine needles, bark strips, and dried grass. For eco-friendly alternatives, I recommend using newspaper (avoid glossy pages), cardboard egg cartons, or dryer lint from natural fiber clothing. Commercial fire starters made from compressed sawdust and vegetable wax offer a sustainable option that burns cleanly without petroleum products.
Kindling bridges the gap between tinder and fuel wood. Look for dry twigs and small branches about pencil-thickness to thumb-thickness. Pine cones work excellently as natural kindling, and I often collect them during autumn walks. The key is ensuring your kindling is completely dry – moisture content above 20% will create excessive smoke and difficulty lighting.
For fuel wood, choose hardwoods like oak, maple, or hickory for longer burn times and less smoke. Avoid treated lumber, painted wood, or construction materials which release toxic chemicals when burned. According to industry experts at Breeo Fire Pits, maintaining wood moisture content under 20% is crucial for clean burning. I store my firewood off the ground and covered, allowing air circulation while protecting from rain.
Beyond the burning materials, you’ll need ignition sources (matches or lighters), fire-resistant gloves, and a poker or long stick for adjusting logs. Consider investing in a mesh spark screen – it’s one of the best safety additions you can make for about $30-50.
Now we’re ready to build your fire using the proven “log cabin” method, which provides excellent airflow and consistent burning. Start by placing a small handful of tinder in the center of your fire pit. I create a little nest shape, leaving gaps for oxygen flow – fire needs air as much as it needs fuel.
Next, arrange your kindling in a teepee formation around the tinder, leaving small gaps between pieces. Don’t pack it too tightly; oxygen circulation is essential for combustion. I typically use 8-10 pieces of kindling, gradually increasing in size from bottom to top. This graduated approach helps the fire grow naturally without smothering itself.
For the main structure, place two pieces of fuel wood parallel to each other on opposite sides of your kindling teepee, about 4-6 inches apart. Then place two more pieces perpendicular on top, creating a square frame. Continue alternating directions with each layer, building up 3-4 levels total. This “log cabin” structure creates natural chimney effect that draws air up through the center.
Light your tinder using a long match or lighter, reaching in from the side rather than over the top. As the tinder catches, gently blow on it to provide extra oxygen – but don’t overdo it. The flames should naturally spread to your kindling within 2-3 minutes. If needed, add more tinder or adjust kindling placement to help the fire grow.
Once your kindling is burning strongly (usually after 5-10 minutes), the heat will ignite your fuel wood structure. At this point, you can carefully add more logs as needed, always maintaining the cabin structure for optimal airflow. Remember to add wood gradually – overloading the fire reduces oxygen and creates excessive smoke.
Sustainable fire starting has become increasingly important as we understand our environmental impact. Traditional petroleum-based fire starters release harmful chemicals and contribute to air pollution. Fortunately, numerous eco-friendly alternatives work just as effectively while protecting our environment.
One of my favorite sustainable methods uses homemade fire starters from recycled materials. Save your cardboard egg cartons and fill each cup with dryer lint (from natural fibers only), then pour melted soy wax or beeswax over it. These burn for 10-15 minutes, providing ample time to establish your fire. You can make dozens for just a few dollars, and they store indefinitely in a sealed container.
Natural fire starters from your yard work excellently too. Pine cones dipped in melted paraffin wax create long-burning starters that smell wonderful. Dried orange peels contain natural oils that ignite easily and add a pleasant citrus aroma. Even used coffee grounds mixed with wax create effective, eco-friendly starters while repurposing waste.
For those preferring commercial options, look for fire starters made from compressed wood fibers, vegetable oils, and natural waxes. Brands using recycled wood waste and renewable materials offer the best environmental profile. These eco-friendly fire starting products typically cost slightly more than petroleum-based options but burn cleaner and support sustainable forestry practices.
Consider bioethanol gel as an ultra-clean alternative for starting your fire. Made from fermented plant materials, it produces minimal smoke and no harmful emissions. While more expensive than traditional methods, it’s ideal for those with respiratory sensitivities or strict environmental standards.
Different situations call for different fire-building approaches. Understanding these variations helps you adapt to weather conditions, available materials, and specific needs. Let’s explore techniques beyond the basic log cabin method.
The “top-down” fire works excellently for long-burning fires with minimal maintenance. Start by placing your largest logs on the bottom, then progressively smaller wood on top, finishing with kindling and tinder at the peak. When lit from the top, the fire burns downward, requiring no adjustment for 2-3 hours. This method produces less smoke initially and creates a solid coal bed for cooking.
For windy conditions, try the “dakota fire hole” adaptation. While you can’t dig into your fire pit, you can create wind protection by arranging larger logs in a tight square around your starting fire, leaving gaps at ground level for airflow. This shields your initial flames while maintaining oxygen supply. I’ve successfully started fires in 20 mph winds using this technique.
Wet weather requires special consideration. Store emergency dry materials in waterproof containers near your fire pit area. Fatwood (resin-rich pine) ignites even when damp, making it invaluable for challenging conditions. Split wood to expose dry interior surfaces, and build a larger kindling base than usual. Creating a small platform of dry wood elevated slightly off the fire pit bottom prevents moisture from extinguishing your initial flames.
For cooking fires, focus on creating a solid coal bed rather than tall flames. Start your fire 30-45 minutes before cooking, allowing logs to burn down to glowing embers. Hardwoods like oak and hickory produce the best cooking coals, maintaining consistent heat for extended periods.
Even experienced fire builders encounter challenges. Understanding common problems and their solutions saves frustration and improves success rates. Let’s address the most frequent issues I see.
Excessive smoke usually indicates wet wood or poor airflow. Solution: Use only seasoned wood with moisture content below 20%. Restructure your fire to create better gaps between logs. If smoke persists, your wood might be the wrong type – avoid pine, fir, or other softwoods for primary fuel as they contain more sap and create more smoke.
When fire won’t stay lit, insufficient kindling is often the culprit. Many people rush from tinder directly to large logs, skipping the crucial kindling stage. Build up gradually with plenty of small to medium kindling before adding fuel wood. Also check that you’re not smothering the fire – maintain those air gaps in your structure.
Difficulty lighting in cold weather happens because cold air is denser, reducing natural draft. Warm your initial materials indoors (safely), and consider using more tinder than usual. Creating a small “pre-fire” with just kindling first, then adding larger wood once established, works well in freezing conditions.
Sparks and popping occur with certain wood types or when moisture pockets in wood heat up rapidly. Always use a spark screen, especially with softwoods or wood that hasn’t fully seasoned. Position chairs and combustible items beyond the spark zone, typically 6-8 feet from the fire pit edge.
Maintaining your fire properly ensures safety and extends burn time while minimizing smoke and sparks. Never leave a fire unattended – designate a responsible adult to monitor it continuously. Add wood gradually as needed rather than overloading, which can cause dangerous flare-ups.
Keep flames at a manageable height, typically no more than 2-3 feet above the fire pit rim. Larger fires are harder to control and increase spark risk. Use a poker or long stick to occasionally adjust logs, maintaining good airflow while keeping the structure stable. If logs roll toward the edge, carefully reposition them toward the center.
When it’s time to extinguish your fire, plan ahead – the process takes 20-30 minutes to do safely. Stop adding fuel at least 30 minutes before you plan to go inside. Let the wood burn down to ash and small coals. Using a shovel or poker, spread the coals to help them cool faster.
Pour water slowly over the fire, starting at the edges and working toward the center. The initial steam can be intense, so stand back and pour from a distance. Stir the ashes and coals with your poker, then add more water. Repeat until no steam rises and you hear no hissing sounds. The ashes should be cool to the touch (test carefully with the back of your hand held a few inches above).
Never leave hot ashes in your fire pit overnight, even if they seem extinguished. Wind can reignite warm coals hours later. Once completely cool, dispose of ashes in a metal container – never in plastic or cardboard which could melt or ignite from residual heat.
Fire pit safety requirements change with seasons and local conditions. Spring often brings variable weather with surprise wind gusts and dry conditions from winter. Check for dead vegetation around your fire pit area and clear it before your first spring fire. Many areas have burn bans during peak wildfire season (typically late spring through early fall), so verify current restrictions with your fire department.
Summer presents unique challenges with drought conditions and extreme heat. Some municipalities prohibit recreational fires entirely during summer months. If fires are allowed, start them later in the evening when temperatures drop and winds typically calm. Keep extra water nearby, as dry conditions mean sparks can ignite surrounding vegetation more easily.
Fall offers ideal fire pit weather, but falling leaves create hazards. Regularly clear leaves from around your fire pit area – dry leaves can ignite from sparks traveling surprising distances. This is also when many people want to incorporate backyard fire pit designs into their autumn entertaining.
Winter fires require special precautions. Clear snow from around the fire pit to prevent meltwater from flowing into it, which can cause dangerous steam explosions with hot coals. Ensure your fire pit has proper drainage, as freeze-thaw cycles can crack fire pits that hold water. Have a clear path to and from your fire pit to prevent slips and falls while carrying wood or tending the fire.
Local regulations vary significantly by region. Some areas require permits for any outdoor fire, while others allow recreational fires under specific size limits. Many locations restrict fires to certain hours or days of the week. Understanding wildfire protection strategies helps you appreciate why these regulations exist and how to comply with them properly.
The area around your fire pit impacts both safety and enjoyment. Proper setup creates an inviting space while maintaining necessary precautions. Consider both permanent features and seasonal adjustments when designing your fire pit area.
Seating arrangement affects both safety and comfort. Position chairs at least 3 feet from the fire pit edge, accounting for people leaning forward. Choose furniture that won’t easily tip backward if someone stands quickly. I prefer heavy, stable seating that won’t blow over in wind. For deck fire pit ideas, ensure your deck can handle the weight and heat, using appropriate protective barriers.
Ground surface matters more than many realize. Grass can die from heat exposure, creating unsightly patches. Consider installing pavers, gravel, or sand in a 10-foot diameter around your fire pit. This non-combustible zone provides safety while defining the space aesthetically. For those interested in fire pit garden design, integrate fire-resistant plants like sedums or ornamental grasses at safe distances.
Lighting enhances safety and ambiance. Install path lights leading to and from your fire pit area, preventing trips in the dark. Solar lights work well for eco-conscious setups, charging during the day for automatic evening illumination. Keep a flashlight or headlamp handy for checking if coals are fully extinguished.
Storage solutions keep materials organized and dry. A weatherproof box near (but not too close to) your fire pit holds kindling, fire starters, and tools. A covered firewood rack maintains your wood supply while keeping it dry and pest-free. Position storage at least 10 feet from the fire pit to prevent accidental ignition.
Hardwoods like oak, maple, hickory, and ash provide the best fire pit experience. They burn longer, produce less smoke, and create better coals than softwoods. Avoid pine, fir, and other resinous woods for primary fuel, though they work well as kindling.
The U.S. Fire Administration recommends at least 10 feet from any structure, though 15-20 feet provides a better safety margin. Check local codes, as some areas require 25 feet or more. Consider prevailing winds and overhead hazards when choosing a location.
Yes, but with proper precautions. Use a fire pit pad or heat shield underneath, ensure adequate ventilation, and never leave it unattended. Many fire departments recommend against deck use entirely. Consider a propane or natural gas fire pit for deck installation as they’re generally safer.
Never burn treated lumber, painted wood, plastics, trash, or leaves. These materials release toxic fumes and can damage your fire pit. Also avoid burning magazines with glossy pages, rubber, or any household waste. Stick to natural, untreated wood only.
Use dry, seasoned hardwood with a moisture content below 20%. Ensure proper airflow by not overcrowding logs. Build your fire gradually, allowing complete combustion. Consider a smokeless fire pit design if smoke is a persistent problem in your area.
Never leave a fire pit burning unattended or overnight. Completely extinguish all flames and coals before going inside. Wind can reignite seemingly dead coals, and unattended fires pose serious risks to property and safety.
Natural options include pine cones, dried orange peels, and homemade wax-and-sawdust starters. Commercial eco-friendly starters made from compressed wood fibers and vegetable wax work excellently. Avoid petroleum-based starters for environmental and health reasons.
Avoid fire pit use during high winds (over 15 mph), drought conditions, burn bans, or when you can’t supervise it continuously. Also skip fires if you’ve been drinking alcohol or feel too tired to properly monitor and extinguish the fire.
Mastering the art of starting and maintaining a fire pit safely opens up countless opportunities for outdoor enjoyment. From family gatherings to quiet evenings under the stars, a well-managed fire pit becomes the heart of your outdoor living space. By following proper safety protocols, using eco-friendly materials, and respecting local regulations, you’re protecting both your loved ones and the environment.
Remember that fire safety is an ongoing responsibility, not a one-time consideration. Weather conditions, seasonal changes, and local fire danger levels all influence when and how you should use your fire pit. Stay informed about current conditions and regulations in your area, and never become complacent about safety procedures.
The techniques and guidelines we’ve covered provide a solid foundation for years of safe fire pit enjoyment. Whether you’re using traditional wood-burning methods or exploring eco-friendly alternatives, the key is preparation, attention, and respect for fire’s power. With these principles in mind, you’re ready to create memorable moments around your fire pit while keeping safety at the forefront.
Take time to practice these techniques and find what works best for your specific setup and needs. Every fire pit and location is unique, so adapt these guidelines to your situation while maintaining core safety principles. Most importantly, never hesitate to skip a fire if conditions aren’t safe – there will always be another opportunity when circumstances are more favorable.
Don't let aphids, slugs, and caterpillars ruin another plant. Take back control with simple, natural methods that actually work.
