
Last week, I discovered mold growing behind my bathroom cabinet. The commercial dehumidifier quotes ranged from $200 to $500, plus the ongoing electricity costs. That’s when I started experimenting with DIY dehumidifiers using materials I already had at home.
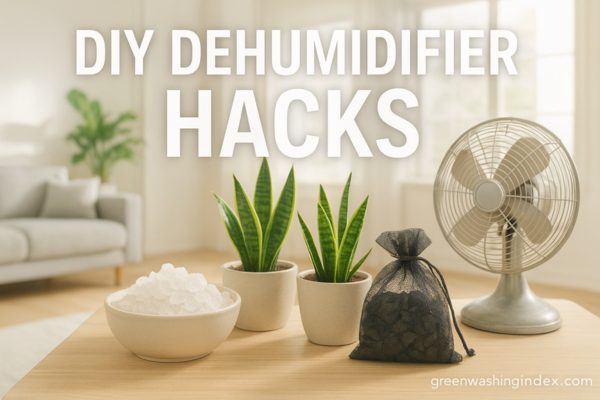
After testing seven different methods over the past month, I found that simple household items can effectively reduce humidity by 15-30% in small to medium spaces. These natural solutions cost under $20 to set up and require zero electricity.
The EPA recommends keeping indoor humidity between 30-50% to prevent mold growth and maintain healthy air quality. While DIY dehumidifiers won’t match the power of electric units in large spaces, they work surprisingly well for bathrooms, closets, RVs, and small rooms up to 150 square feet.
In this guide, I’ll show you exactly how to build each type of DIY dehumidifier, what materials you need, and which method works best for different situations. Every method uses sustainable, reusable materials that align with green cleaning habits and reduce environmental impact.
DIY dehumidifiers use three basic principles to remove moisture from the air:
Absorption: Materials like silica gel and calcium chloride chemically bond with water molecules, pulling them from the air. These desiccants can absorb 40% of their weight in moisture.
Adsorption: Activated charcoal and baking soda trap moisture on their porous surfaces. Charcoal has millions of tiny pores that capture water vapor through physical attraction.
Condensation: Cooling surfaces cause water vapor to condense into liquid. This principle powers thermoelectric dehumidifiers and fan-enhanced salt systems.
The effectiveness depends on three factors: ambient humidity level, room temperature, and air circulation. Higher humidity and warmer temperatures increase absorption rates, while good airflow speeds up the process.
Rock salt pulls moisture from the air through hygroscopic absorption. I tested this in my 100-square-foot bathroom and saw humidity drop from 65% to 45% within 48 hours.
Step 1: Drill 15-20 holes in the bottom of one bucket. Space them evenly for proper drainage.
Step 2: Place the drilled bucket inside the intact bucket. The gap between them collects water.
Step 3: Line the drilled bucket with wire mesh to prevent salt from falling through.
Step 4: Pour rock salt into the top bucket, filling it halfway.
Step 5: Position the setup in your target area. For faster results, place a small fan on top to increase airflow.
Step 6: Check weekly and empty collected water from the bottom bucket.
This method removes 1-2 cups of water daily in 60-70% humidity conditions. One setup covers 150 square feet effectively. The salt lasts 2-3 months before needing replacement.
Keep rock salt dehumidifiers away from pets and children. Salt can be toxic if ingested in large quantities. Always wear gloves when handling wet salt to prevent skin irritation.
Calcium chloride absorbs moisture twice as fast as rock salt. I use this method in my basement storage area where quick moisture removal prevents damage to stored items.
Step 1: Fill a pantyhose leg with calcium chloride pellets. Tie the top securely.
Step 2: Suspend the filled pantyhose inside the coffee can using string. Leave 3 inches of space at the bottom.
Step 3: Cover the can opening with cheesecloth to allow airflow while preventing debris.
Step 4: Place a collection tray under the setup to catch any overflow.
Step 5: Position in areas with highest humidity levels.
When pellets dissolve completely (2-4 weeks), dispose of the liquid safely. The calcium chloride brine can damage plants, so dilute heavily before disposal or use designated chemical disposal methods.
While effective, calcium chloride requires careful disposal. Consider this method only for severe moisture problems where other natural options prove insufficient.
Activated charcoal naturally adsorbs moisture while eliminating odors. This completely renewable option works indefinitely with simple recharging.
Step 1: Fill fabric bags with 1/2 pound of activated charcoal each.
Step 2: Add 2-3 drops of essential oil if desired for pleasant scent.
Step 3: Seal bags securely, ensuring fabric remains breathable.
Step 4: Arrange bags in wire basket for maximum air exposure.
Step 5: Place in closets, bathrooms, or small rooms.
Every 2-3 weeks, place charcoal bags in direct sunlight for 4-6 hours. The heat releases absorbed moisture, completely regenerating the charcoal. This process works indefinitely, making it the most sustainable option.
Activated charcoal removes VOCs, allergens, and odors while dehumidifying. This makes it ideal for people with chemical sensitivities or allergies.
Those little packets in shoe boxes contain silica gel, a powerful desiccant. I collect and reuse these for protecting electronics and small storage areas.
Step 1: Mix regular and indicator silica gel in 4:1 ratio.
Step 2: Fill fabric pouches with 2-3 ounces of mixture.
Step 3: Seal pouches, leaving fabric breathable.
Step 4: Place in drawers, toolboxes, camera bags, or storage containers.
Step 5: When indicator gel changes from blue to pink, recharge all pouches.
Microwave pouches for 30-60 seconds on medium power, checking every 15 seconds. Alternatively, bake at 200°F for 1-2 hours. Gel returns to original color when dry.
Never eat silica gel. While non-toxic, it can cause choking. Keep away from children and pets. Some indicator gels contain cobalt chloride, which requires careful handling.
Baking soda absorbs both moisture and odors, making it perfect for refrigerators, pantries, and food storage areas.
Step 1: Pour 1-2 inches of baking soda into shallow containers.
Step 2: Add 5-10 drops of essential oil and mix thoroughly for scent.
Step 3: Cover with cheesecloth to prevent spills while allowing airflow.
Step 4: Place containers in problem areas.
Step 5: Stir weekly to expose fresh surface area.
Replace baking soda monthly or when it forms hard clumps. Used baking soda works great as a cleaning scrub, supporting zero waste DIY projects.
For tech-savvy DIYers, a Peltier cooling device creates a powered dehumidifier using minimal electricity. This project costs $30-40 but provides continuous operation.
Step 1: Apply thermal paste to both sides of the Peltier unit.
Step 2: Attach heatsinks to each side, ensuring tight contact.
Step 3: Mount the fan to blow air across the cold-side heatsink.
Step 4: Wire the Peltier and fan to the 12V power supply following polarity markings.
Step 5: Position the cold side over a collection container.
Step 6: Enclose in a ventilated housing, leaving the cold side exposed to room air.
The Peltier effect creates a temperature differential. The cold side drops below dew point, causing condensation. This method removes 10-20 ounces daily while using only 50-70 watts.
Run during the coolest part of the day for maximum efficiency. Clean heatsinks monthly to maintain performance. This system works best in 40-60% humidity ranges.
Uncooked rice and natural clay both absorb moisture effectively. This combination costs almost nothing and uses completely biodegradable materials.
Step 1: Mix rice and clay in 2:1 ratio.
Step 2: Add handful of cedar chips for natural moth repellent if desired.
Step 3: Fill cloth bags with 1-2 cups of mixture.
Step 4: Seal bags, keeping fabric breathable.
Step 5: Place in closets, storage boxes, or small rooms.
Spread mixture on baking sheet and heat at 200°F for 30 minutes. This removes absorbed moisture, allowing multiple reuses. Replace every 3-4 months as effectiveness decreases.
Different DIY dehumidifiers work better in specific situations:
Bathrooms (high humidity, small space): Rock salt or calcium chloride provide rapid moisture removal. Position near shower area but away from direct water contact.
Closets and wardrobes: Activated charcoal or silica gel packets protect clothing while eliminating musty odors. Hang bags from closet rods for best air circulation.
Basements (large area, persistent dampness): Combine multiple rock salt stations or build the thermoelectric system for continuous operation. Focus on corners where moisture accumulates.
RVs and boats: Calcium chloride or silica gel handle confined spaces effectively. Use multiple small units rather than one large system for even coverage.
Storage containers: Silica gel packets or rice/clay mixture protect stored items. Include indicator gel to monitor saturation levels.
Kitchen and pantry: Baking soda serves double duty removing moisture and odors. Safe around food when properly contained.
Following EPA guidelines ensures safe, effective moisture control:
Always wear gloves when handling calcium chloride or wet salt solutions. These substances can cause skin irritation or chemical burns. Store chemicals in labeled, child-proof containers away from food areas.
Dispose of saturated calcium chloride and rock salt brine properly. Never pour concentrated solutions directly onto soil or into storm drains. Dilute heavily with water or use designated chemical disposal services.
While reducing humidity, ensure adequate ventilation. The EPA recommends 0.35 air changes per hour minimum. Open windows periodically or use exhaust fans to maintain fresh air circulation.
EPA guidelines state humidity above 60% promotes mold growth. Monitor levels with a hygrometer ($10-15) and maintain 30-50% relative humidity. Address water leaks immediately, as DIY dehumidifiers cannot overcome active water intrusion.
Position all DIY dehumidifiers out of reach. Many materials, while natural, pose ingestion hazards. Use secured containers and wall-mounted options where possible.
Regular maintenance keeps DIY dehumidifiers working effectively:
Problem: Dehumidifier stops working effectively
Solution: Material likely saturated. Recharge or replace absorption medium.
Problem: Water overflows collection container
Solution: Empty more frequently or upgrade to larger collection vessel.
Problem: Musty smell persists despite dehumidifier
Solution: Add activated charcoal for odor absorption. Check for hidden mold growth.
Problem: Humidity levels remain high
Solution: Increase number of units or combine methods. Check for water leaks or inadequate ventilation.
DIY dehumidifiers offer significant savings over commercial units:
DIY dehumidifiers support eco-friendly home improvements through multiple pathways:
Energy savings: Most methods require zero electricity, reducing carbon footprint by 200-400 pounds CO2 annually compared to electric units.
Material reuse: Repurposing containers, using biodegradable materials, and recharging systems minimizes waste.
Chemical reduction: Natural absorption materials eliminate need for synthetic chemicals and refrigerants found in commercial units.
Longevity: Reusable systems like activated charcoal and thermoelectric units provide years of service with minimal replacement parts.
Optimize your DIY dehumidifier performance with these strategies:
Position dehumidifiers at moisture sources. Place units under windows, near bathroom doors, and in basement corners where humidity accumulates. Elevate containers 12-18 inches off the floor for better air circulation.
Use multiple methods simultaneously for severe moisture problems. Combine fast-acting calcium chloride with sustainable activated charcoal for immediate relief and long-term control.
Add small fans to increase air movement across absorption materials. Even a 4-inch computer fan doubles moisture removal rates. USB-powered fans offer energy-efficient options.
Install multiple hygrometers to track humidity in different areas. This data helps position dehumidifiers optimally and identifies problem zones requiring extra attention.
Increase dehumidifier capacity during humid summer months. Reduce or discontinue use in dry winter periods to maintain healthy humidity levels and prevent over-drying.
DIY dehumidifiers work best as part of comprehensive moisture management:
Install bathroom and kitchen exhaust fans vented to the exterior. Run fans during and 20 minutes after showers or cooking. This removes moisture at the source before it spreads.
Caulk windows and weatherstrip doors to prevent humid outdoor air infiltration. This reduces the moisture load your DIY dehumidifiers must handle.
Clean gutters regularly and extend downspouts 6 feet from foundations. Proper drainage prevents moisture from entering basements and crawl spaces.
Add insulation to prevent condensation on cold surfaces. Focus on attics, basements, and exterior walls where temperature differences cause moisture problems.
Open windows on opposite sides of your home during dry weather to create cross-ventilation. This free method removes moisture while improving air quality.
DIY dehumidifiers remove 0.5-2 pints of water daily in small spaces, while electric units extract 30-70 pints. For rooms under 150 square feet with moderate humidity, DIY methods prove sufficient. Larger spaces or severe moisture problems require commercial units.
Lifespan varies by method: rock salt lasts 2-3 months, calcium chloride 2-4 weeks, activated charcoal recharges indefinitely, silica gel recharges 50+ times, and baking soda needs monthly replacement. Thermoelectric units operate for years with basic maintenance.
Yes, maintaining humidity below 50% inhibits mold growth. DIY dehumidifiers effectively control moisture in small spaces, preventing mold. However, they cannot remedy existing water damage or active leaks requiring professional remediation.
Most materials pose ingestion hazards. Activated charcoal and baking soda are safest, while calcium chloride and rock salt require careful handling. Always use secured containers and position units out of reach. Never leave chemicals accessible to children or pets.
Rock salt offers the best value, costing $3-5 for 2-3 months of moisture control. Activated charcoal costs more initially ($15-20) but lasts indefinitely with sun recharging, making it most economical long-term.
Table salt works but less effectively. Rock salt’s larger crystals provide more surface area for absorption. If using table salt, expect 30-40% less moisture removal and more frequent replacement.
Visual indicators include: salt dissolving into brine, charcoal feeling damp, silica gel changing color, baking soda clumping, and rice becoming soft. Use a hygrometer to monitor effectiveness – when humidity stops dropping, materials need attention.
Effectiveness decreases below 65°F as cold air holds less moisture. Calcium chloride and silica gel work best in cold conditions. Thermoelectric units become more efficient as temperature differential increases.
Properly contained DIY dehumidifiers pose no risk. Avoid placing salt or calcium chloride directly on surfaces as brine can cause damage. Keep electronics away from water collection areas. Silica gel packets work safely inside electronic storage.
The EPA recommends 30-50% relative humidity. Below 30% causes dry skin and respiratory irritation. Above 50% promotes mold, dust mites, and bacteria growth. Use a hygrometer to monitor and adjust your DIY dehumidifier deployment accordingly.
DIY dehumidifiers provide effective, sustainable moisture control for small to medium spaces. After testing all seven methods, I keep rock salt systems in my bathroom and basement, activated charcoal in closets, and silica gel protecting stored electronics.
The total investment of $40 replaced a $300 electric dehumidifier quote, while eliminating ongoing electricity costs. More importantly, these natural methods align with zero waste DIY solutions and reduce environmental impact.
Start with one method matching your specific needs. Monitor humidity levels to verify effectiveness. As you gain experience, combine approaches for comprehensive moisture management throughout your home.
Remember that DIY dehumidifiers complement, not replace, proper home maintenance. Fix leaks promptly, ensure adequate ventilation, and address drainage issues. With these fundamentals covered, natural dehumidifiers maintain healthy humidity levels sustainably and affordably.
The shift from energy-hungry appliances to simple, reusable solutions represents one small step toward sustainable living. Each DIY dehumidifier reduces electricity consumption, minimizes chemical exposure, and demonstrates that effective home solutions don’t always require complex technology or significant expense.
Don't let aphids, slugs, and caterpillars ruin another plant. Take back control with simple, natural methods that actually work.
