

Stuck with a windowless room and sweltering heat? Your portable AC doesn’t have to gather dust.
Many rooms lack traditional windows, making portable AC installation seem impossible. Whether you’re dealing with a basement office, interior bedroom, or server room, the absence of windows shouldn’t condemn you to suffering through summer heat.
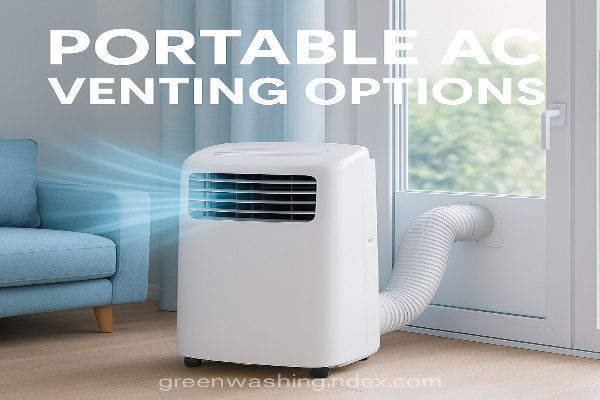
You can effectively vent a portable air conditioner through 10 different methods including sliding doors, walls, ceilings, and even existing vents, no window required. Each solution offers different benefits, costs, and installation complexity levels.
This guide covers professional-grade venting solutions, DIY options, costs, efficiency ratings, and step-by-step installation instructions for each method. You’ll discover which option works best for your specific situation, budget, and technical skill level.
Portable air conditioners operate on basic thermodynamic principles. They pull warm air from your room, pass it over cold evaporator coils, and return cooled air back into the space. However, this process generates heat that must be expelled outside.
The refrigeration cycle creates a temperature differential by moving heat from inside to outside. Without proper venting, this hot air simply recirculates back into your room, completely negating the cooling effect. Think of it like trying to cool your kitchen by leaving the refrigerator door open, it actually makes the room warmer.
Every portable AC produces exhaust air that’s typically 20-30 degrees warmer than room temperature. A 10,000 BTU unit removing heat from your room needs to expel approximately 3,000 watts of thermal energy through its exhaust hose.
Operating a portable AC without proper venting creates several serious problems:
Ineffective Cooling: The unit works continuously but room temperature never drops. You’ll feel brief moments of cool air directly from the unit, but overall room temperature may actually increase.
Energy Waste: Your electricity bill skyrockets as the unit runs constantly trying to achieve the set temperature. Units can consume 500-1,500 watts per hour while providing zero net cooling.
Equipment Damage: Overheating can damage the compressor, leading to costly repairs or complete unit failure. Most manufacturers void warranties for improper venting.
Increased Humidity: Without venting, moisture removed from the air has nowhere to go, creating a humid, uncomfortable environment that can promote mold growth.
True portable air conditioners require venting, period. Products marketed as “ventless air conditioners” are actually evaporative coolers, which work on completely different principles.
| Feature | Vented Portable AC | Evaporative Cooler (“Ventless”) |
| Cooling Method | Refrigeration cycle | Water evaporation |
| BTU Output | 5,000-15,000 BTU | 0 BTU (evaporative cooling only) |
| Power Usage | 500-1,500W | 90-160W |
| Humidity Effect | Removes moisture | Adds moisture |
| Effectiveness | Works in all climates | Only works in dry climates |
| Venting Required | Yes, always | No |
| Actual Temperature Drop | Yes (10-20°F) | No (feels cooler only) |
Wall venting provides the most permanent and efficient solution for windowless rooms. This method involves cutting a hole through an exterior wall and installing a dedicated vent system.
Installation Costs and Requirements
Professional wall vent installation typically costs $200-$500, depending on wall type and complexity. Drywall installations run cheaper ($200-$300), while brick or concrete walls can reach $400-$500. The price includes cutting the hole, installing the vent collar, sealing, and exterior weatherproofing.
You’ll need a wall vent kit ($30-$80) that includes an interior collar, exterior hood, and flexible duct connector. Choose a kit sized for your AC’s exhaust hose diameter, typically 5-6 inches.
Building Code Considerations
Most municipalities require permits for cutting exterior wall openings. Check local building codes before installation, as requirements vary. Some key considerations include:
Rental properties require landlord permission in writing. Many landlords approve wall vents as they’re less visible than window units and add value for future tenants.
Step-by-Step Professional Installation
Drop ceiling venting works exceptionally well in offices, basements, and commercial spaces. This method routes exhaust air into the ceiling plenum and out through existing HVAC returns or dedicated vents.
Best for Office and Commercial Spaces
Server rooms particularly benefit from ceiling venting, as it removes both AC exhaust and equipment heat. The method works in any room with at least 12 inches of plenum space above the tiles.
Ceiling venting maintains clean floor space without visible hoses or wall penetrations. It’s ideal for leased commercial spaces where wall modifications aren’t permitted.
Installation Complexity and Costs
Professional installation runs $150-$300, making it more affordable than wall venting. However, DIY installation is possible for handy individuals, reducing costs to just $40-$60 for materials.
The main challenge involves ensuring adequate airflow through the plenum space. Blocked plenums or insufficient return vents can cause heat buildup, potentially damaging ceiling tiles or creating fire hazards.
You’ll need:
Sliding door vents offer the easiest installation for rooms with patio or balcony access. These kits include adjustable panels that fit into your door track, with a port for the exhaust hose.
Product Recommendations and Prices
Top-rated sliding door vent kits include:
Most kits adjust both horizontally and vertically, accommodating various door sizes. Look for models with security bars that maintain door lock functionality.
Security Considerations
Sliding door vents can compromise security if not properly installed. Key safety features include:
For ground-floor installations, consider adding a door sensor or security film to the glass. Many users remove the vent kit when away for extended periods.
Exterior wall venting differs from standard wall venting by using larger, more robust systems designed for permanent installation. This method suits homeowners planning long-term portable AC use.
Professional Installation Requirements
Exterior wall venting requires professional installation due to complexity. Installers must:
Installation costs range from $300-$800 depending on exterior material. Vinyl siding installations cost less, while brick or stucco can double the price.
Weatherproofing Essentials
Proper weatherproofing prevents water damage and energy loss:
Quality exterior vents include pest screens preventing insect or rodent entry. Some models feature motorized dampers that open only when the AC operates.
Homes with crawl spaces or raised foundations can vent portable ACs through the floor. This unique solution keeps walls intact while providing efficient exhaust removal.
Unique Solution for Specific Homes
Floor venting works best in:
The method involves cutting a hole through the floor and subfloor, installing a vent boot, and routing exhaust air into the crawl space where it exits through foundation vents.
Professional Assessment Needed
Never attempt floor venting without professional assessment. Key concerns include:
Professional installation costs $250-$400, including crawl space inspection and any necessary ventilation improvements. The installer may need to add foundation vents if existing ventilation proves insufficient.
| Venting Method | Installation Cost | Difficulty | Permanence | Best For |
| Wall Venting | $200-$500 | High | Permanent | Homeowners |
| Drop Ceiling | $150-$300 | Medium | Semi-permanent | Offices |
| Sliding Door | $45-$60 (DIY) | Low | Temporary | Renters |
| Exterior Wall | $300-$800 | Very High | Permanent | Long-term use |
| Floor Venting | $250-$400 | High | Permanent | Raised homes |
Using an existing dryer vent offers a tempting solution for portable AC exhaust. While possible, this method requires careful consideration and specific safety precautions.
Safety Precautions and Limitations
Dryer vents typically measure 4 inches in diameter, while portable AC exhaust hoses are 5-6 inches. This size mismatch creates back pressure, reducing cooling efficiency by up to 35%. Never use this method while the dryer operates, the competing airflows can cause dangerous backdrafts.
Critical safety requirements:
Adapter Requirements
You’ll need a step-up adapter ($15-$25) to connect the larger AC hose to the smaller dryer vent. Look for adapters with:
Some users create custom adapters using HVAC reducers and metal tape, but commercial adapters provide better sealing and safety.
Unused chimneys provide excellent venting opportunities for portable ACs. This method works only with permanently closed fireplaces, never attempt this with functional chimneys.
Seasonal Considerations
Chimney venting requires seasonal setup and removal:
Summer Setup:
Winter Removal:
Sealing Requirements
Proper sealing prevents cool air loss and pest entry:
Total DIY cost: $30-$50 for materials.
When exterior venting isn’t possible, routing exhaust to an adjacent room with better venting options provides a temporary solution. This method works best between a windowless room and a larger space with windows.
Creating Temporary Venting Between Rooms
Interior pass-through requires:
Use a 6-inch hole saw for standard installations. The receiving room must have enough ventilation capacity to handle both its own cooling needs and the exhaust heat, typically requiring an open window or dedicated exhaust fan.
This method adds 10-15°F to the receiving room’s temperature. It works best when venting from a small office into a large living area or from a bedroom into a hallway with attic access.
Casement windows that crank open horizontally challenge standard AC installation. Custom solutions enable venting without replacing the window.
Custom Plexiglass Panels
Creating a custom panel:
Secure the panel using:
Weatherstripping Techniques
Proper sealing maximizes efficiency:
Professional tip: Create a template from cardboard first to ensure proper fit before cutting expensive plexiglass.
Venting into an attic space requires extreme caution but can work under specific circumstances. This method suits only well-ventilated attics with adequate exhaust systems.
When It Works and When It Doesn’t
Attic venting works ONLY when:
Never attempt attic venting with:
Moisture and Heat Concerns
Portable ACs exhaust humid air that can cause severe attic problems:
If attempting this method:
| DIY Method | Cost | Difficulty | Risk Level | Effectiveness |
| Dryer Vent | $15-$25 | Easy | Medium | 65% efficient |
| Chimney | $30-$50 | Medium | Low | 85% efficient |
| Interior Wall | $40-$60 | Hard | Low | 70% efficient |
| Casement Window | $60-$80 | Medium | Low | 90% efficient |
| Attic Venting | $20-$40 | Easy | High | 60% efficient |
When traditional venting proves impossible, evaporative coolers offer genuine cooling relief without exhaust requirements. These devices work by evaporating water to create a cooling effect, similar to how your body cools through perspiration.
Hessaire MC37M (3,100 CFM)
The Hessaire MC37M stands out as the most powerful ventless cooling option available. With its massive 3,100 CFM airflow, it can effectively cool spaces up to 950 square feet.
Key specifications:
The unit creates significant air movement that enhances evaporative cooling from your skin. While it doesn’t lower actual room temperature like an AC, the perceived cooling effect can drop temperatures by 10-15°F in ideal conditions.
Best Climates for Effectiveness
Evaporative coolers work best in specific conditions:
Ideal climates:
Poor performance climates:
Effectiveness drops dramatically as humidity rises. In 30% humidity, cooling effectiveness reaches 85%. At 60% humidity, effectiveness drops to just 25%.
Some innovative portable ACs require minimal venting, making them suitable for challenging installations. These units use advanced technology to reduce exhaust requirements.
Coolzy Technology Explained
Coolzy represents a new category of “personal air conditioners” that focus cooling on individuals rather than entire rooms. The technology uses:
The Coolzy can operate in large, well-ventilated rooms without traditional venting. Its minimal heat output dissipates naturally in spaces over 200 square feet with normal air circulation.
Energy Savings Analysis
Coolzy uses approximately 1/5 the electricity of traditional portable ACs:
| Usage (Daily) | Coolzy Cost | Traditional AC Cost | Monthly Savings |
| 8 hours | $0.37 | $1.64 | $38.10 |
| 12 hours | $0.55 | $2.46 | $57.30 |
| 24 hours | $1.10 | $4.92 | $114.60 |
*Based on $0.13/kWh electricity rate
The focused cooling approach works best for:
True portable air conditioning without any venting restrictions exists in battery-powered units. These premium devices offer genuine refrigeration-based cooling anywhere.
Zero Breeze Mark 2 Features
The Zero Breeze Mark 2 provides 2,300 BTU of real cooling power on battery power:
Specifications:
Unique features include:
Cost-Benefit Analysis
While expensive initially, Zero Breeze offers unique advantages:
Benefits:
Drawbacks:
For occasional use or true portability needs, the investment makes sense. For daily home cooling, traditional vented options provide better value.
| Alternative Solution | Cooling Type | Power Use | Price Range | Best Use Case |
| Hessaire MC37M | Evaporative | 250W | $300-$400 | Dry climates |
| Coolzy Pro | Focused AC | 340W | $600-$700 | Personal cooling |
| Zero Breeze Mark 2 | Battery AC | 650W | $1,000-$1,400 | True portability |
| Honeywell TC10PEU | Evaporative | 145W | $150-$200 | Budget option |
| BLACK+DECKER BEAC75 | Evaporative | 90W | $180-$220 | Small spaces |
The sliding door vent kit offers the easiest DIY installation for most users. Follow this detailed guide for professional results.
Accurate measurements ensure purchasing the correct kit size:
Record measurements to the nearest 1/8 inch. Most kits adjust 4-6 inches, but starting with accurate measurements prevents installation issues.
Choose a kit based on your measurements:
Quality indicators to look for:
Installation takes 20-30 minutes:
Ensure the panel sits flush against both door frame sides. Gaps indicate incorrect sizing or warped frames requiring additional weatherstripping.
Proper hose connection prevents air leaks:
Avoid over-tightening, which can crack plastic components. The connection should be snug but not stressed.
Final sealing ensures maximum efficiency:
Testing procedure:
Pro-Tip Box: Security Enhancement Tips
Enhance sliding door security with vent kit installed:
The exhaust hose configuration significantly impacts your portable AC’s efficiency. Every foot of extra hose length reduces cooling capacity by approximately 5%.
Ideal hose configuration:
Position your AC unit as close to the venting point as possible. If you must extend the hose, use rigid metal duct instead of flexible hose beyond 5 feet. Each 90-degree bend equals roughly 5 feet of straight run in terms of airflow restriction.
Air leaks can reduce cooling efficiency by up to 40%. Common leak points require attention:
Primary leak locations:
Sealing methods by location:
Test for leaks using an incense stick, smoke movement indicates air escape. Seal even tiny gaps, as they compound to create significant efficiency losses.
Each venting method requires specific maintenance to maintain efficiency:
Wall Vents:
Sliding Door Kits:
Ceiling Vents:
Alternative Methods:
Different venting methods impact overall system efficiency:
| Venting Method | Efficiency Rating | Annual Extra Cost* | Notes |
| Direct Wall Vent | 95-98% | $0-$10 | Shortest path, minimal loss |
| Sliding Door Kit | 90-94% | $15-$25 | Good seal critical |
| Window Kit | 88-92% | $20-$35 | Standard efficiency |
| Ceiling Vent | 85-90% | $30-$50 | Plenum heat affects performance |
| Dryer Vent | 65-75% | $60-$100 | Significant restriction |
| Interior Pass-through | 60-70% | $80-$120 | Requires cooling two spaces |
*Based on 3-month cooling season, 8 hours daily use, $0.13/kWh
Budget-conscious options for handy individuals:
Under $50:
$50-$100:
DIY solutions save 70-80% versus professional installation but require time and basic tools. Factor in potential mistakes or re-dos when budgeting.
Professional installation ensures proper function and often includes warranties:
$200-$400 Range:
$400-$600 Range:
$600-$800 Range:
Professional installation typically includes permits, guarantees against leaks, and 1-2 year workmanship warranties.
Calculate total cost of ownership over 5 years:
Efficient Installation (Wall Vent):
Moderate Efficiency (Sliding Door):
Poor Efficiency (Dryer Vent):
Investing in proper venting pays off through energy savings, typically reaching break-even within 2-3 years.
Return on investment varies by method:
Fastest ROI (12-18 months):
Moderate ROI (2-3 years):
Longest ROI (3-5 years):
Consider factors beyond energy savings: comfort improvement, property value increase, and reduced AC wear from efficient operation.
Renters face unique challenges when venting portable ACs. Always obtain written permission before any modifications.
Typically Allowed:
Usually Prohibited:
Getting Landlord Approval:
Some landlords appreciate tenants solving their own cooling needs and may share costs for permanent improvements.
Improper venting creates fire hazards requiring careful attention:
Critical Safety Rules:
Code Requirements:
Portable ACs draw significant current, making extension cord use dangerous:
Why extension cords fail:
If absolutely necessary:
Better solution: Have an electrician install a dedicated outlet near your AC location ($150-$300).
Certain situations demand professional expertise:
Always hire professionals for:
Warning signs requiring pros:
Pro-Tip Box: Red Flags Requiring Professional Help
When your properly vented AC fails to cool effectively, systematic troubleshooting identifies the issue:
Check venting system first:
Common causes and solutions:
If exhaust air feels cool rather than warm, the refrigeration system needs professional service.
Portable ACs remove moisture while cooling, creating potential water problems:
Normal condensation locations:
Problematic moisture signs:
Solutions by location:
For persistent moisture, consider adding a small dehumidifier near the venting area.
Venting can amplify AC noise. Address different noise sources:
Vibration noise:
Airflow noise:
Resonance in venting:
Expect 5-10 dB reduction with proper noise control, the difference between normal conversation and library quiet.
Optimize venting performance throughout the cooling season:
Spring startup:
Summer peak performance:
Fall shutdown:
Winter considerations:
Yes, but with significant limitations. Venting into another room transfers heat rather than removing it, requiring that room to have excellent ventilation, typically an open window or dedicated exhaust fan. The receiving room’s temperature will increase by 10-15°F, making this suitable only when the adjacent space is much larger or rarely occupied. Energy costs increase by 30-40% due to cooling inefficiency.
Manufacturer-provided hoses (typically 5 feet) represent the maximum recommended length. Each additional foot reduces cooling capacity by approximately 5%. If you must extend beyond 5 feet, switch to smooth rigid metal duct, which creates less airflow restriction. Never exceed 10 feet total length, as the compressor strain can cause premature failure and void warranties.
Yes, all true portable air conditioners require venting to expel hot air. Products marketed as “ventless portable air conditioners” are actually evaporative coolers that use water evaporation instead of refrigeration. These coolers don’t lower room temperature but create a cooling sensation through airflow and evaporation. They only work effectively in dry climates below 50% humidity.
Direct wall venting provides the highest efficiency at 95-98%, as it creates the shortest, straightest path for exhaust air. The permanent installation eliminates air leaks common with temporary solutions. Sliding door kits rank second at 90-94% efficiency when properly sealed. Avoid dryer vent adaptations and interior pass-throughs, which can reduce efficiency to 60-70%.
Yes, basements without windows can accommodate portable ACs through several methods:
Monitor humidity carefully, as basements naturally retain moisture. The AC’s dehumidification helps, but ensure adequate venting to prevent mold growth.
Venting through dryer vents is possible but not ideal. Safety concerns include:
If you must use this method: clean thoroughly, never operate both simultaneously, install a backdraft damper, and check local codes. Consider it a temporary solution while planning proper venting installation.
With 10 proven venting methods, windowless rooms no longer mean suffering through summer heat. From professional wall installations to clever DIY solutions, there’s an option for every situation and budget.
The key to success lies in matching your specific circumstances, rental restrictions, budget constraints, technical skills, and room layout, with the appropriate venting method. Professional wall venting offers the best long-term efficiency for homeowners, while sliding door kits provide renters with effective temporary solutions. Creative alternatives like chimney adaptation or ceiling venting solve unique challenges without breaking the bank.
Remember that proper venting isn’t just about making your AC work, it’s about maximizing efficiency, ensuring safety, and protecting your investment. A well-vented portable AC runs quieter, cools better, and lasts years longer than improperly installed units.
Whether you choose a $25 dryer vent adapter or invest in professional exterior wall venting, taking action beats sweltering in silence. Start with your room’s specific constraints, consider your budget and skills, then select the method that best fits your needs.
Choose your venting method based on your specific needs, and don’t forget to share your installation success (or challenges) in the comments below. Your experience could help others facing similar cooling challenges find their perfect solution.