

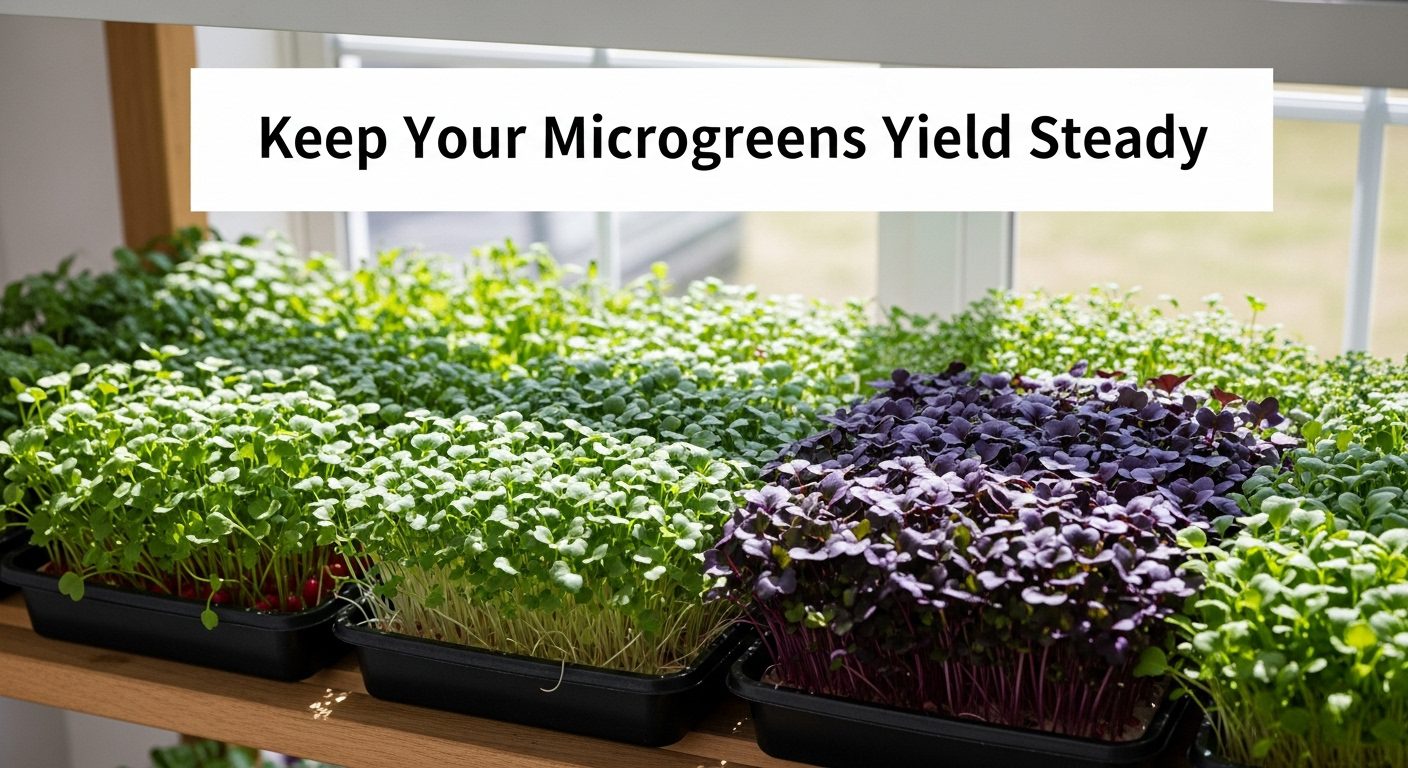
If the entire world were a salad, microgreens would be its superheroes.
That’s possibly the best, fastest way to explain microgreens to someone who doesn’t know what they are and would sooner say it’s a new strain of COVID-19 than food. But you know better.
You grow these tiny little powerhouses on your windowsill or in your grow tent, and every time you make a meal, it looks like it was prepared by a chef who meditates a lot and does yoga.
But have you ever had a perfect batch one week and then a sad, wonky, wimpy one the next? It’s like you went from being the microgreen millionaire and now, you’re convincing your friends that ‘sparse’ is the new ‘artisanal’.
Honestly, it’s all very sad.
The secret sauce (or is it better to call it a secret dressing?) that separates a cute little hobby from an actual harvest is consistency.
So until you find a magic wand, read on to learn how to master growing your microgreens.
Simply put, getting a consistent yield comes down to 2 things:
Let’s start with the seeds.
If you have a family recipe, you need the same ingredients every time to get a delicious result. It’s the same idea with seeds. You have to have a reputable supplier because they’re the only ones who can guarantee good genetics and high germination rates (the latter is a fancy way of explaining the amount of seeds that sprout after planting).
Also, this is the only way to be sure you’re not buying a bag of weed seeds. You’ll see labels like ‘organic’ and ‘untreated’, which basically tell you about the seeds’ history, like whether it was grown without chemicals, whether it has been coated with fungicide, whether it has been checked for reliability, etc.
Once you know your seeds are worth their salt, the next big thing is the way you sow them. If you sprinkle them too thickly, they’ll be too crowded. And this means you’ll get weak stems and mold. On the other hand, if you plant them too sparsely, then there aren’t enough of them in there to get a rich harvest. In perfect conditions, all seeds have their own personal space, but not so much that they feel isolated and lonely.
Next is the growing medium, which is where your seeds sleep, and you have a few choices here. Soil is the obvious choice, but it can be messy. Coco coir is another fantastic option because it holds water well, but it doesn’t get soggy. Then you have hemp mats and hydroponic pads, which are really clean and simple. If you want the least fuss possible, these are the ones to go for.
The last thing is cleanliness. You absolutely cannot reuse trays without washing them first. It’s gross, and it can cause trouble. Wash them with soap and water or a vinegar solution to prevent mold and bacteria from having a rave in there.
Microgreens are divas.
They like to be comfortable, and they like predictability. This means that your goal is to create consistent conditions that don’t change much. Or, ideally, at all.
Let’s talk about light. You should use consistent LEDs for a set number of hours every day so your greens don’t get tall and ‘leggy’. Or, on the flip side, stunted. The light should be even across all trays because nobody wants a lopsided harvest.
Temperature is another big factor, and you’ll want to keep things between 60 and 75°F (15-24°C).
If the temperature swings around too much, your germination will be all over the place, so again, the yield won’t be the way you want it to be.
Then there’s humidity. If there’s too much of it, your greens will soon be sharing their space with mold. If there’s not enough humidity, however, your micros will dry out.
40-60% humidity is ideal, so stick to that.
But that’s not all. Your little divas also want a gentle breeze from a fan. Good air circulation will make the stems stronger, and it will keep fungus at bay. Timers and sensors can help you out here.
Extra tips:
Microgreens are really, really picky. In fact, they’re so picky that they’re annoying. Imagine living with food critics, and you’ll get the picture.
But don’t worry, there is a way to make them happy.
Watering is a whole strategy here.
Bottom watering is excellent (this is where you add water to the tray underneath) for consistency because it helps the roots get stronger and, more importantly, it keeps the leaves and stems dry. Overhead watering is easier, but that will make the leaves wet, and the level of moisture will be uneven.
But if you thought this was everything when it comes to watering, you’re sorely mistaken. The quality of the water matters, too. You don’t exactly have to give your greens Evian, but if your tap water has a smell or if it’s too hard, it can stress your plants, so filtered water is much better.
Now, onto the food.
You don’t need to overthink this because most microgreens already have enough energy from their seed to grow without you adding any extra nutrients. Actually, adding nutrients could be like making someone eat a snack after a big lunch, and if you do it, you’ll probably get uneven growth. The only thing you really need is a light nutrient boost for heavy feeders like sunflowers and peas; that’s it.
If you see that any plants are yellowing or that they look stunted, it’s more likely that watering’s the issue, not hunger.
Extra tips:
If you think that your four walls mean you’re the climate boss, think again.
Nature always has the last say. Your indoor space where all your microgreens grow is always interacting with the world outside, so weather is a big factor.
Let’s say it’s a super hot summer day and you’re blasting the AC. It’ll dry the air out and suck all the moisture out of the grow room. Or there’s a whole week that’s raining, and all of a sudden, your greens have a huge amount of moisture to deal with.
The only way to fight back is to use the forecast to your advantage. Keep an eye on what’s happening outside and adjust the conditions inside accordingly.
If you’re really serious about growing microgreens, you can always utilize a precise weather API for analysts so that you have constant and accurate weather data in real-time, which in turn tells you how the microgreens are being (indirectly) affected. If you take it to the next level, you can even utilize all those data points provided by the API to give you predictive suggestions based on the forecast.
Here’s a routine for every day that will give you noticeable results.
Keep things clean! Trays, tools, and work surfaces need to be wiped down every day or you risk mold and disease. This simple habit will prevent you from passing problems from one batch of greens to the next.
It’s all about timing. If you harvest too early, you get a light yield. But if you wait too long, the stems will be way too tough.
If you use a sharp (and clean) knife (ideally a scalpel), you’ll be able to get a clean cut that won’t crush the stems. You can use scissors, but they might crush more than cut, so be careful. After that, don’t let them sit. Cool them down quickly so they stay fresh and crisp.
If you harvest the whole yield the same day, you’ll end up with a feast on Monday, but already on Tuesday, you might be out of stock. If that’s the idea, then absolutely go for it, but if you’re looking to get a non-stop supply, then staggered sowing is the way to go.
Staggered sowing – plant a new tray batch every few days instead of all at once.
Do you know what your memory and a leaky watering can have in common?
They both leak!
To keep it simple (and clear) – write everything down instead of going with your gut feeling. Weigh your final yield from each of the trays, record the amount of seeds used, if you’ve gotten the seeds from a different supplier, not that, as well, etc.
Only by recording absolutely everything – regardless of it not being important at that very moment – can you make an accurate analysis and know what works and what doesn’t, and through that, improve your yield.
Getting to a consistent microgreen yield is in no shape or form easy, but then again, what is?
Microgreens are fussy and sensitive, and if you even look at them the wrong way, they’ll show you just how unhappy they REALLY are.
Be consistent, write the numbers down, and clean, clean, clean.
Now go on and show those greens who’s really in charge!